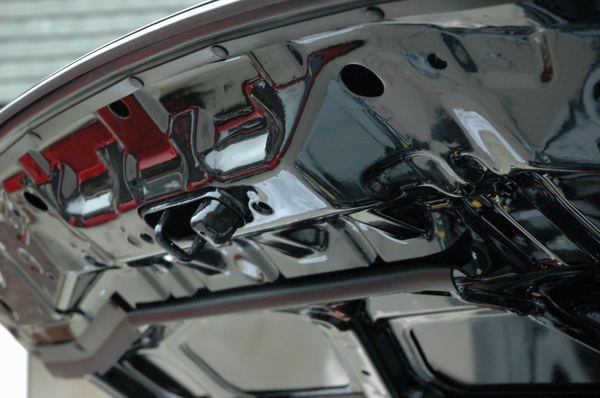
Fuse box appears to have some dirt on it
I'm joking, ridiculous restoration it looks awesome

Fuse box appears to have some dirt on it
I'm joking, ridiculous restoration it looks awesome
Cheers mate, top manOriginally Posted by Vez

The boost control system is totally stock including the recirc valve. Whatever is going on inside the turbowhen you change gear it sounds reet gud
Friday the 13th todayI knew I should have left it alone
So far everything has gone to plan and I havent really hit any major problems. Today was different though
When I built the engine and gearbox up I didnt fit the starter motor. I wrongly assumed it would be relatively easy to fit. How wrong was I
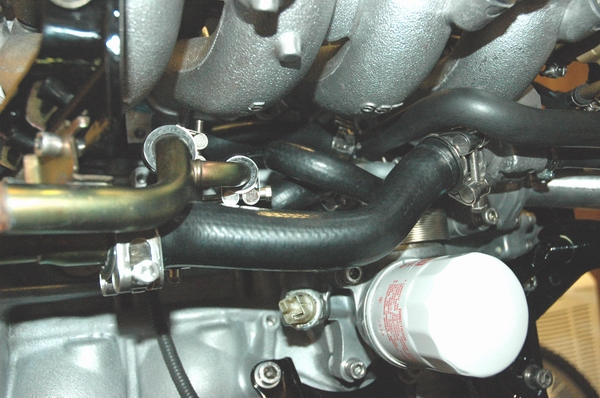
I ended up having to slide the steering rack coupling up the column to make enough room to slot the starter motor into place. Then I hit snag No2. It was fouling on a large jubilee clip I used on the heater hose. It's the clip to the left of the oil pressure switch.
I have replaced the jubilee clip with a stock item and it's now sorted.
Then I hit promlemo No3
Oh joy
Pete
SXOC Member Number : 317
I could have told you fitting the starter with everything in situ is a PITA
I would like also to suggest asking the NIstune people about getting one of their chips on your car at some point... As you can play with the standard boost solenoid to get some more go, with everything still looking totally stock
You and your fancy jubilee clip, but I do like the "reet gud" bit.
Thanks for that
Fancy Jubilee - I know. It saved me having to replate all the originals though
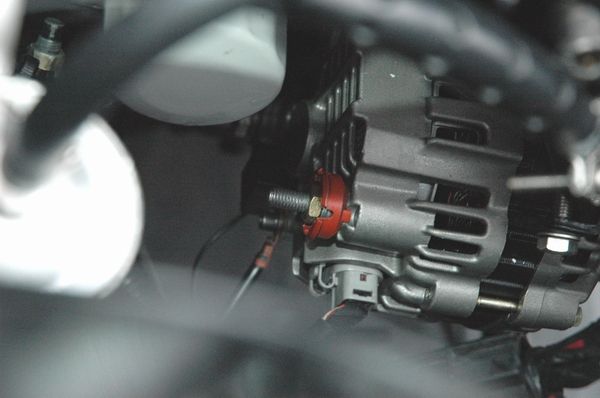
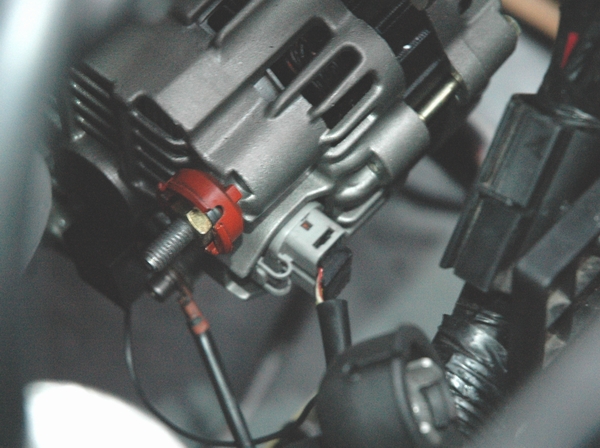
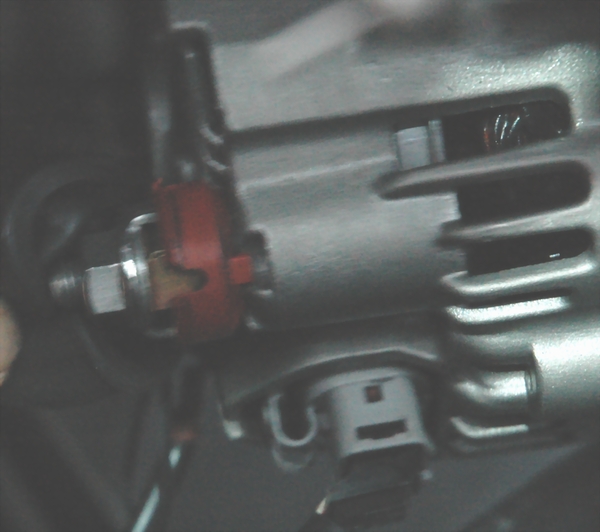
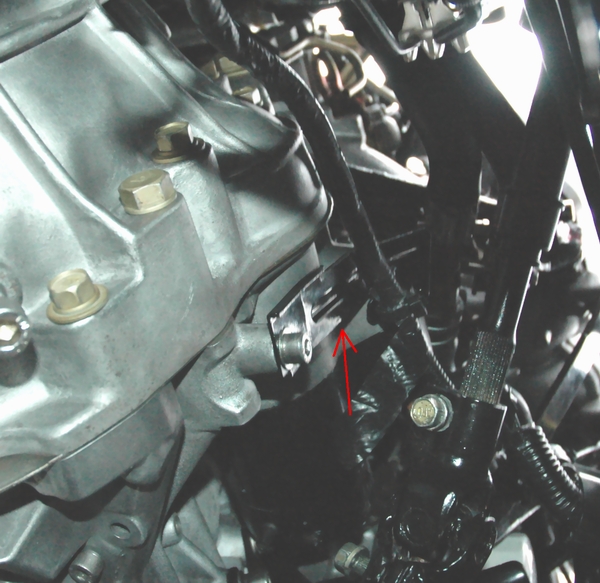
Thought I would post these up to keep a record of where everything goes. Having done a bit of searching, I couldn’t find any pics of the alternator wiring or gearbox loom support bracket.
Huge thanks to pdh s14a for the techie support hotline
Small black cable goes into the back of the alternator along with the supressor (you can just see the cable coming out of the supressor)
This shows the grey plug into the side of the alternator
The black cable from the supressor and the large lug fit over this stud
Gearbox loom support
Sorry for the poor pics. Not easy to take but better than nothing
Pete
SXOC Member Number : 317
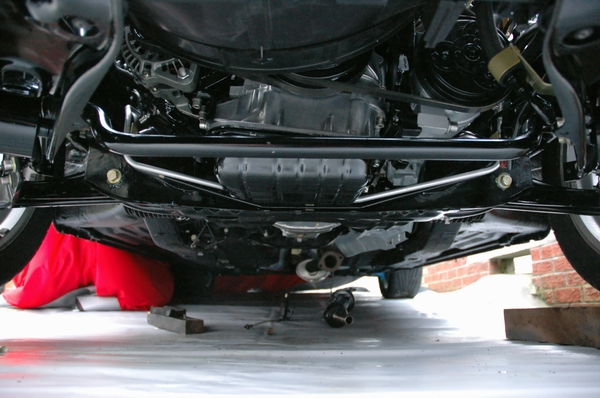
In order to torque the front suspension up, the car needs to be level. Fortunately there is a gentle slope on my drive so I have jacked it.
And used blocks of wood under the wheels
This made it easier to finish under here
Once everything is refitted and fluids are added, I can torque up the suspension
Pete
SXOC Member Number : 317
Wasn't much help in the end! but ring or pm on here for anything! Happy to help
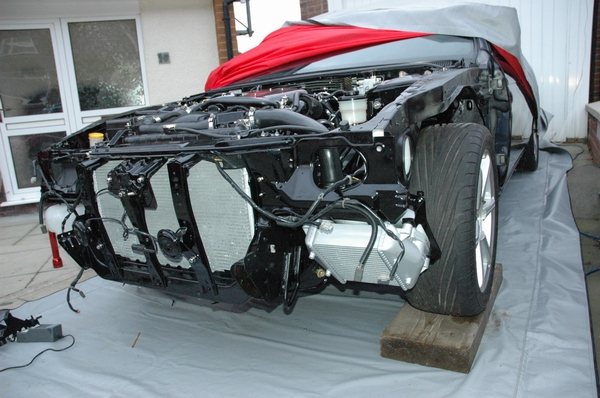
Its really taking shape now
You only need two tools in life - wd-40 and duct tape. If it doesn't move and should, use the wd-40. If it shouldn't move and does, use the duct tape.
And if you can't fix it with a hammer,you've got an electrical problem!
Was having a flick through as i often doand couldnt help but notice these few comments from November 2007 that made me chuckle a bit
Lol,that was before i realised HOW fussy he was
You only need two tools in life - wd-40 and duct tape. If it doesn't move and should, use the wd-40. If it shouldn't move and does, use the duct tape.
And if you can't fix it with a hammer,you've got an electrical problem!
Hey Petrol,
I registred here in the first place because of this thread. The work you've done with that S14 is just insane, there's no word to describe how beautiful that car will be once all done. In fact, it's going to be 200% better than when it got out of the factory a couple years back.
I'm not even near you guys as i'm in Quebec city, Canada, I'm an S14 owner as well and I wish I could do the same as you did on your car myself.
Again, amazing work. I'll be looking forward to see the rest of the refurb
Cheers,
JP
Welcome to the boardThanks for taking the time to say hello
I didnt intend going so mad with it honest. The thing is, once you have refurbed a part and it looks good, you have set a precedent. Next news the engine is out
I have also noticed some of the stock parts are pretty naff. The plan, when its all back together is to make my own improved components using better materials
LOL at pdh 14a
Pete
SXOC Member Number : 317
Pete - You've done a really good job!
"I have also noticed some of the stock parts are pretty naff. The plan, when it’s all back together is to make my own improved components using better materials "
Any hints? Go awwwwwwwwwwwwwn
Cheers
Well this things a total piece of $hite for starters. I have seen better quality stuff on a kiddies bike
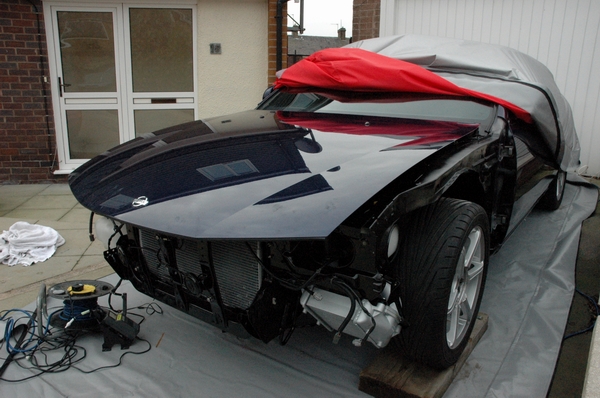
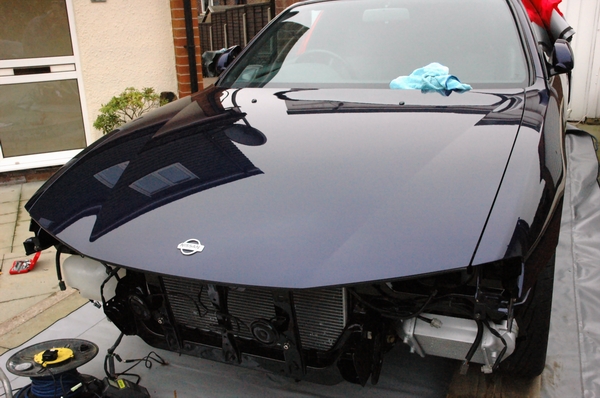
Fitted the front panels today. Ill get some pics up later
Pete
SXOC Member Number : 317
It's best when fitting a front end to put the bonnet on first. Towels again for protection.
Aligned it to fit into the catch
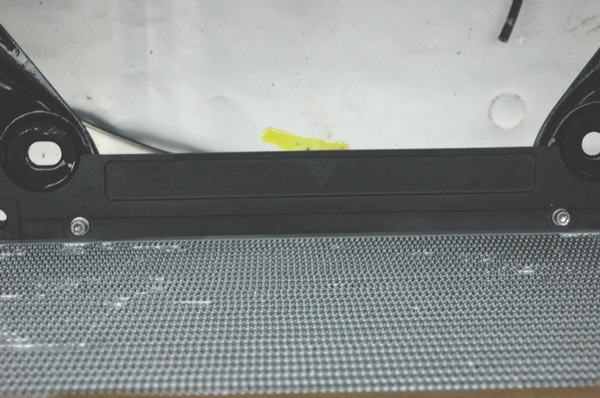
Underneath
I was struggling to get the washer pipe through the clip in the bulkhead. Cutting it at an angle made it easy
This clip fits into the wing here - No idea what it's for though
Protection for the door
Fit all of the bolts loosely, then adjust to get the panel gap right. Smaller gaps look better if you can tweak it a bit
Then the other
Looks more like a car now
Pete
SXOC Member Number : 317
Wow some very noticible progress thereI'm not sure if I'm happy or not that you have nearly finished this, I love all the updates
1998 Nissan 200sx s14a , 2000 std 5 speed with nismo supercoppermix clutch bn6 Sapphire Blue
nice job my friend !
should look like new when finished
Keep up the good work Pete.
Yay its looking like a car again now! Loving it
You only need two tools in life - wd-40 and duct tape. If it doesn't move and should, use the wd-40. If it shouldn't move and does, use the duct tape.
And if you can't fix it with a hammer,you've got an electrical problem!
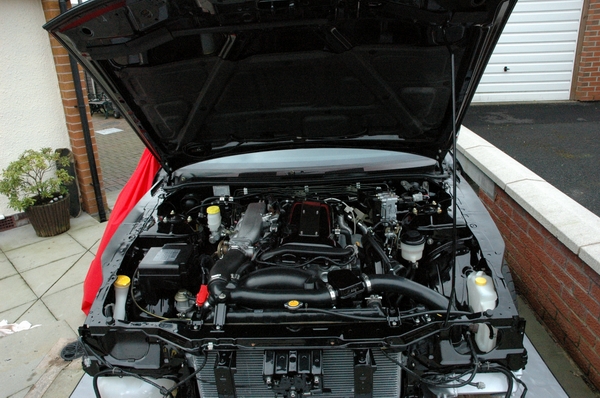
Blimey that Bay is looking so clean, But as i have OCD experience what about the fins on that Rad!! There not all straight if a fly gets in there i can see you with a jetwash or hoover & cocktail stick to make it pristine again LOL. That perfectionists for you
 Posting Permissions

 Reply With Quote