


Since my annoying ticking and clicking noise in the head of my ca I have been trawling the internet for a definitive rebuild thread that explains the characteristics the lifters should have and how to dismantle, clean and rebuild them correctly.
Here is a write up I found which details everything I needed to know about the voodoo magic that is the hydraulic lifter valve:
The hydraulic lifters used by nissan are just like any other hydraulic lifter in terms of its function and design: By using the engine oil as a cushion for valve control action, you have a zero-lash, self adjusting valve-train that is incredibly quiet and reliable. That is, until the lifter itself develops a problem.
I have seen two modes of failure of a lifter:
1) The check-valve that retains the oil within the cushioning body gets debris between the ball and seat which allows the oil to freely move in and out of the lifter body during compression. When this occurs, the lifter body 'bottoms out' and results in the tick you can audibly hear.
2)The lifter body's telescoping action becomes seized. This is actually the least common failure I have seen in a lifter. The parts are precision machined and have fine finishes on the contacting parts. However, oil varnish (the stuff that makes a used engine look brown/black inside) can coat the pieces and if it is excessive, it can cause these parts to bind.
The best thing you can do to prevent lifter tick is to change your oil on scheduled intervals of 3K miles and use a high quality oil such as Mobil1 or any other premium synthetic-based lubricant. These synthetic oils have higher resistance to developing these varnishes that coat the parts down - this is also why you want to use synthetic for turbocharged vehicles as they are much more resistant to developing the worst-case varnish, oil coke. This is the cooked-down version of oil and it leaves abrasive, solid deposits on parts.
Unfortunately case #2 is typically not repairable as you wont even be able to disassemble the lifter to service it. If you do manage to get it apart, a good dip will likely correct it. If you have a hard time getting a lifter apart, it is possible that it suffers from this same case.
Case #1 is the easiest to correct. It only involves the cleaning of the parts and reassembly in order to correct.
Any hydraulic lifter has a good bit of demand put on it and it is subject to a considerable amount of wear, but one thing we have working to our advantage is the size of the lifter itself. This distributes the load and wear over a greater amount of area so it wont wear out nearly as quickly as other smaller counterparts used in engines like domestic V8's with push-rod technology. Even though these lifters were built much better than most I've ever seen, they are still susceptible to wear and you must take care to inspect the parts and replace them if necessary. Keep in mind you cannot buy just one piece of a lifter - you will have to replace the entire lifter if one of yours is shot.
One easy way to tell which lifter is bad is to squeeze them. If a lifter 'bottoms out' when you compress it by hand, there is good chance that the lifter is your bad one. This check must be performed immediately after removal of the lifter from the engine though. If you pull them out and flip them over, there is chance that air will get into the lifter body and allow it to compress although the lifter isn't bad. Obviously if case #2 is the reason, it wont compress anyway. For this reason it is recommended that you disassemble all lifters of the engine if you are going to do this.
The tools you will need are:
- Something with considerable mass and a flat surface to strike the lifter against to remove the lifter body. A bench-vice with a flat anvil works wonderfully. It MUST have a flat surface or you will damage the lifter during disassembly.
- A pair of pliers
- A pair of pliers
- A pair of pliers
- A small pick
- Red Scotchbrite pad
- 1500-grit finishing paper
- 1-gallon Carburettor Cleaner dip with parts bucket
- 1 quart of premium engine oil
- 1 can WD-40
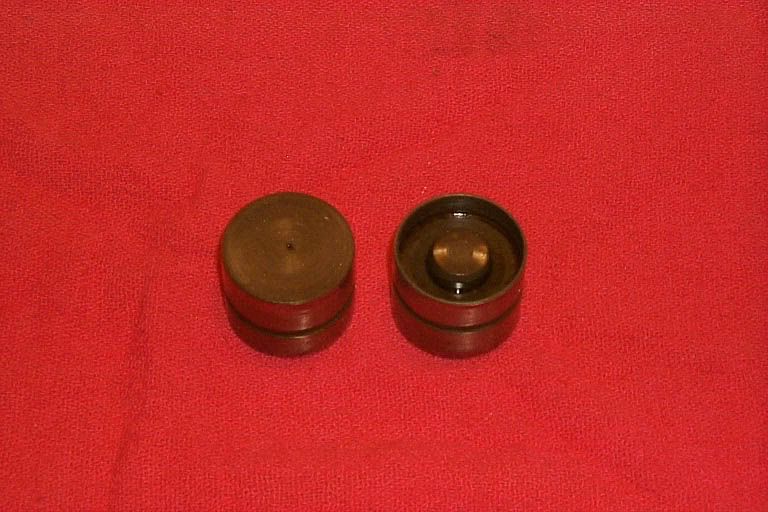
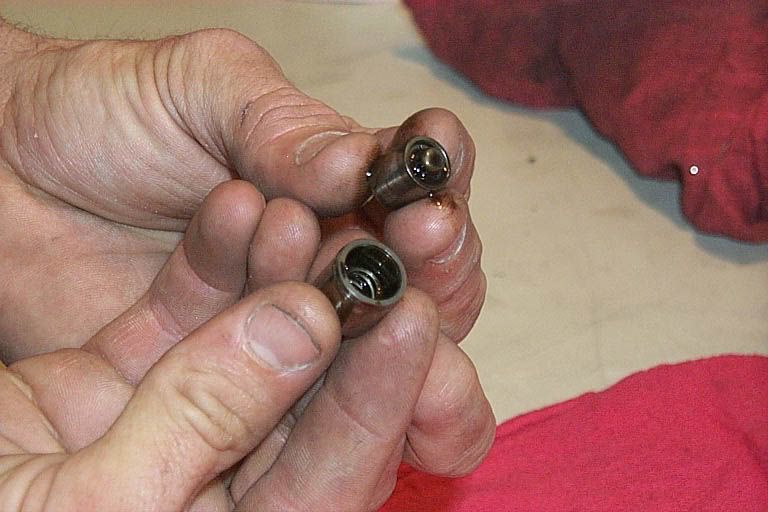
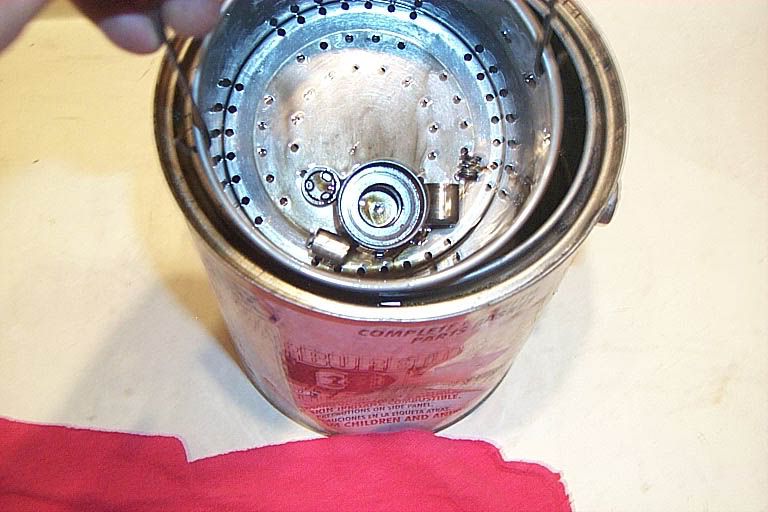
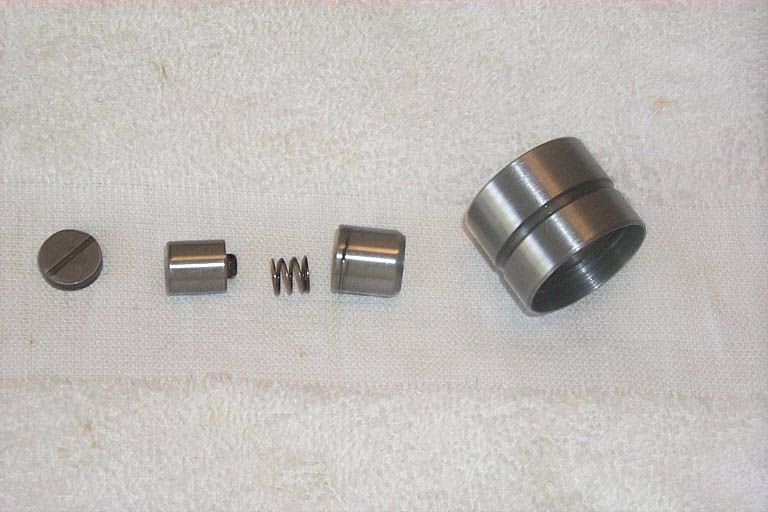
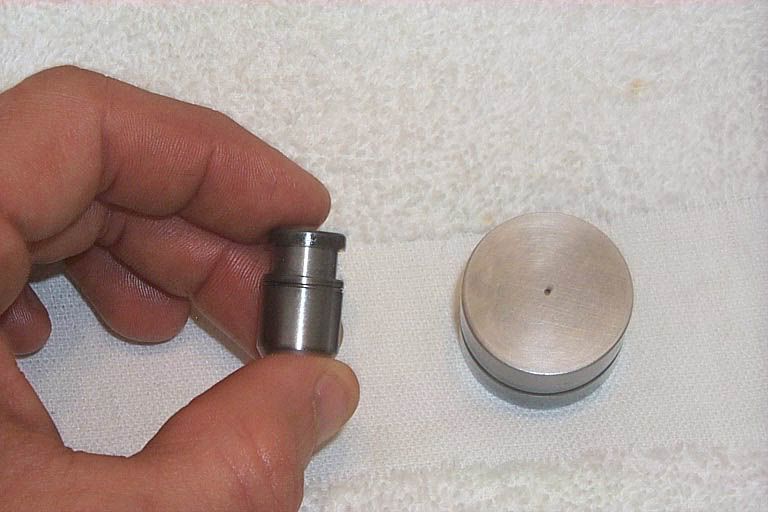
This is the lifter. Top/bottom.
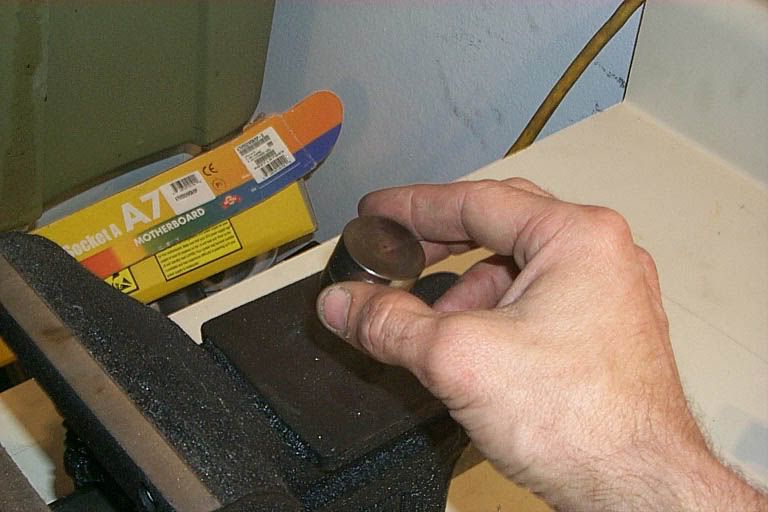
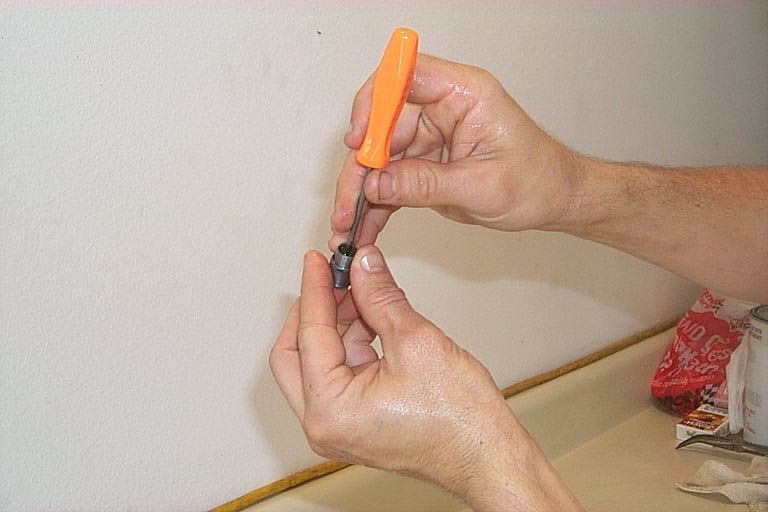
In order to remove the lifter body from the lifter housing, you must strike the base of the lifter housing in order to 'pop' the lifter body retaining clip free. This step takes a decent impact to accomplish - try progressively striking the lifter harder until the body pops loose, inspecting it after each strike until you get the feel for the right amount of force.
You will be able to tell if the lifter body clip has released by looking across the base of the lifter from edge to edge. The lifter body will be at the same level as the base edges of the lifter housing.
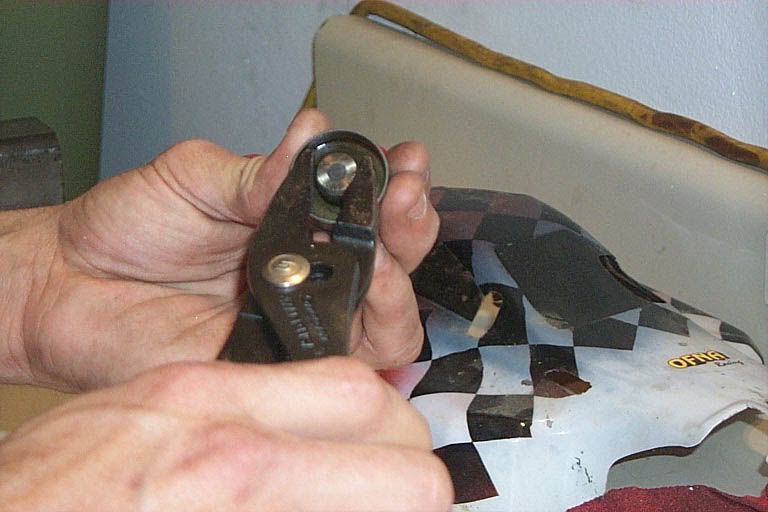
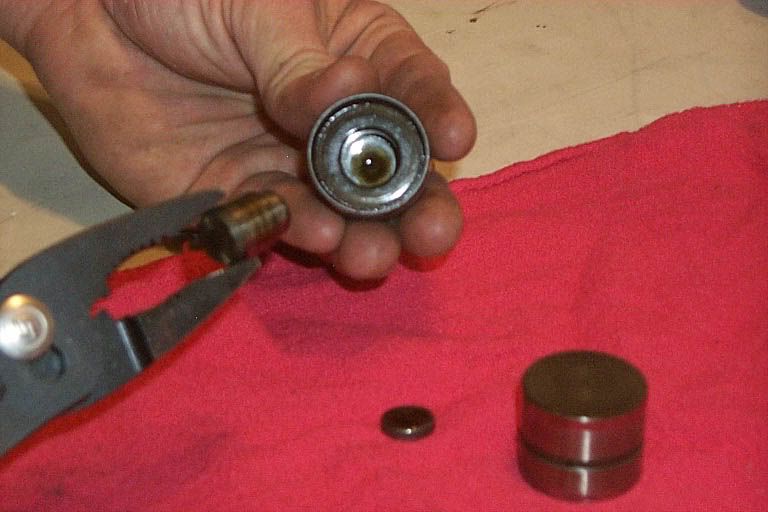
With a pair of pliers, grab a hold of the lifter body and pull it out of the housing. Note the small dime-sized cap on the red cloth. This is within the assembly and you will need to get it out if it doesn't come out with the lifter body. Its just sitting in place so it will only need a good jostle to get it out.
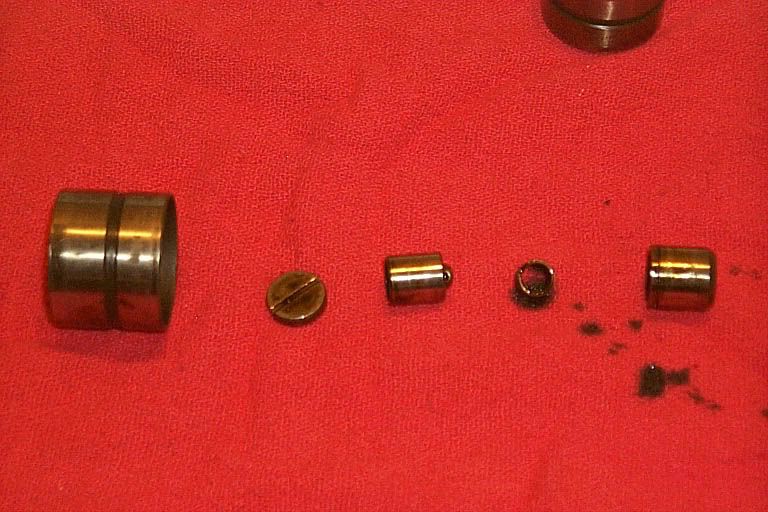
Open the lifter body by pulling the telescoping pieces apart. Be careful not to lose the compression spring inside.
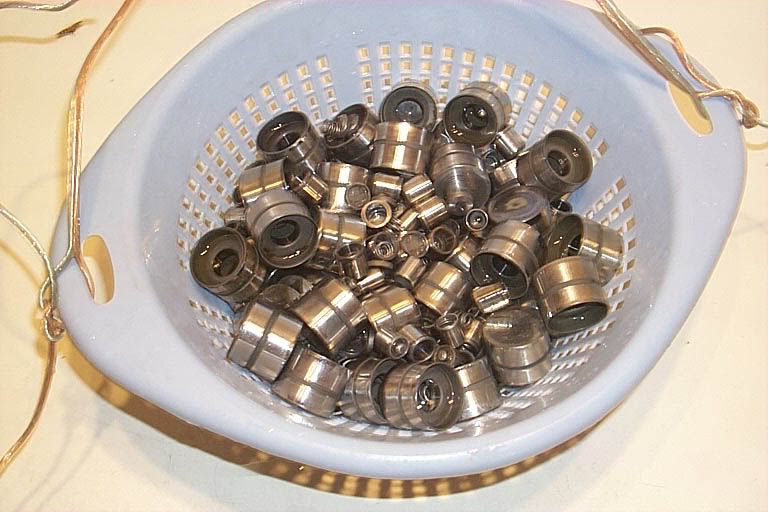
Here is what you should have on the bench to this point.
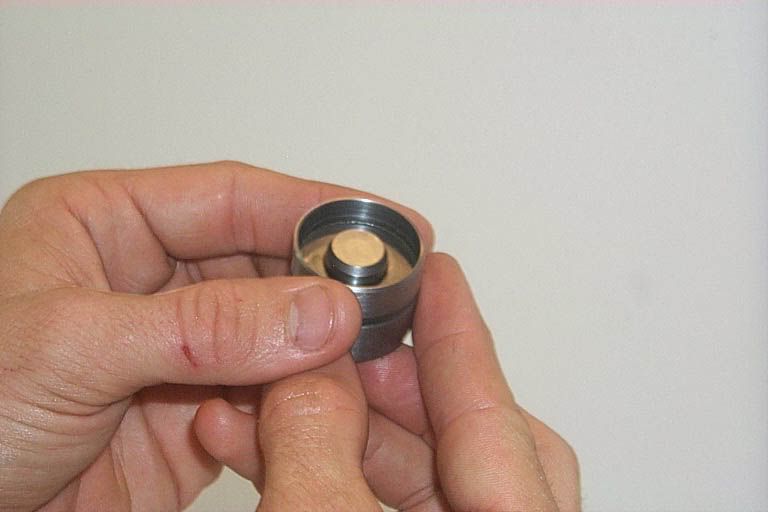
The check-valve assembly is part of the smaller telescoping lifter body. I have disassembled this part to show the pieces and scale. They are very small parts. You can see how the check-valve works - a small ball with a sealing seat and a spring to apply tension to the ball's position against the seat. This valve will let oil enter the lifter body, but it wont let it back out under normal conditions. When I have reconditioned my lifters, I left this part of the assembly together for fear of losing the small parts associated with it. The cleaning solution will remove any and all varnish from the parts and during the reassembly process there will be a step to ensure that the check-valve is sealing. I would recommend not taking this apart and relying on the assembly check to determine if the valve is sealing, and if it doesn't seal up you can disassemble only the ones that would need further cleaning. These parts are just really small and easy to lose or damage.
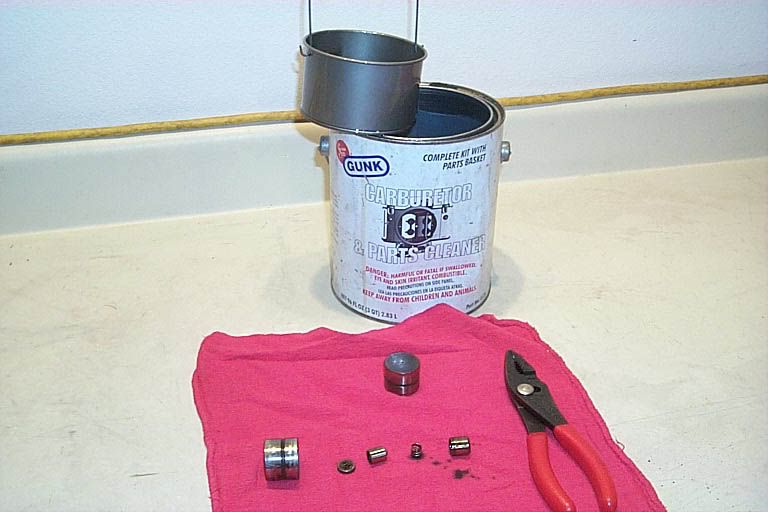
I use Gunk Carburettor & Parts Cleaner for all of my smaller engine parts that need to be cleaned. It comes with a parts basket that is perforated on the bottom to allow the cleaning solution to drain out when you remove the basket. This solution works incredibly well for engine parts. For your own protection, be sure to read the hazardous materials warnings on the container - this is not something you want to get on you. You can pick this up from any auto parts store for about $8 a can.
Put your parts in the basket. Note I left the check-valve assembly together for the dipping. I only show 1 lifter in the basket, but I was able to clean all of my lifters in 1 single dip. Just put the larger lifter housings in the bottom of the bucket first and all the smaller parts in the basket will fit on top and you can still close the lid. Let sit for about 2 hours for a thorough cleaning. You don't have to agitate this solution.
Rinse all of your parts off with cold water. It helps to have an air compressor to blow the remaining water out of the parts. Once all the water is out, give them a good spray-down with some WD40 to displace the water and keep them from oxidizing.
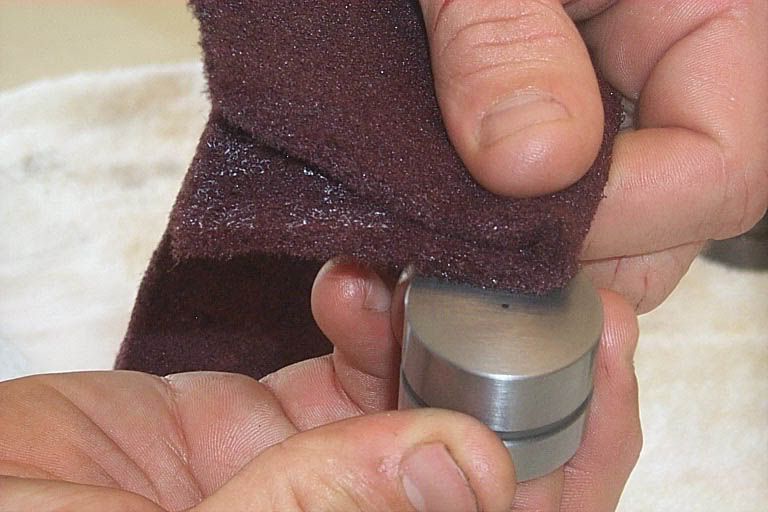
Using a red Scotchbrite pad, be sure to give a good once-over on the surfaces of the lifter housing that contact the camshaft and the lifter bucket, as well as inside the housing where the lifter body inserts. The lifter body's telescoping surfaces should also be de-burred. This is preparing the parts for re-mating since you wont be getting every single lifter together with the exact components that were originally in it. This wont cause any problems but it is advised not to do this excessively.
During this step, pay special attention to the crown of the lifter. This is the area that the camshaft contacts and it has a small hole in the top-centre. If you see any abnormal pitting on this surface, particularly around the hole in the centre of the crown, the lifter will have to be replaced. It is normal for there to be some light surface patterns that are worn in due to the camshaft lobe, but these markings should completely disappear when you hit it with the Scotchbrite. If you find yourself rubbing and rubbing on a particular spot to remove a blemish, it is likely a low spot or the metal has galled. If this is the case, you gotta replace it or this will cause damage to the camshaft.
To restore the finish on the housing I used a piece of 1500 grit paper. This will provide a really smooth surface free of burrs.
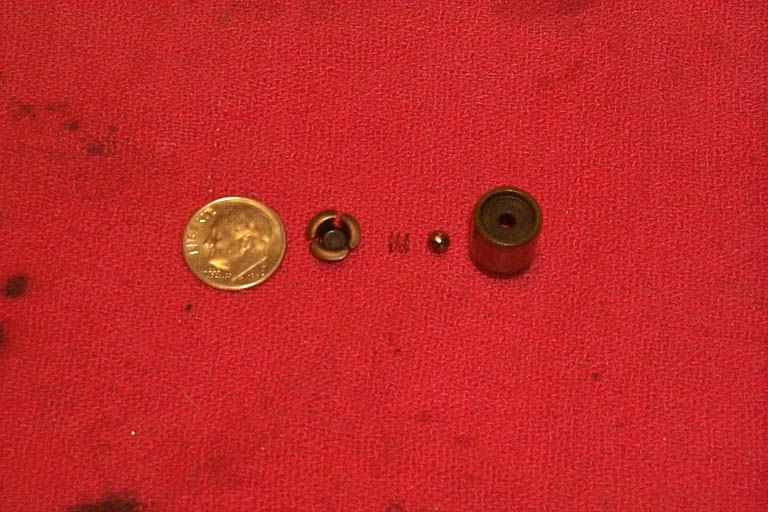
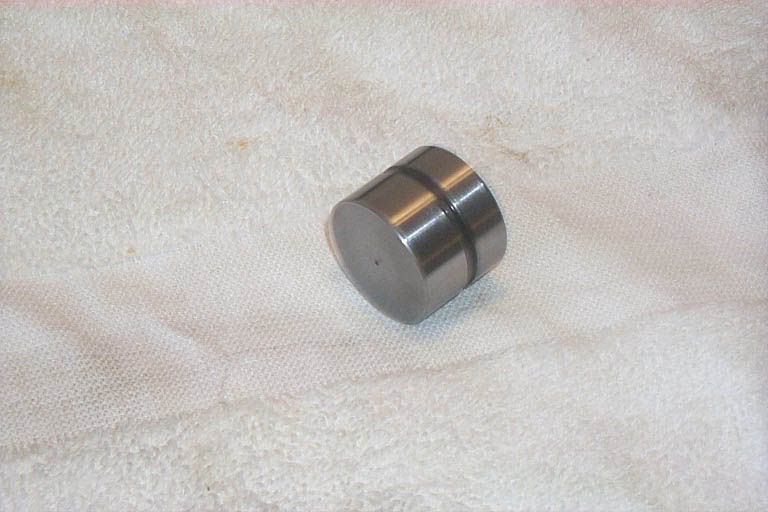
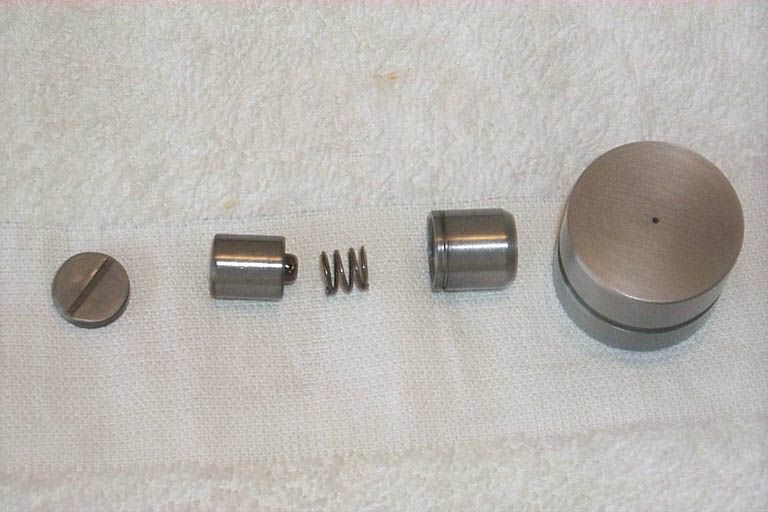
When you are finished, your parts should look like this:
You will first need to install the spring into the larger lifter body.
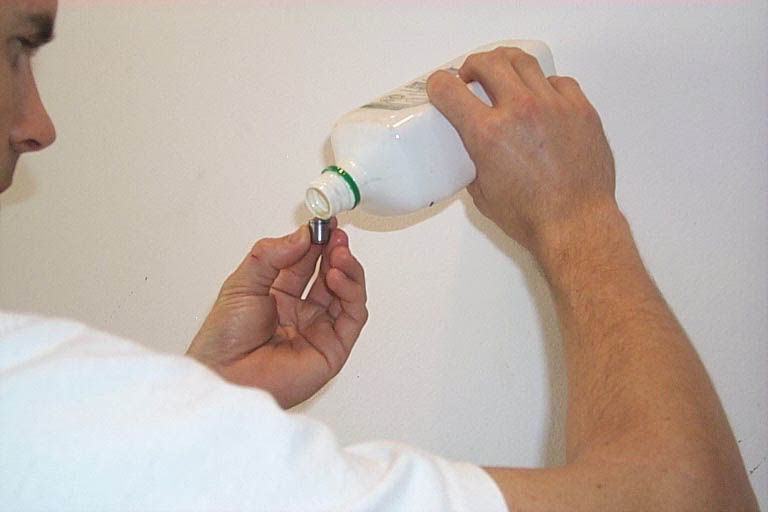
Fill the lower lifter body with oil. Leave about 2-3mm shy of completely filling the body.
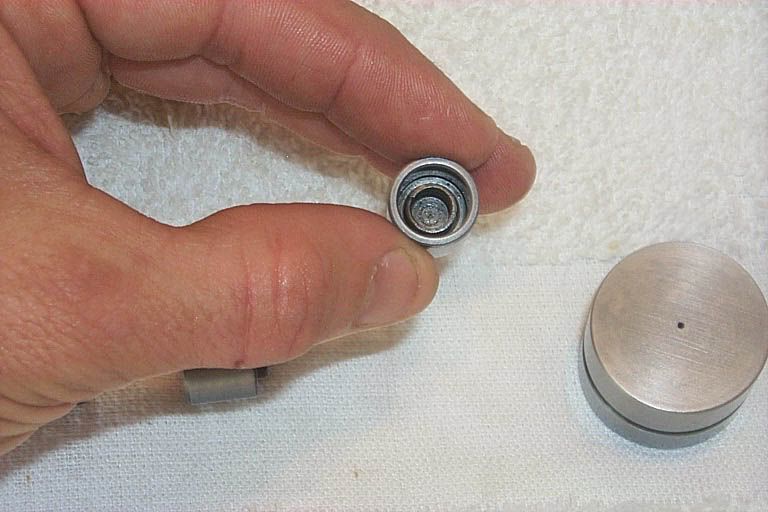
Then install the smaller check-valve assembly with the check-valve going first into the lower body. When you squeeze this together, you are going to have some air in the assembly. Using the pick, gently press onto the check-valve ball while squeezing the body together. The air in the body will flow out as well as some of the oil - be sure to bottom the check-valve body into the lower body and while holding, remove the pick. Slowly allow the two bodies to extend while the internal spring pushes them apart and take note of any air bubbles that might get sucked back into the body - they will be floating in the oil you can see through the bottom of the check-valve assembly. Once it has extended to full length, try compressing it again. It should not compress at all. If you have oil come spouting out of the valve, try compressing and releasing it a few times as the ball may have become un-centred over the seat. If it still does not seal up disassemble the entire component and clean/inspect. If all is well, you are ready for the final assembly.
Place the cap onto the check-valve body. This is what the body will look like once it is assembled.
Now the installation of the lifter body is kind of tricky. You have to be careful with the cap as there is nothing holding it in place here except gravity. It is important when the lifter is reassembled that this cap is in place just as you see here in the picture. You will need to hold the pieces as shown in the picture and carefully slide the body into the housing. This is to be done while the lifter is submerged completely in oil to avoid air getting trapped in the lifter.
Once you have the body in the housing, it will require a good squeeze to get past the retaining clip of the lower body. You must also ensure that you have the lifter body aligned into the housing's bore or you'll squeeze all day long without any success. Also this is to be done submerged in an oil bath.
Be sure to inspect the camshafts for signs of uneven wear, dings, or burrs. I typically use the red scotchbrite on the journals and lobes to clean up the surface and prepare it for assembly. The lifter buckets (in the cylinder head) are also prone to getting dinged up during the valve spring installation - be sure to inspect them for any defects prior to installing the lifters. The lifters should drop right into the buckets with no force required.
Original website: http://twinturbo.net/net/viewmsg.asp...ral&dtSearch=0


 Reply With Quote


 .
.

