


I have some on photobucket but I can't access it from work. I'll post up some pics tonight if I get chance. Basically, after cleaning the groove out with d-oxy gel then "drying" it with a wire wheel, I ran 3 beads along the groove. One deep one down the middle then two side by side on top of it then sanded it flat with a flap wheel.
There are some pictures here of my practices and stuff but some of it is a bit disorganised...
http://s218.photobucket.com/user/jzw...?sort=3&page=1

 Reply With Quote


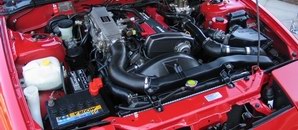


 - RB25DET, GTR steel twin turbo conversion, RB26 crank & rods. 2.6L VVT twin turbo, SR20 OSG box, OSG STR twin plate clutch, Z32 ECU w/ nistune.


 how time flies. I want to get this one as close to that as I can


