Page 8 of 13 FirstFirst ... 678910 ... LastLast
Results 141 to 160 of 244

Thread: Polofours s14a

  1. #141
    Guest Polofour's Avatar
    Join Date
    Jun 2012
    Location
    South west
    Posts
    232
    Rides
    0
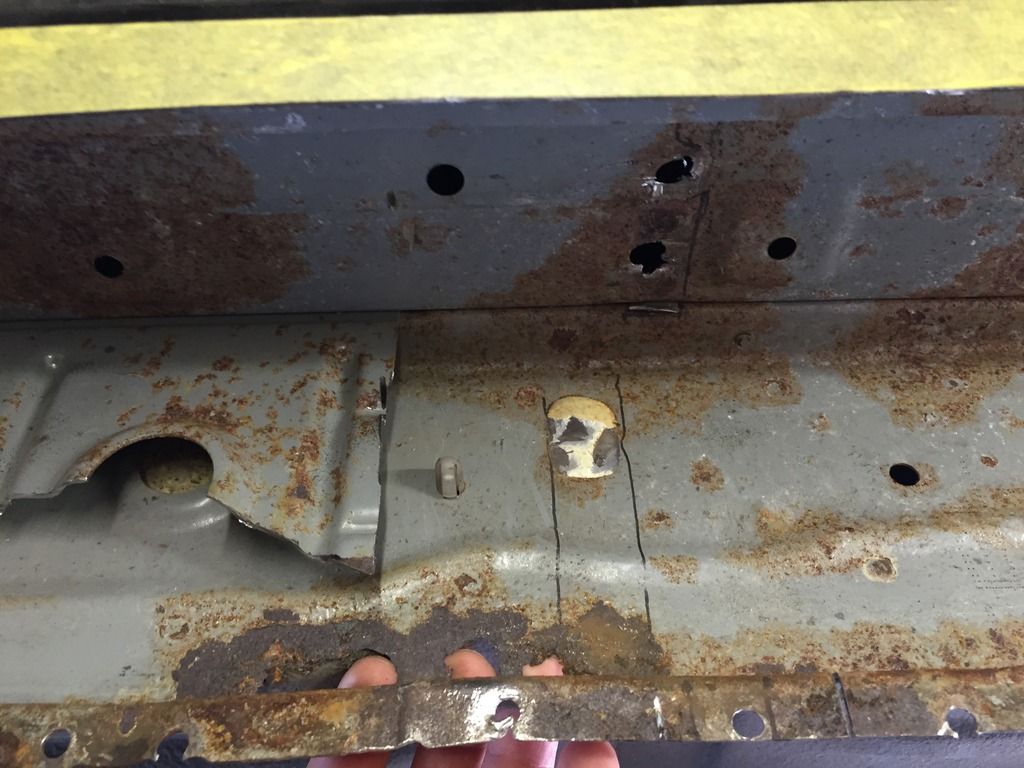
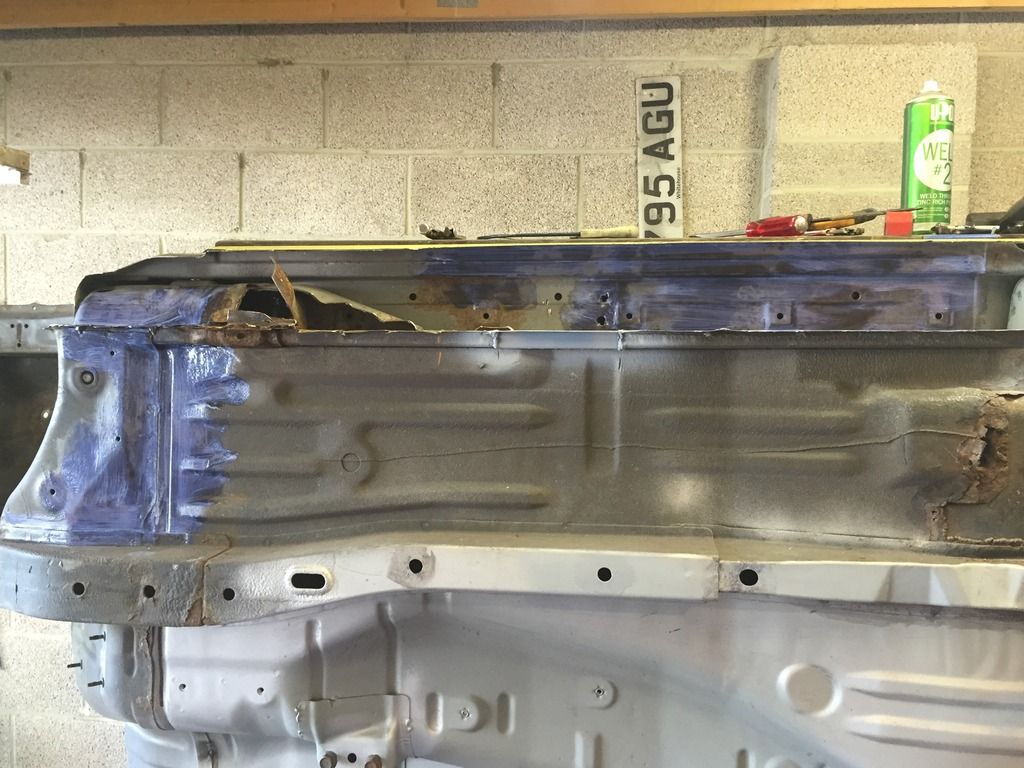
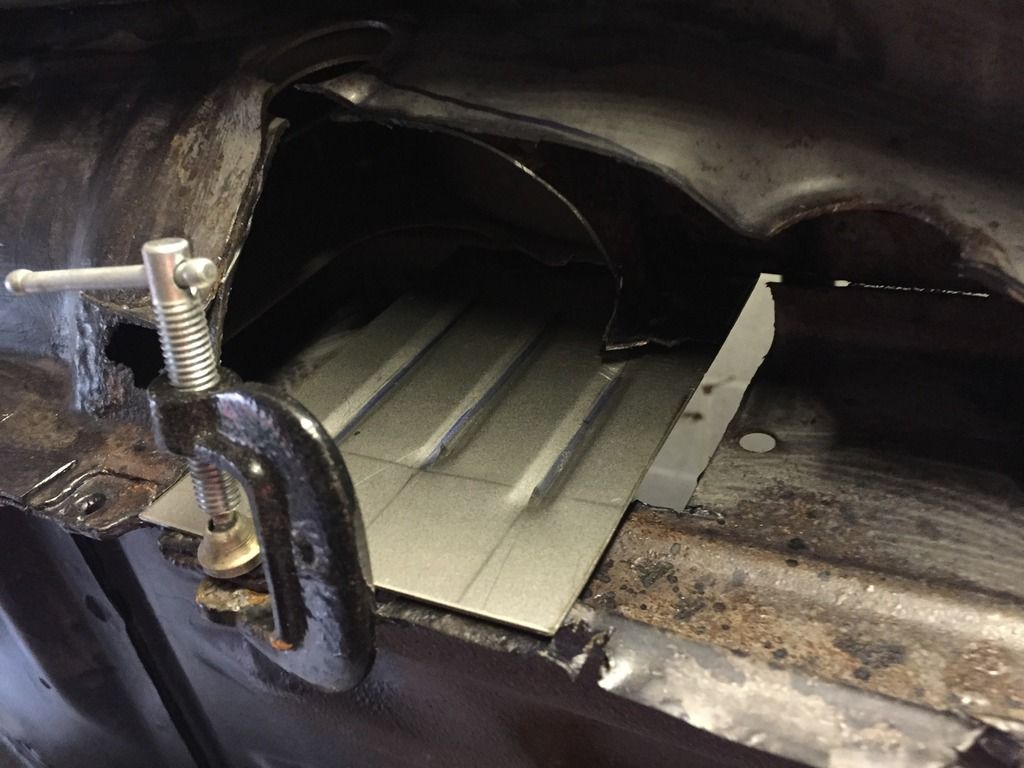
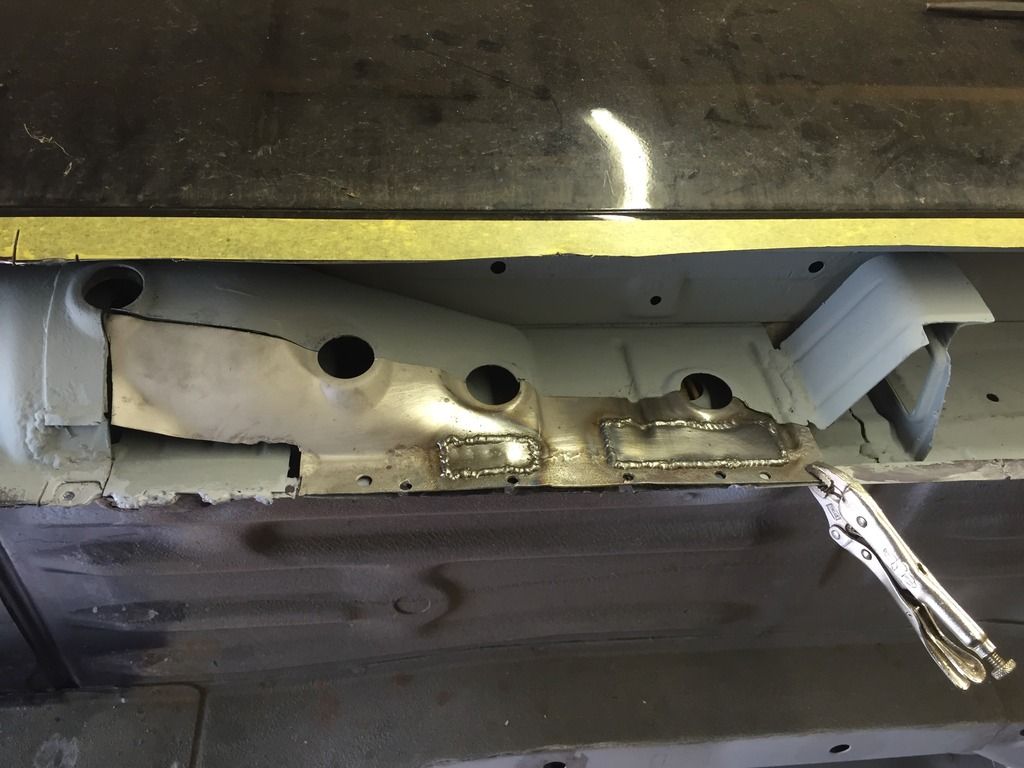
    holes


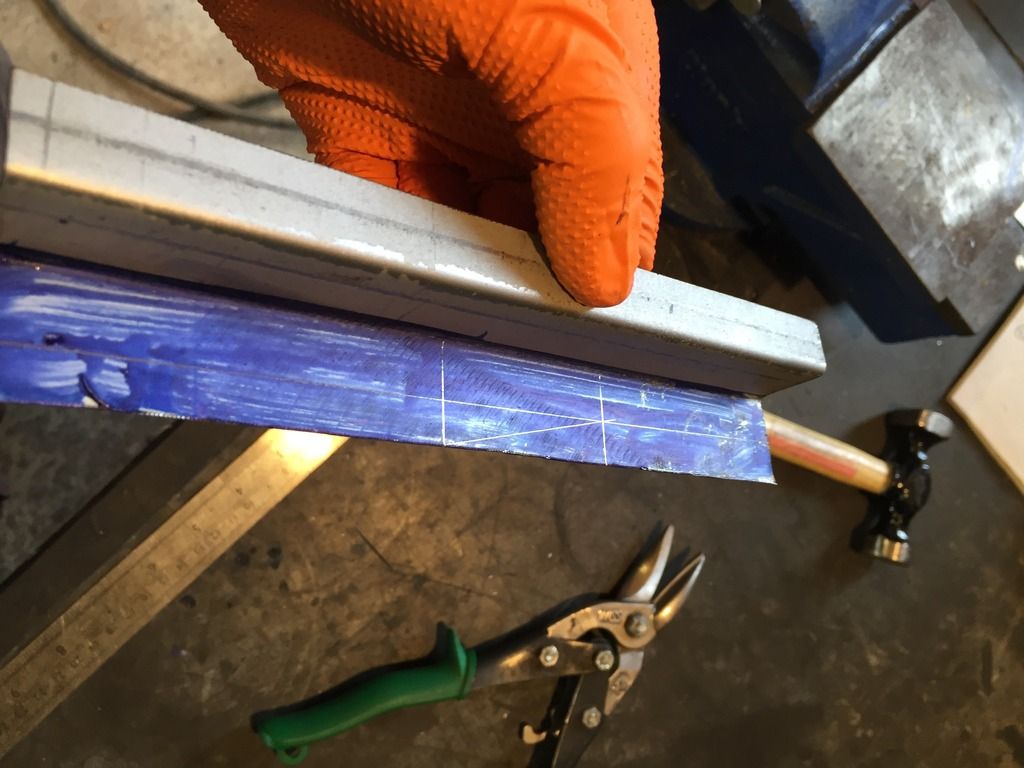
    trimmed.


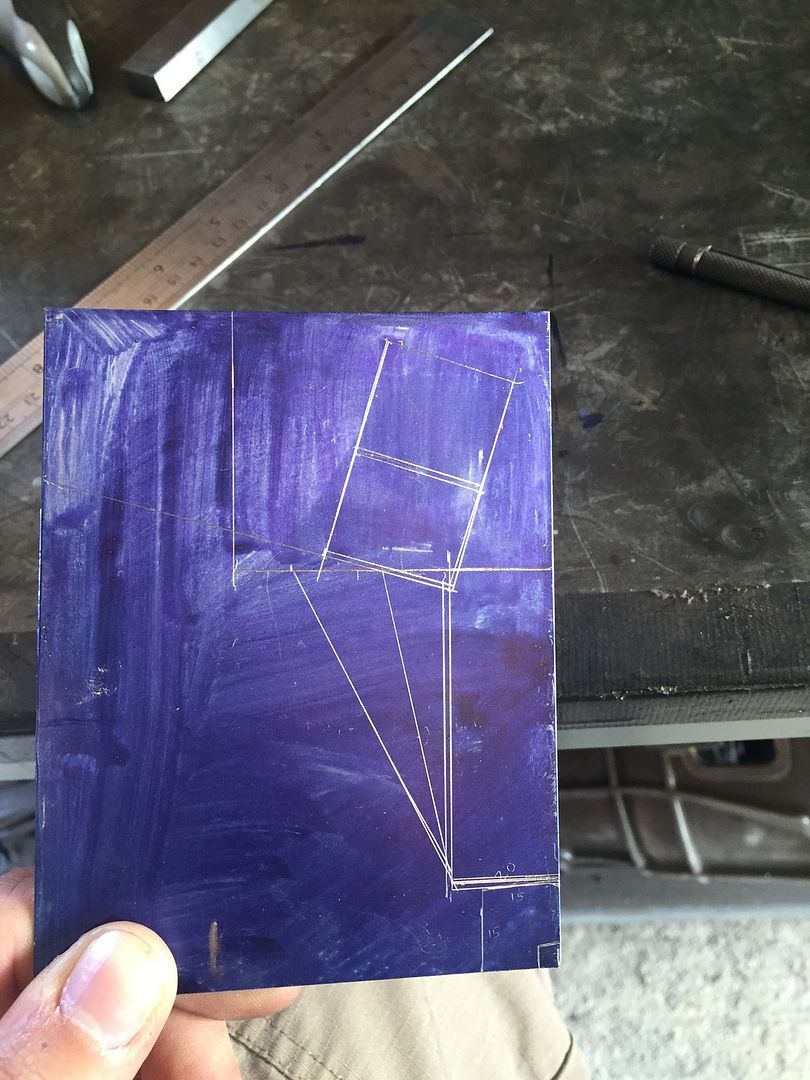
    angles marked.


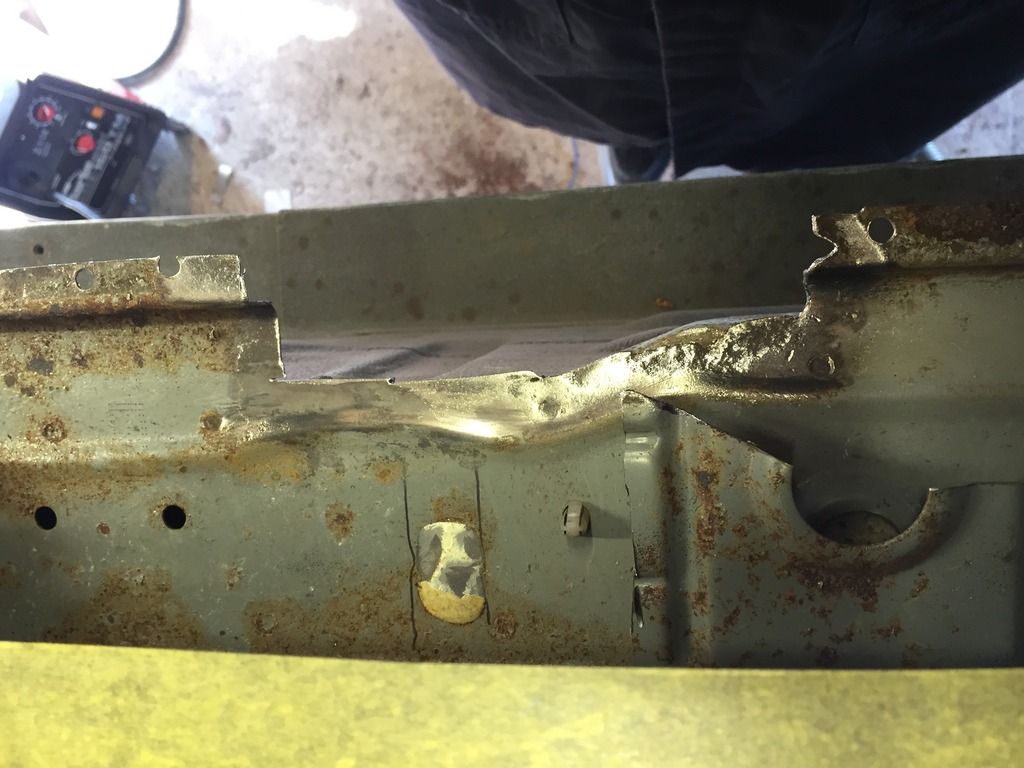
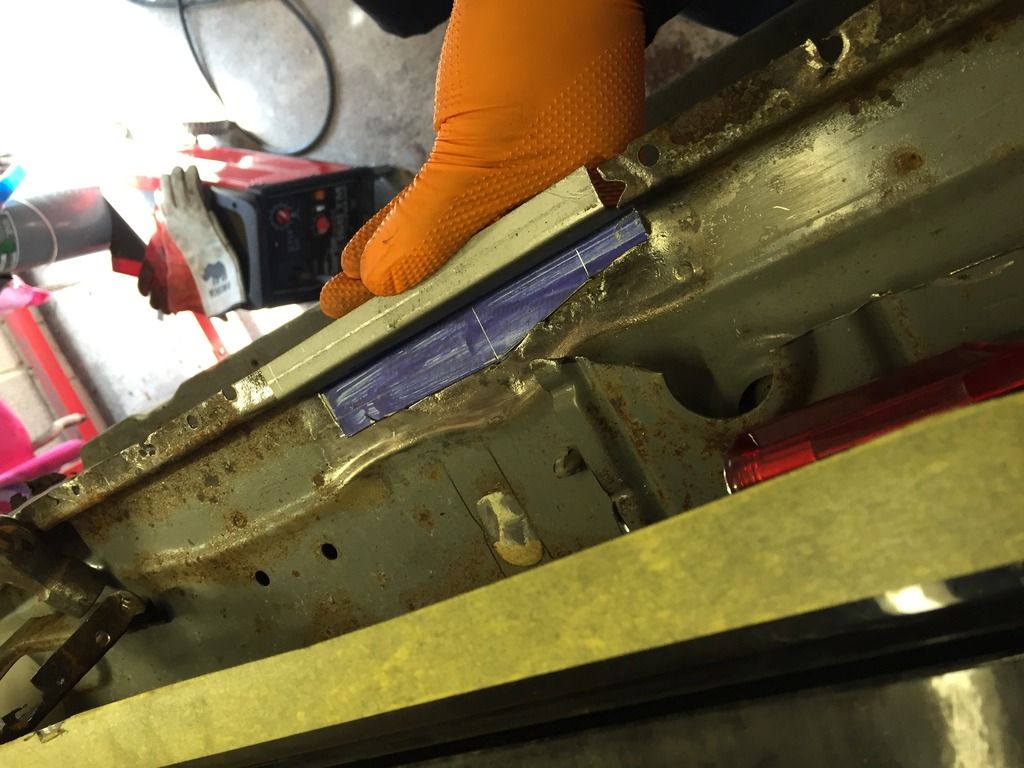
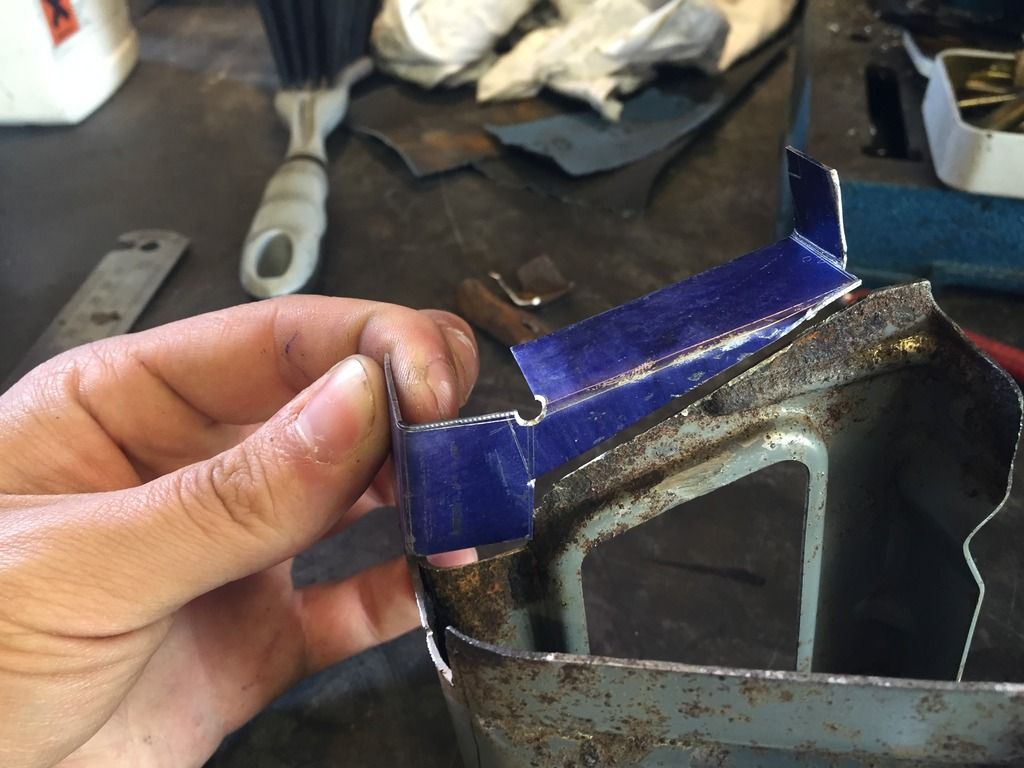
    fits ok. the gap on the right is just where the sill is bent, it lined up when I bent it back down.


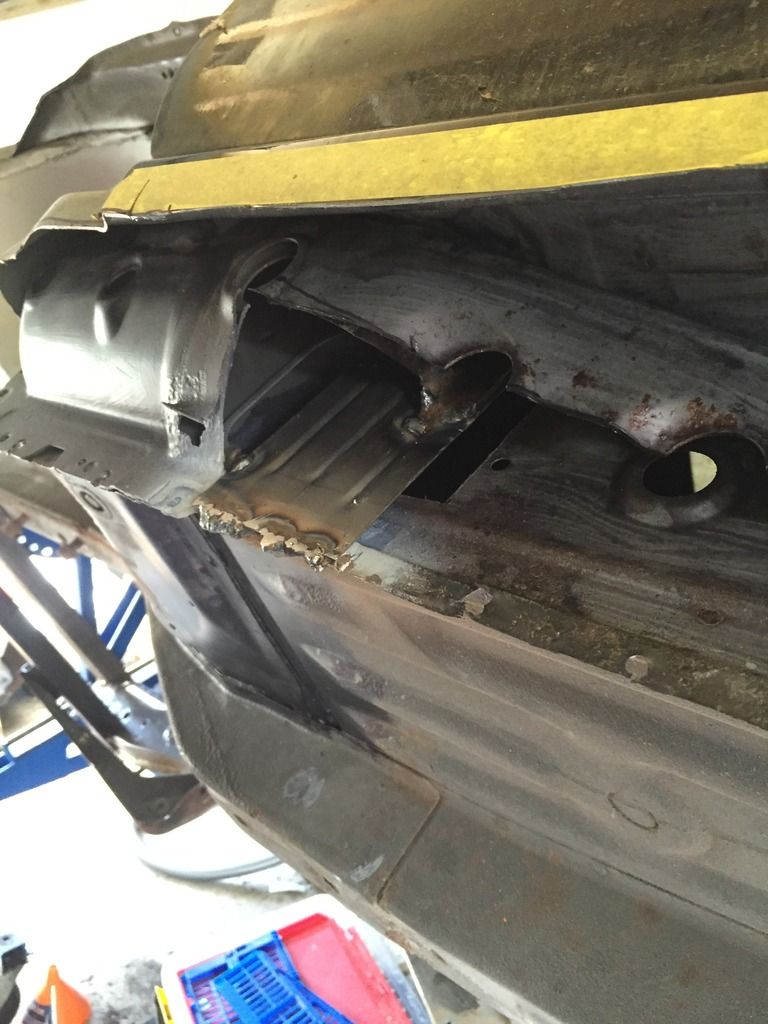
    Snotted in, a fair few blow through's on this piece even after I dropped the amps and wire speed. seems to vary hugely by panel even when i clean the steel back and prep it well as to if I will be chasing holes.


    DEOX Gelled the bracket after trimming out the worst of it. i think it would have worked better if i had shot blasted it first, i may take it in to work tomorrow and see what i can do.


    I then plated the bottom of the jacking point back up.


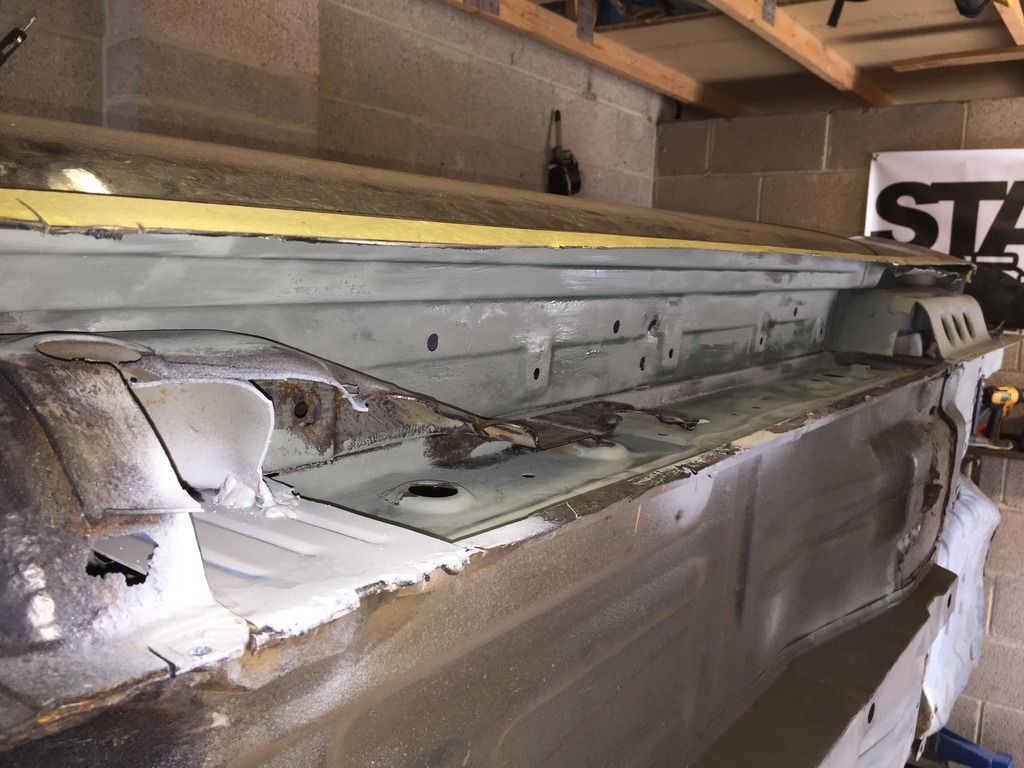
    Then caught myself sat on my stool ( I seem to just sit and stare at the car and before I know it 20 minutes has passed not sure why I do this) so I gave myself a crappy job and wire wheeled the center of the sill and blue goo'd it ready for paint tomorrow. I know I missed a bit but I cant fit the wire wheel in and have to get the drill charged.


    I cant do anymore today as i have to do mundane things like take the cat to the vet and pick my daughter up from nursery should get a few more hours tomorrow morning though so i hope to at least come up with a plan for the front bit and finish the back of the sill.
    Last edited by Polofour; 05-05-2016 at 12:34.

  2. #142
    Guest
    Join Date
    Oct 2003
    Location
    Carms.
    Posts
    1,010
    Rides
    0
    God they must be all the same,i dont feel so bad now after all these years thinking i was the unlucky one. sorry hijacking the post.

  3. #143
    Guest Polofour's Avatar
    Join Date
    Jun 2012
    Location
    South west
    Posts
    232
    Rides
    0
    Quote Originally Posted by Gerry View Post
    God they must be all the same,i dont feel so bad now after all these years thinking i was the unlucky one. sorry hijacking the post.
    its cool, i cant even think of a way to check peoples cars without some seriously expensive kit. someone should make a sill kit and the replacement panels to fix them up but theres probably not enough money in it.

  4. #144
    Guest CrazySx's Avatar
    Join Date
    Jul 2005
    Location
    Isleworth/Harrow
    Posts
    5,163
    Rides
    0
    Quote Originally Posted by Polofour View Post
    its cool, i cant even think of a way to check peoples cars without some seriously expensive kit. someone should make a sill kit and the replacement panels to fix them up but theres probably not enough money in it.
    Spice Weasle has been making the outer sills, he could probably do the inners as well, but he is going through a bit of a crisis right now

    As for commercially, you are right, not enoguh money to warrant the moulds etc to make them in the first place!

    On a side note, how did you swage the holes? have you got proper kit? and if so where did you get it and for how much?

    As for the welding, i have a huge learning curve ahead. Joined MIG-Welding forum a few weeks back, i think i have learned a few tips.

    Oh another question are you 'butt' welding your bits, or 'lap' welding them?

  5. #145
    Guest
    Join Date
    Apr 2016
    Location
    Essex
    Posts
    31
    Rides
    0
    Well that's a read, and some very scary photos of tin worm. Well done
    I need to learn welding, once I've got a welder haha

  6. #146
    Guest Polofour's Avatar
    Join Date
    Jun 2012
    Location
    South west
    Posts
    232
    Rides
    0
    Quote Originally Posted by karlosr33 View Post
    Well that's a read, and some very scary photos of tin worm. Well done
    I need to learn welding, once I've got a welder haha
    Thanks, MIG isnt hard to do but its not easy to do well, I have a couple of mates who are fabricators and there MIG welds make mine look awful.

    Quote Originally Posted by CrazySx View Post
    Spice Weasle has been making the outer sills, he could probably do the inners as well, but he is going through a bit of a crisis right now

    As for commercially, you are right, not enoguh money to warrant the moulds etc to make them in the first place!

    On a side note, how did you swage the holes? have you got proper kit? and if so where did you get it and for how much?

    As for the welding, i have a huge learning curve ahead. Joined MIG-Welding forum a few weeks back, i think i have learned a few tips.

    Oh another question are you 'butt' welding your bits, or 'lap' welding them?
    ha ha... butt...

    I haven't caught up on Rich's for a while, I hope he is ok.

    it depends on the metal, there is a lot of pitting from the corrosion and even after cleaning it back and treating the rust the metal thickness varies hugely (as a percentage of overall thickness anyway) so from one tack to the next is a completely different weld, this, I think, is why I cant seem to run a good bead on anything that is original steel, on parts where I am welding new steel to new steel I can run a decent continuous bead. the other thing to consider is that if you lap a joint it potentially causes a new pocket for corrosion to form in. I would say Butt where you can but if you need the extra strength of a double thickness joint then use a lap.

    I have a hole swager and hole punch. they are cool but were not cheap, kind of an impulse buy really will try to find where I got them from.

    I got loads of odd bits of steel at varying thicknesses and just stuck them together over and over. I also asked friends for advice and watched videos on YouTube and the forums (MIG-Welding.co.uk I think). it is all practice you will be fine! just get the best you can afford, use gas ( its unbelievable how much better gassed welding is than that gas-less crap) I also only use 0.6mm wire and tip as its less current for the thinner steel, this helped loads. 0.8mm was too much for a rusty datsun.

    just mustering the enthusiasm to go out to the garage now...

  7. #147
    Guest CrazySx's Avatar
    Join Date
    Jul 2005
    Location
    Isleworth/Harrow
    Posts
    5,163
    Rides
    0
    Quote Originally Posted by Polofour View Post
    Thanks, MIG isnt hard to do but its not easy to do well, I have a couple of mates who are fabricators and there MIG welds make mine look awful.


    ha ha... butt...

    I haven't caught up on Rich's for a while, I hope he is ok.

    it depends on the metal, there is a lot of pitting from the corrosion and even after cleaning it back and treating the rust the metal thickness varies hugely (as a percentage of overall thickness anyway) so from one tack to the next is a completely different weld, this, I think, is why I cant seem to run a good bead on anything that is original steel, on parts where I am welding new steel to new steel I can run a decent continuous bead. the other thing to consider is that if you lap a joint it potentially causes a new pocket for corrosion to form in. I would say Butt where you can but if you need the extra strength of a double thickness joint then use a lap.

    I have a hole swager and hole punch. they are cool but were not cheap, kind of an impulse buy really will try to find where I got them from.

    I got loads of odd bits of steel at varying thicknesses and just stuck them together over and over. I also asked friends for advice and watched videos on YouTube and the forums (MIG-Welding.co.uk I think). it is all practice you will be fine! just get the best you can afford, use gas ( its unbelievable how much better gassed welding is than that gas-less crap) I also only use 0.6mm wire and tip as its less current for the thinner steel, this helped loads. 0.8mm was too much for a rusty datsun.

    just mustering the enthusiasm to go out to the garage now...
    Thanks for the advice bud! You are right about the pitting. I bought a sandblaster to try and resolve that. I also plan to cut out as much rusty metal as poss.

    I know what u mean about impulse buys. I bought a 1inch swage after looking at your post yesterday. Cost me 25 quid for 1 on ebay lol!

    I have bought loads of tools for the job. Also bought a hammer and dolly set after seeing yours. I think the more and better tools you have the better the job will be.

    I think with the welding I will just have to suck it and see.

    Sent from my SM-G920F using Tapatalk

  8. #148
    Guest Polofour's Avatar
    Join Date
    Jun 2012
    Location
    South west
    Posts
    232
    Rides
    0
    even with sandblasting the pitting will still be there afterwards, i've done a few courses on corrosion for the aircraft work I do and its a bitch. using a series of tacks seems to be the best way and you can "pulse" to keep just enough heat in to give you a bit more penetration but not so much you blow through.

    didn't really get anywhere on the car today,cleaned the garage and I am rebuilding the sill bracket I removed but its a fiddly thing for sure lots of marking and measuring

  9. #149
    Guest CrazySx's Avatar
    Join Date
    Jul 2005
    Location
    Isleworth/Harrow
    Posts
    5,163
    Rides
    0
    I see what you mean. Yes I was advised against seam welding. A few spots at one end then the other then the middle then pulse and alternate so you don't get too hot.

    The day is yet young bud.. lol!

    Did you drill out any drain holes in the outer sill so a) trapped moisture can get out and b) you can shoot cavity wax in

    Sent from my SM-G920F using Tapatalk

  10. #150
    Guest Polofour's Avatar
    Join Date
    Jun 2012
    Location
    South west
    Posts
    232
    Rides
    0
    am going to dynax it from the inside of the car, there are so many access point for that.

    haven't planned out where drain holes will go yet, i will probably only put a couple in each side and they wont be bigger than 3mm.

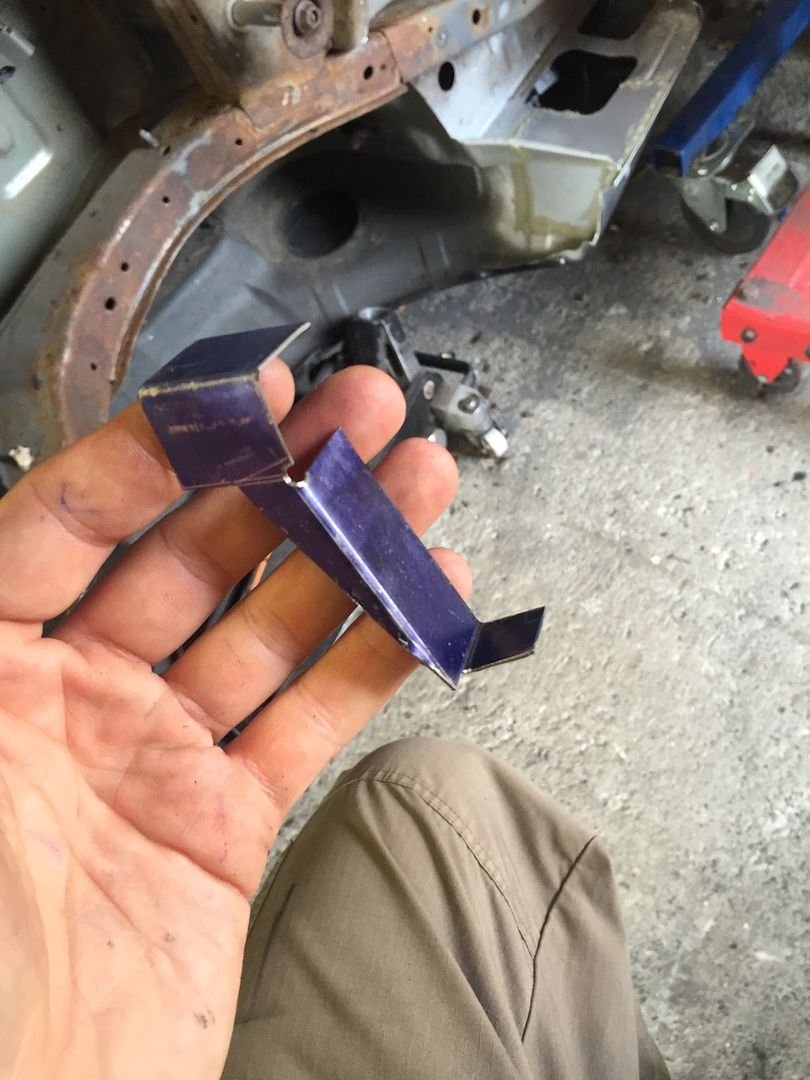
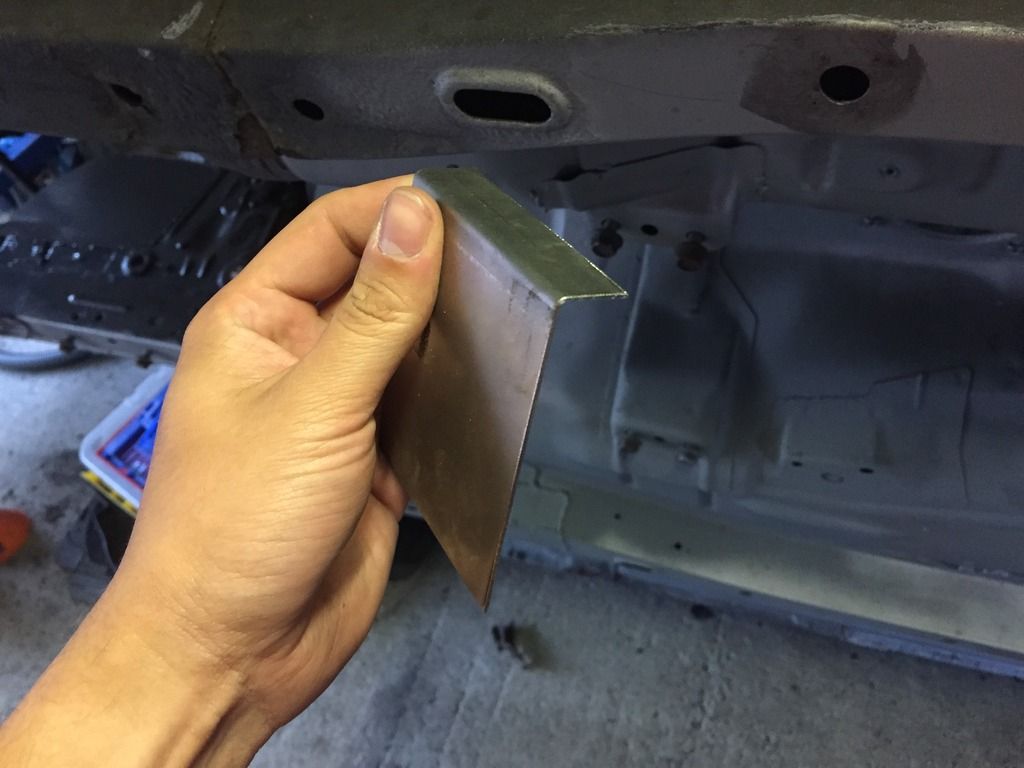
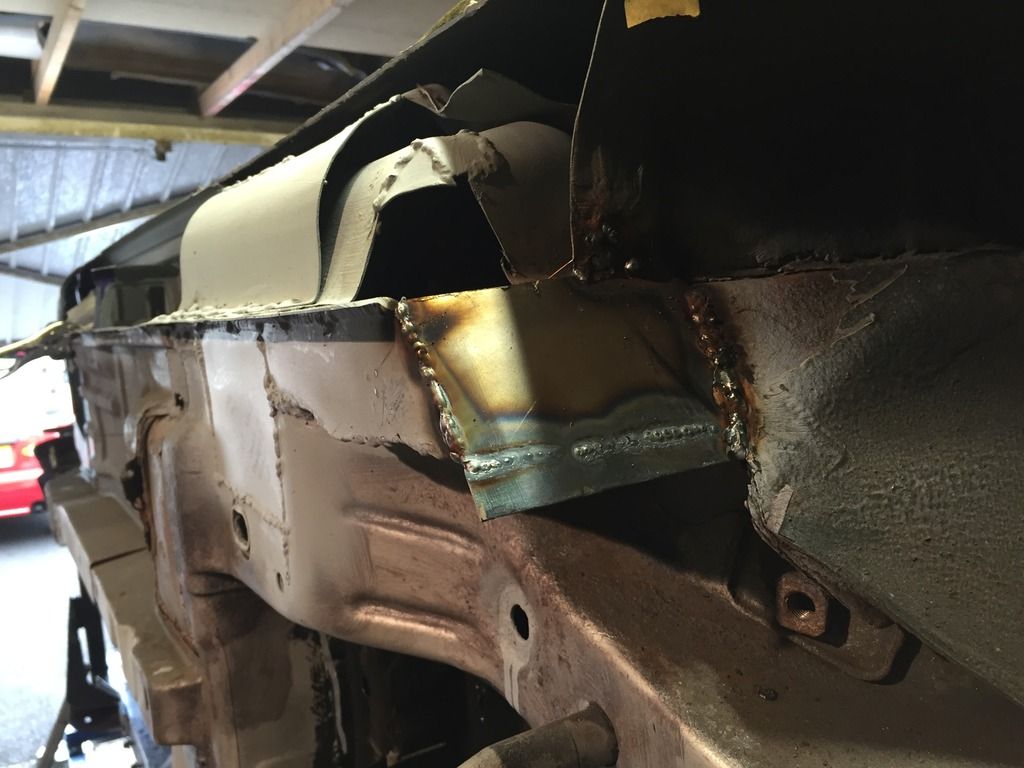
    I did a little bit, it was fiddly so it was a job i could do slow time, i made a repair piece for the mid sill bracket lower edge. ( its hassle identifying all these pieces )

    lots of marking and measuring of angles. engineering = maths


    cut it out and drilled the corners and folded it, didn't use the sheet folder I used a box and pan bender for more accuracy on these little folds. drilling the tight corners helps prevent stress raisers that will crack, once its filed (by hand) back to the correct size you wont see anything but smooth rounded edges.


    first fit. happy. little trim and it should weld in real nice.


    I wanted to get more done but just ran out of enthusiasm, I got so much done this week I am really happy. the same work on the other side took around 12 weeks! I am away all next week but will try and get a bit done on sunday maybe.
  11. #151
    Guest Polofour's Avatar
    Join Date
    Jun 2012
    Location
    South west
    Posts
    232
    Rides
    0
    not sure how I managed to double post that?

  12. #152
    Guest Polofour's Avatar
    Join Date
    Jun 2012
    Location
    South west
    Posts
    232
    Rides
    0
    so had a quick look earlier and i can indeed cut a plate out of the inside of the car to reach the back of the inside of the front jacking point to repair it, will try to get it cut out tonight but am not wanting to rush this cut.....

  13. #153
    Guest Polofour's Avatar
    Join Date
    Jun 2012
    Location
    South west
    Posts
    232
    Rides
    0
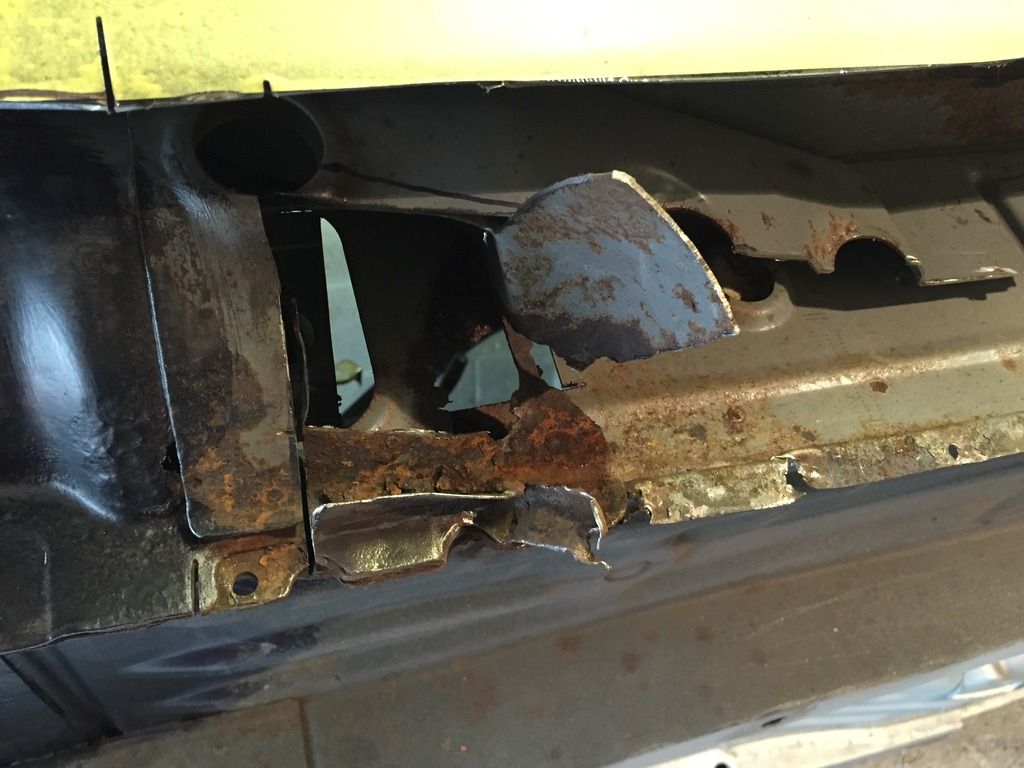
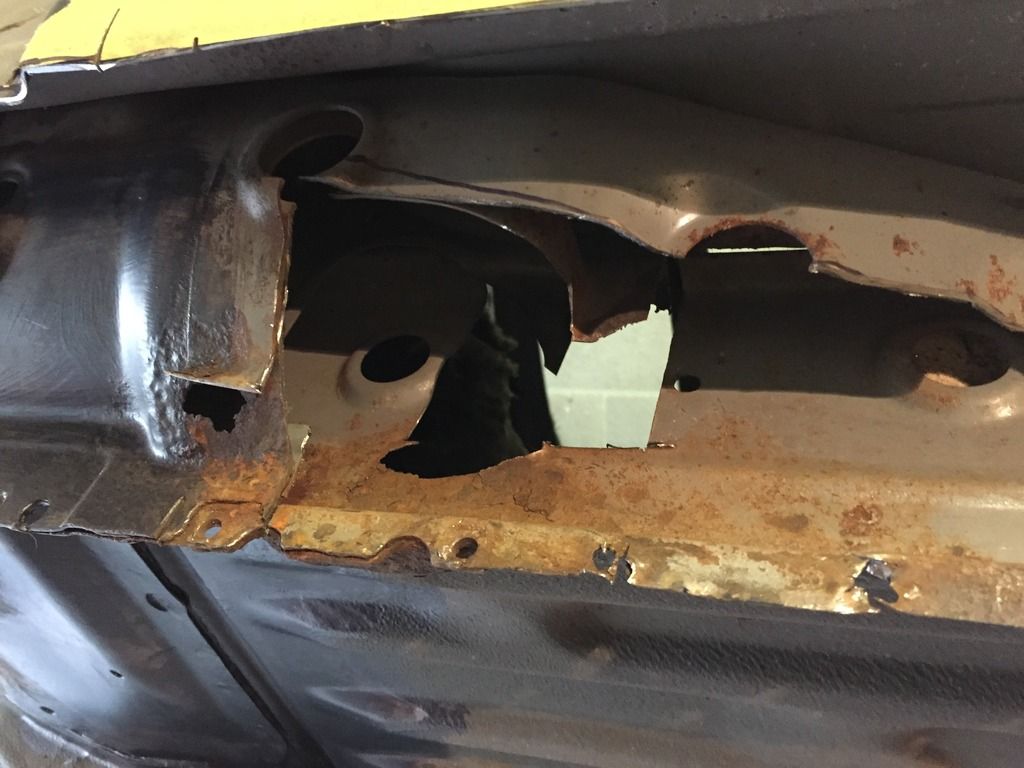
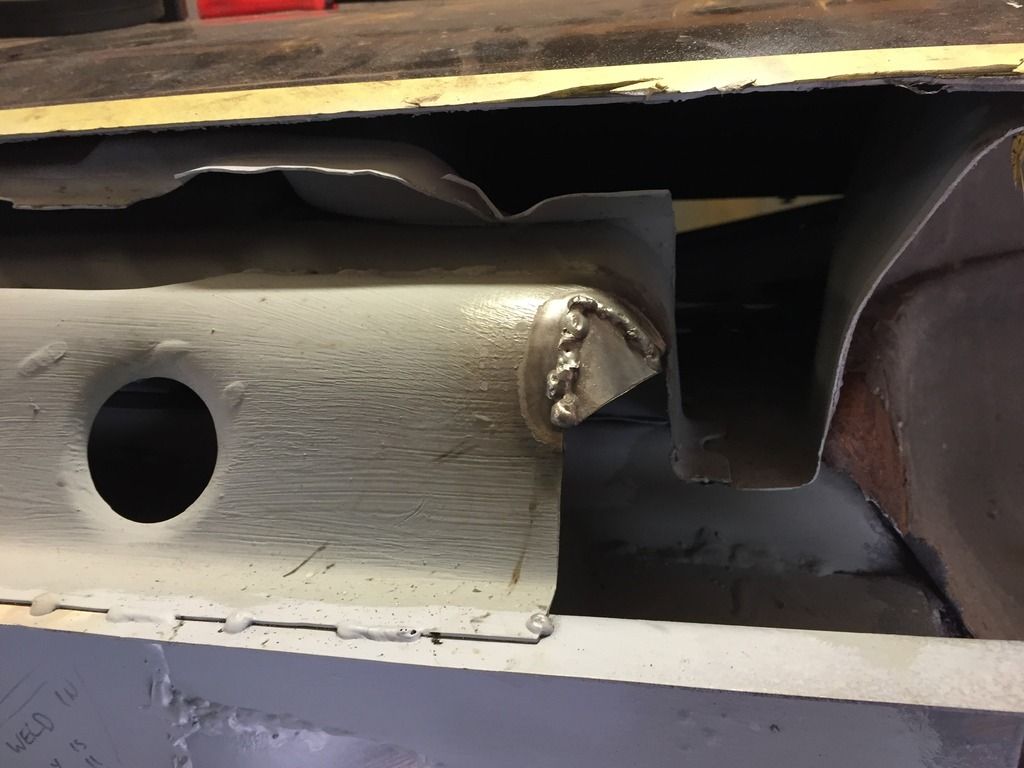
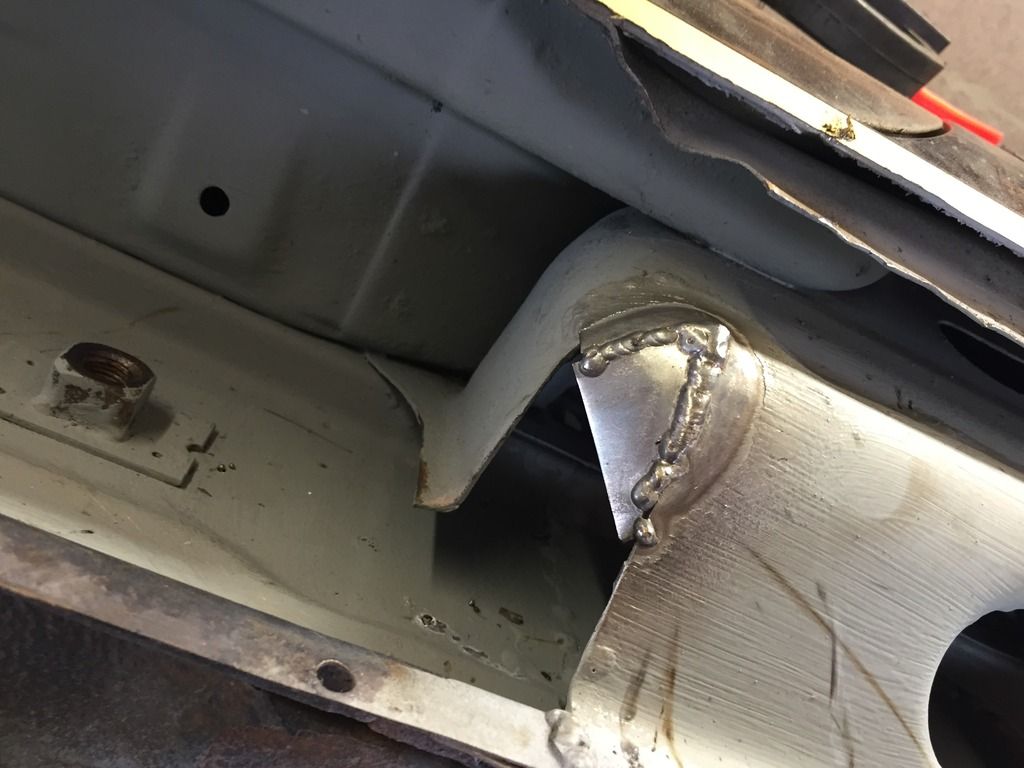
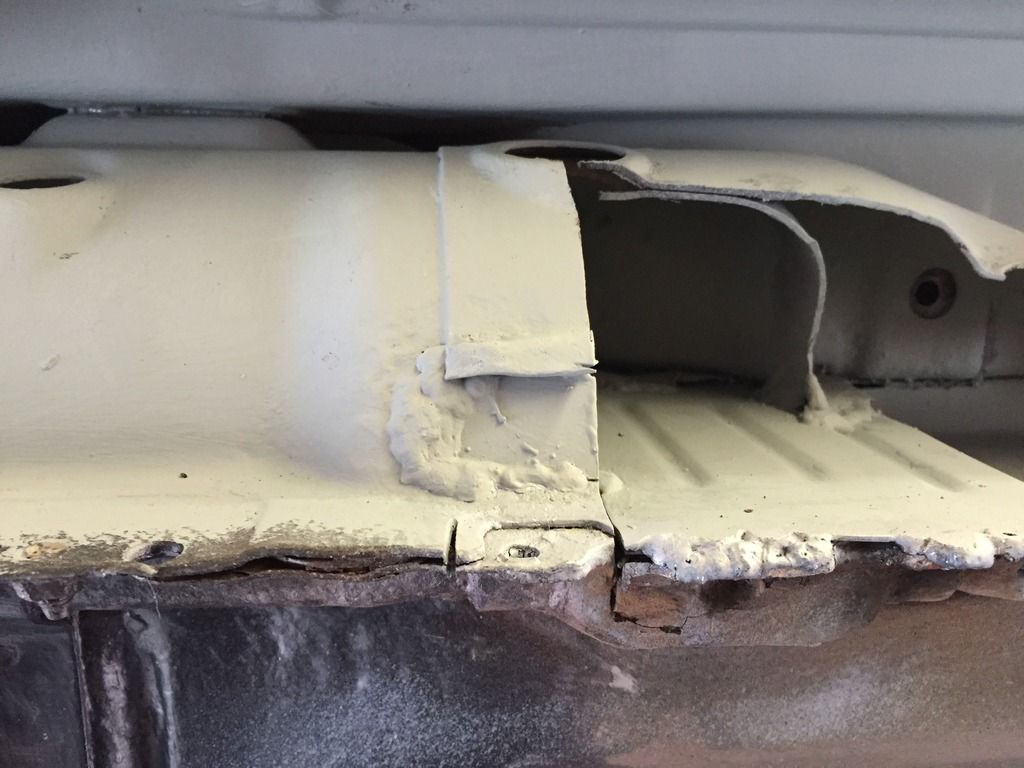
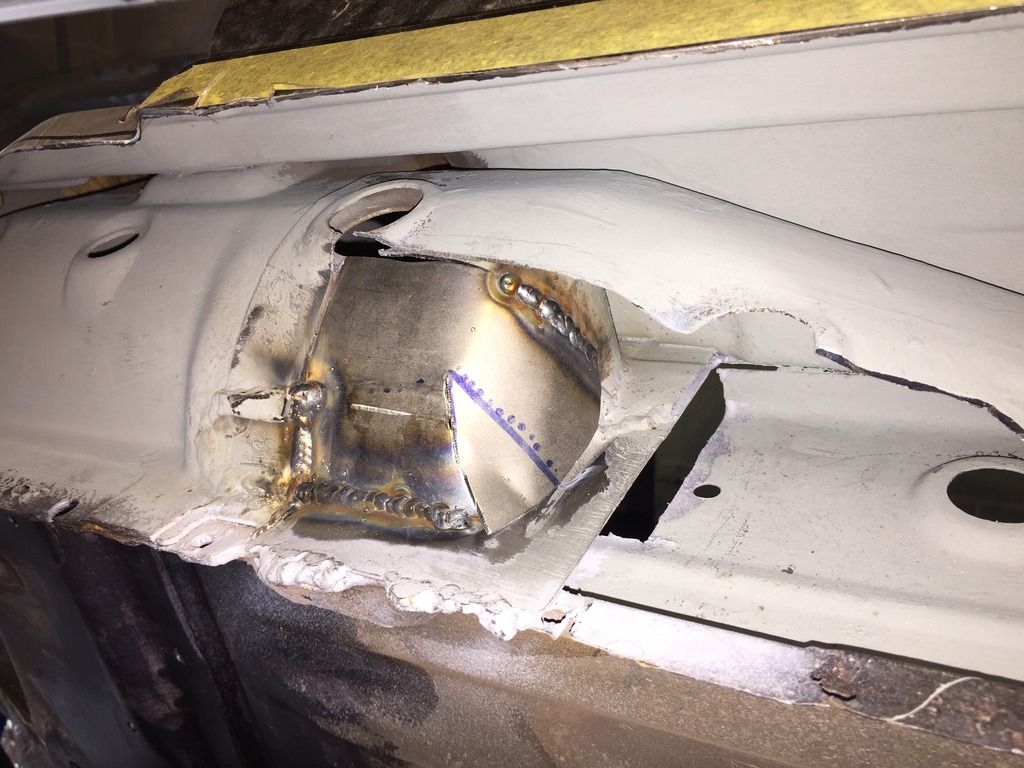
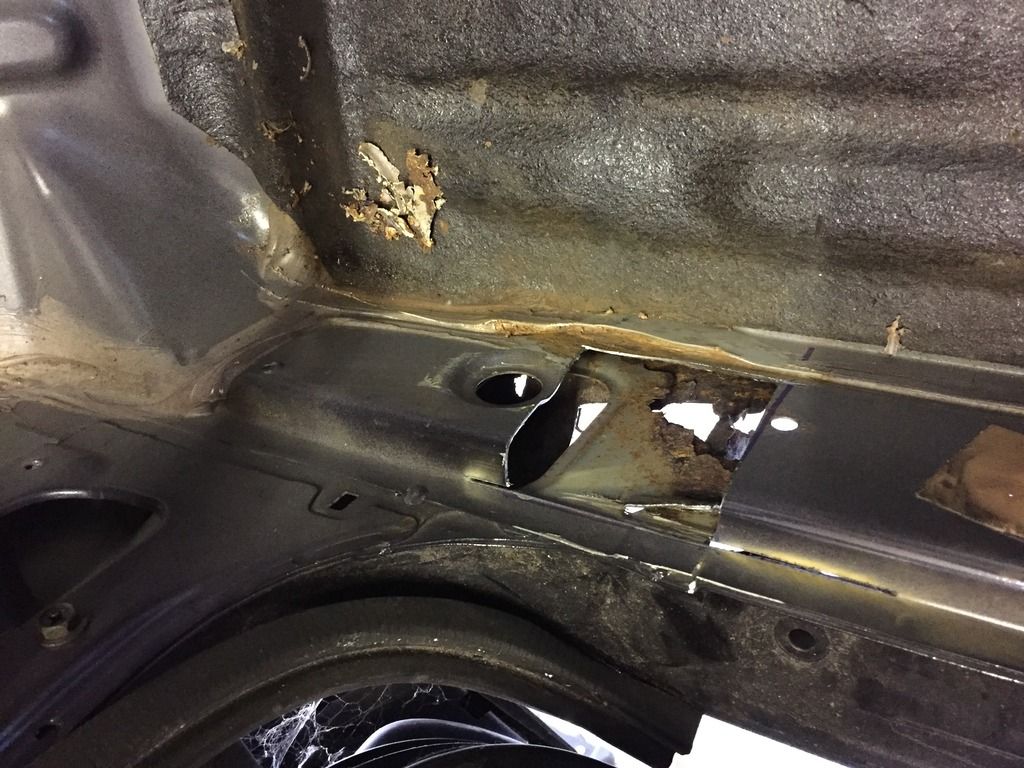
    Ok, this bit has been having me thinking for a while now. I don't want to cut away more than I have to and I need to be able to ensure the jacking point maintains its designed strength.

    So here is what I decided to do. I marked up a hole using some references that were visible from the outside of the car and cut it open. This let me see the backside of the rot.


    This left me looking at this, no appreciable difference until I pull the rest of the rubbish out which the hole has allowed me access to do.


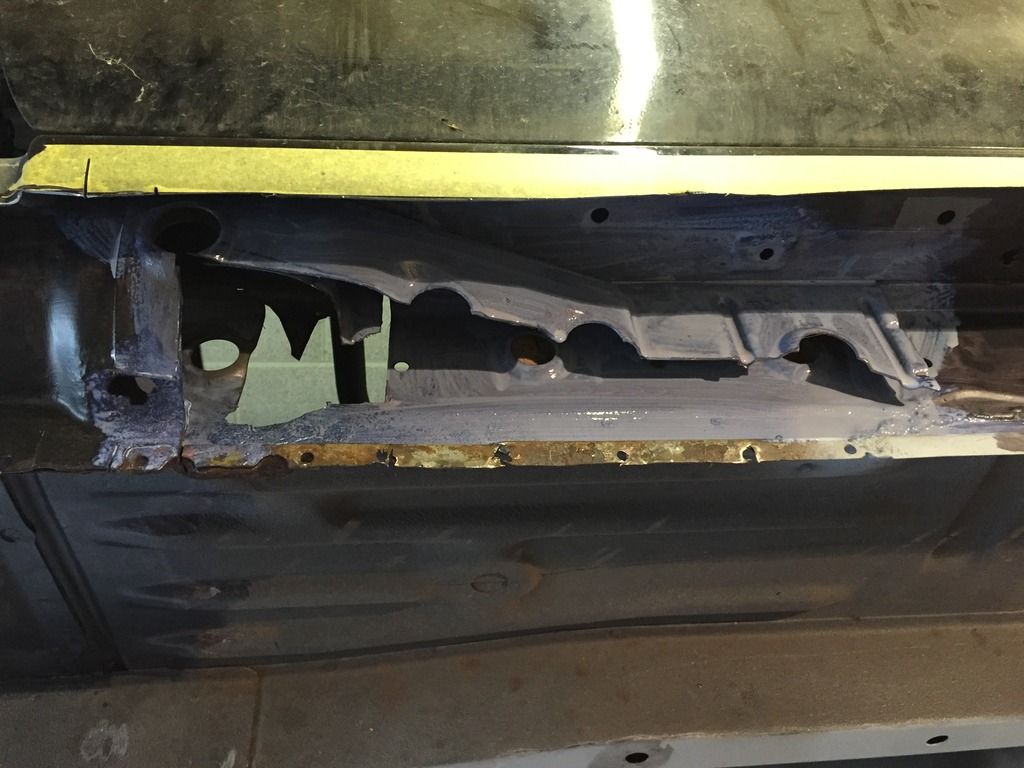
    The piece that was hanging down in the first few pictures I just bent right back inside the car, it has lined it up nicely with the top grinder cut line from when I removed the inner skin, I will run a grinder down this tomorrow and it should cut it really neatly.

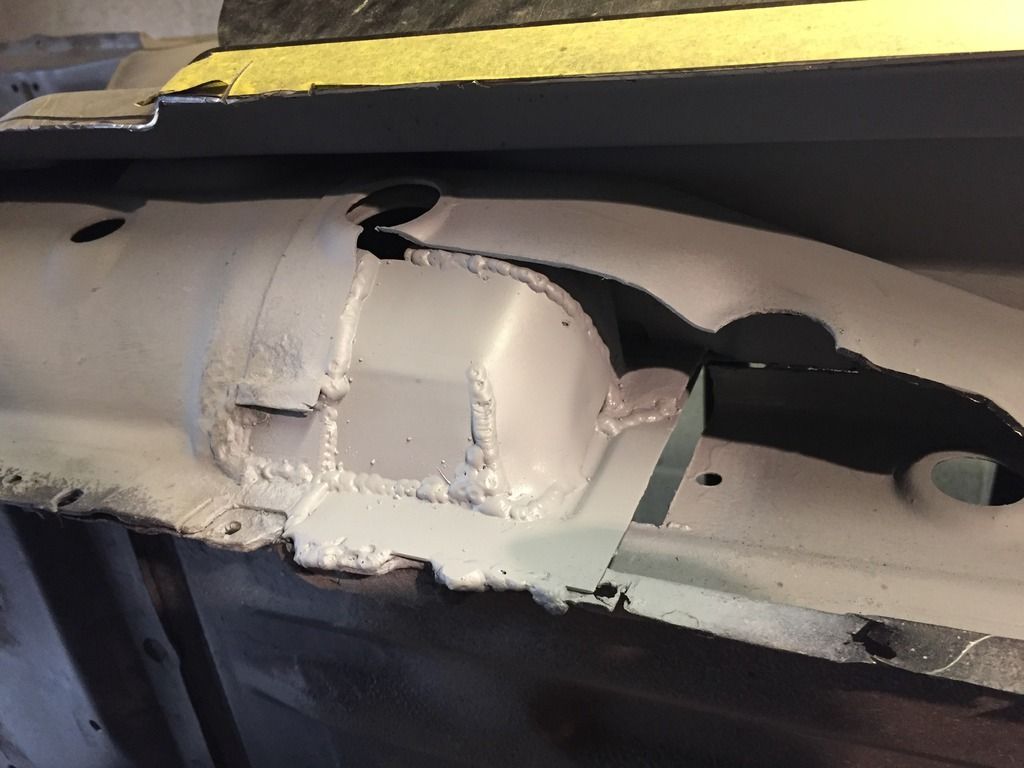
    I applied some more blue goo and have left it overnight. I will start making the repair plates tomorrow and hopefully have it welded back up by the end of the week.


    That's how I left it for today.


  14. #154
    Guest CrazySx's Avatar
    Join Date
    Jul 2005
    Location
    Isleworth/Harrow
    Posts
    5,163
    Rides
    0
    Good progress bud, but looks like it's gonna be a pig to weld inside there. What MIG do you have and how are you finding welding new metal to old?

    I was doing ok with welding new stuff to new but when I practiced welding a but of new stuff to a bit of the old sill I started blowing holes

    Sent from my SM-G920F using Tapatalk

  15. #155
    Guest Daz's Avatar
    Join Date
    Jun 2007
    Location
    Essex
    Posts
    16,949
    Rides
    0
    Making some awesome progress buddy. I'm saving down all these images for reference for when I attack the sills on my car.

  16. #156
    Guest Polofour's Avatar
    Join Date
    Jun 2012
    Location
    South west
    Posts
    232
    Rides
    0
    Quote Originally Posted by Daz View Post
    Making some awesome progress buddy. I'm saving down all these images for reference for when I attack the sills on my car.
    Some hard yards for sure. my Photobucket is pretty organised so they should stay up here in order for everyone who needs them.

    Quote Originally Posted by CrazySx View Post
    Good progress bud, but looks like it's gonna be a pig to weld inside there. What MIG do you have and how are you finding welding new metal to old?

    I was doing ok with welding new stuff to new but when I practiced welding a but of new stuff to a bit of the old sill I started blowing holes
    I have a Clarke 160 TM turbo, the price has dropped on these and you can source them new for around £320. Using gas is a massive help when welding to old Nissan steel. I would recommend staying away from disposables, at around 15 quid a pop they don't last long and if you get on Adams gas you can get an entire cylinder of argon/co2 mix for £82 (+VAT?) and that has lasted me for all this work!

    Also take your time and weld tacks sequentially, you will soon get a feel for how much heat to keep in the material to let your tack penetrate nicely but not blow holes. Even with all this I still chase alot of holes through razor thin metal.

    Took another week off work and got a load done on the passenger sill today. Remember my "holey" jacking point? cut a 1.2mm plate and rolled some stiffeners into it, with the hole inside the car it was really easy to weld.


    Also folded up a patch for the inside bit I cut out. I will probably make another one as this one doesn't allow for the lightening hole on the interior sill.


    Painted with Electrox. I think i did the other side with Hammerite as my Electrox hadnt turned up yet, will be interesting to see which side rots back through first!!


    Put some ears on the B pillar. I cant remeber if I took these all the way down on the other side I will have to look back through and see.


    A tiny patch for the little hole that was here.


    Filled the holes on the sill front and painted the inside ready for re attaching.


    then put the outer inner ( ) Bottom B-pillar plate in, its a pretty straight forward piece and helps support the sill line. I had real trouble with the spot welds on this as I forgot to clean the Electrox off the underlying piece, I only twigged this after I had tacked the plate in place and was putting out small fires. and for some reason my welder started blowing holes through the new steel with ridiculous ease which was hugely annoying.


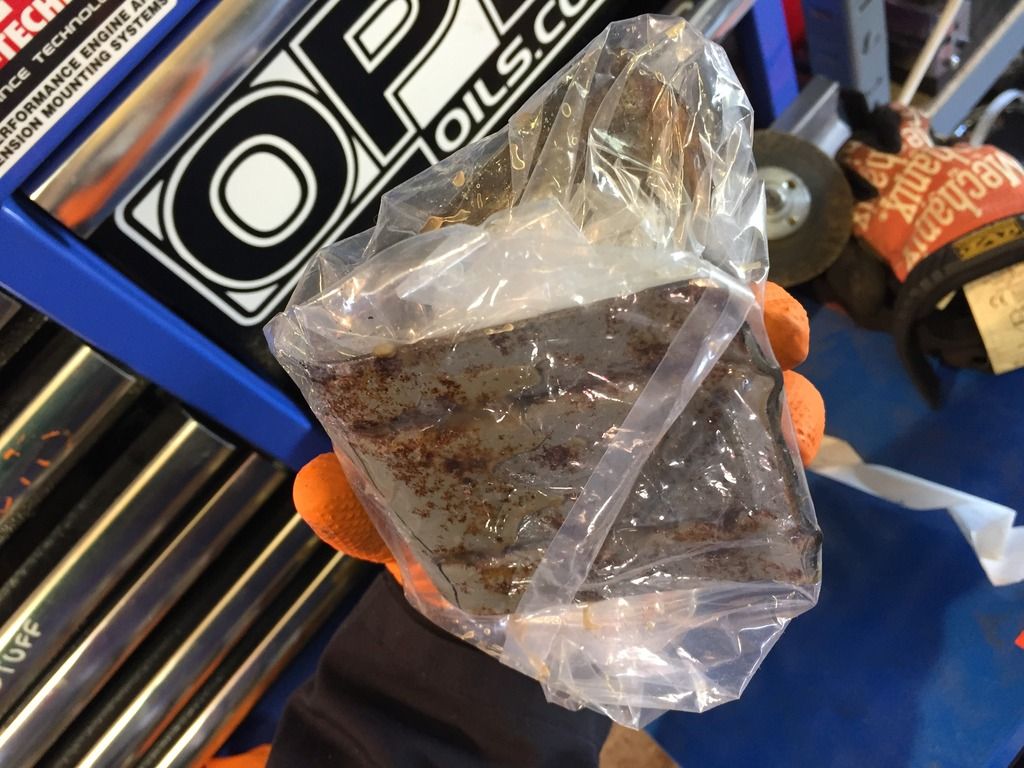
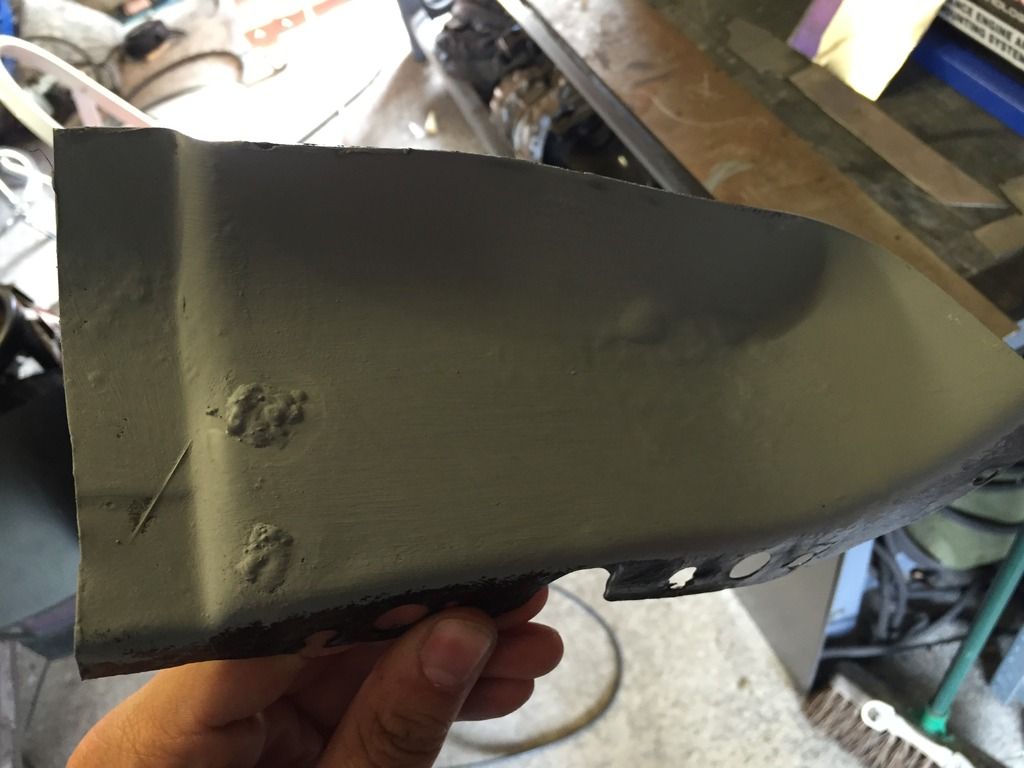
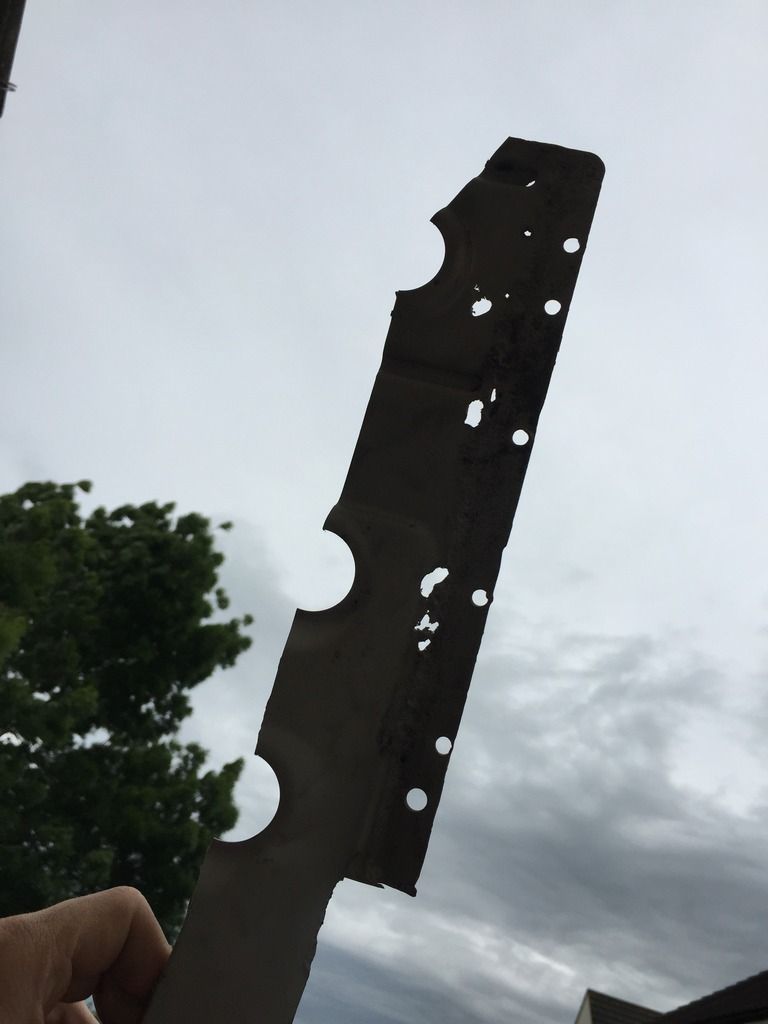
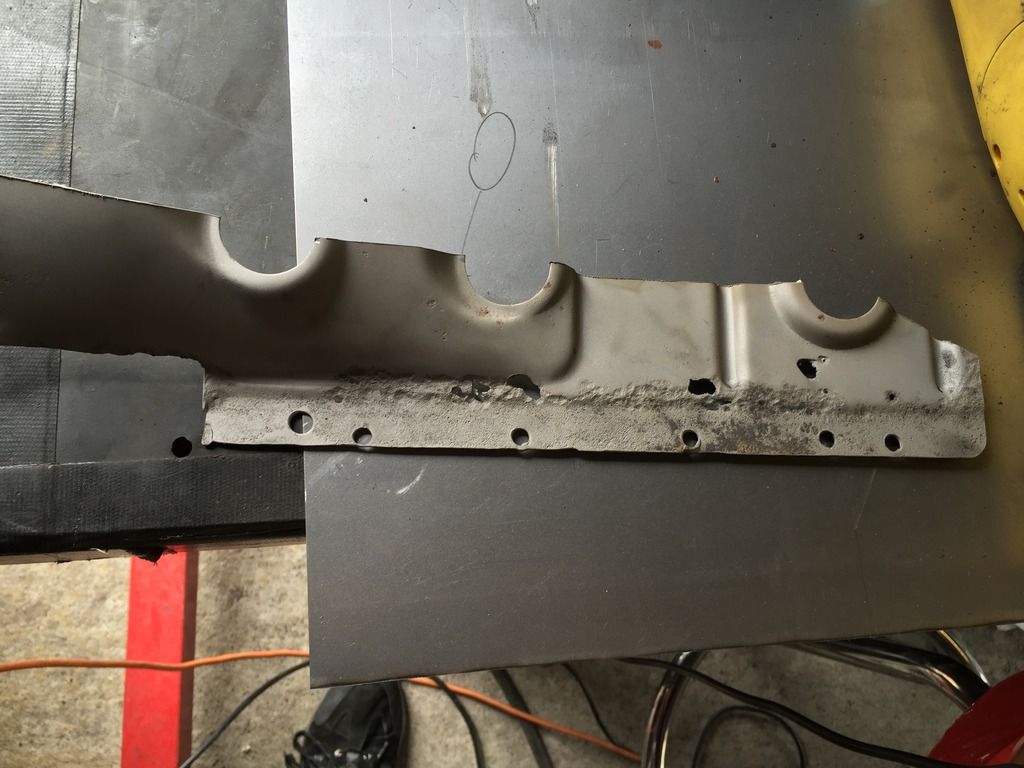
    moving back to the front of the sill, I saved the old piece I cut out and it looked like this...


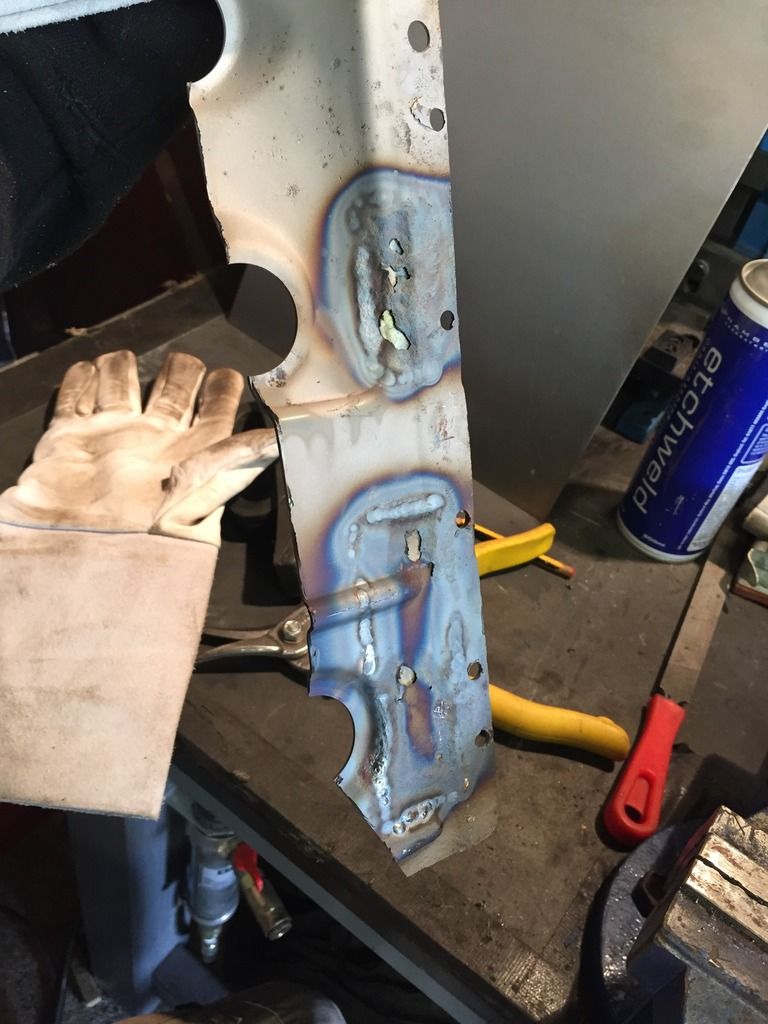
    Nipped into work and whizzed it into the media blaster to see how bad it was. It was alot better than I thought and would need only two small patches.


    Easy.


    I will dribble some Hydrate 80 into the air gaps then Electrox the pants off it before welding it back in.


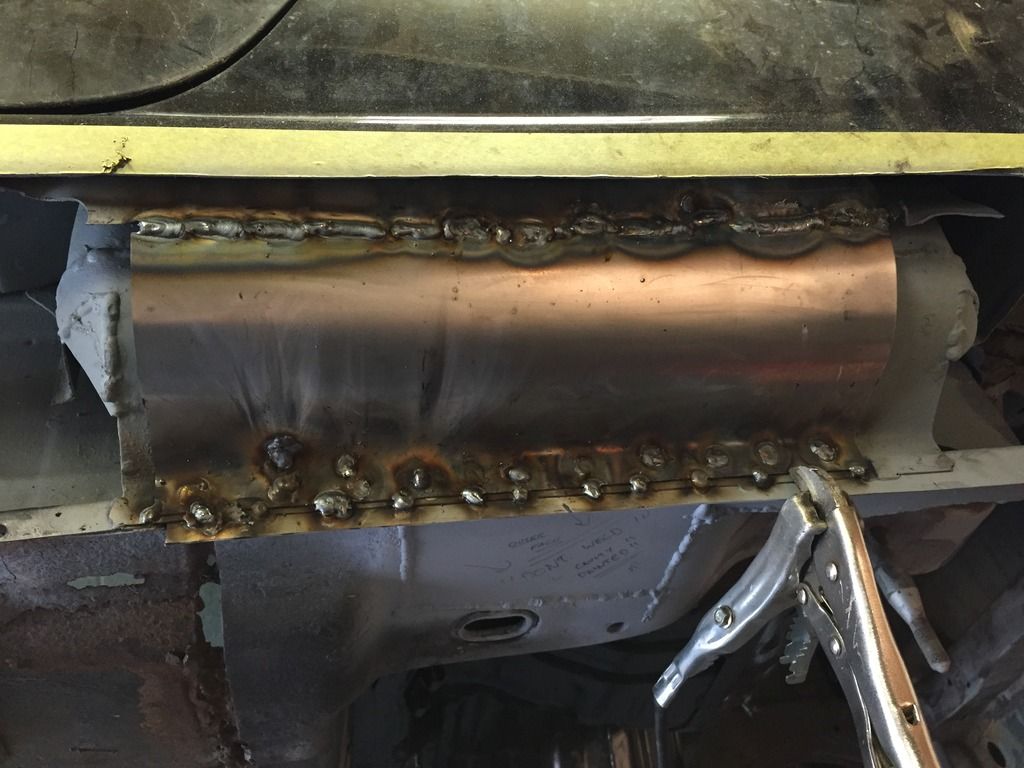
    lines up pretty nice, some minor distortion but nothing that cant be normalised back out with a blow torch. Also in this photo you can see I have welded the mid sill bracket back in place, minus the trick little bracket I made. I dont know if I am going to use it or not, I will see how everything lines up when I start skinning the sill.


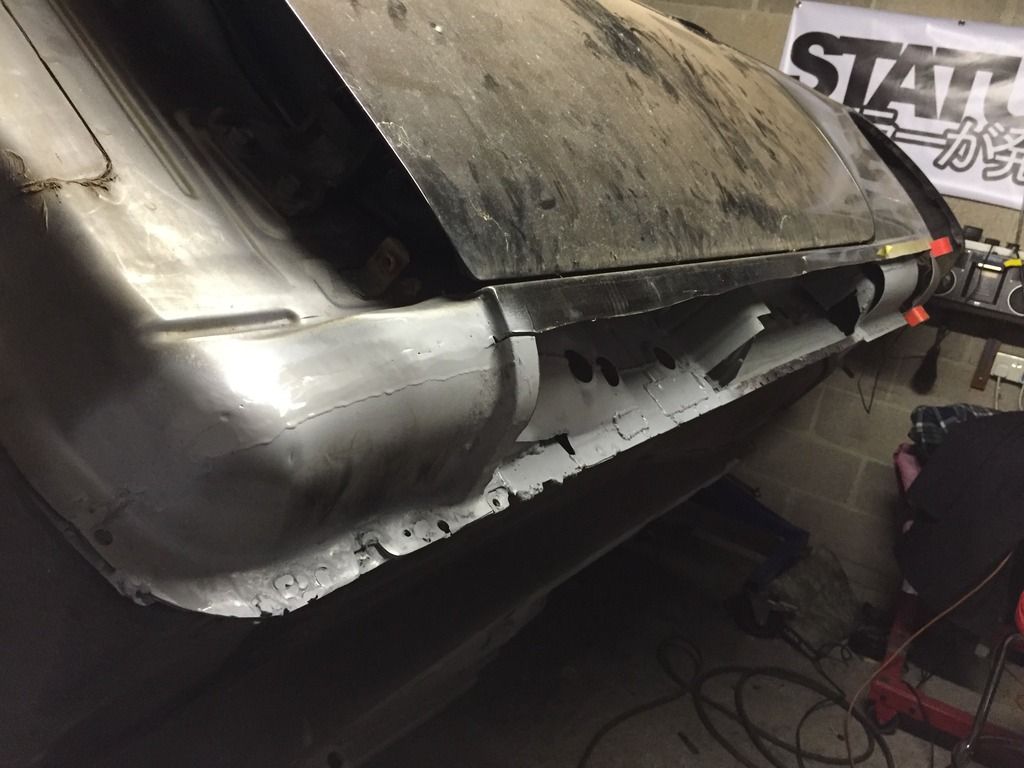
    I also made a start on the back end of the sill, trimming the excess away and putting the sill end plate on ready for the bits of wheel arch to go back in.


    I am happy with how much I got done today, if I push hard again tomorrow and thursday I should be ready to or have started to re skin it.

  17. #157
    Guest CrazySx's Avatar
    Join Date
    Jul 2005
    Location
    Isleworth/Harrow
    Posts
    5,163
    Rides
    0
    Wow that's really good progress! I think I found my issue with welding. I am welding outside and all my gas is getting blown away might have to try flux core wire.

    Have you checked my thread recently

    Sent from my SM-G920F using Tapatalk

  18. #158
    Guest Polofour's Avatar
    Join Date
    Jun 2012
    Location
    South west
    Posts
    232
    Rides
    0
    Quote Originally Posted by CrazySx View Post
    Wow that's really good progress! I think I found my issue with welding. I am welding outside and all my gas is getting blown away might have to try flux core wire.

    Have you checked my thread recently
    I will head over and have a look now, you can increase the gas pressure to help with that or use your steady hand as a slight shield to help, also try holding the trigger to let the gas come out before pulling it enough to actually start the arc, this way you can kind of "flood" the area with gas, although argon is a noble gas and therefore very heavy, so this tends to work better if you are welding down onto a part.

  19. #159
    Guest Polofour's Avatar
    Join Date
    Jun 2012
    Location
    South west
    Posts
    232
    Rides
    0
    Got more done this morning,

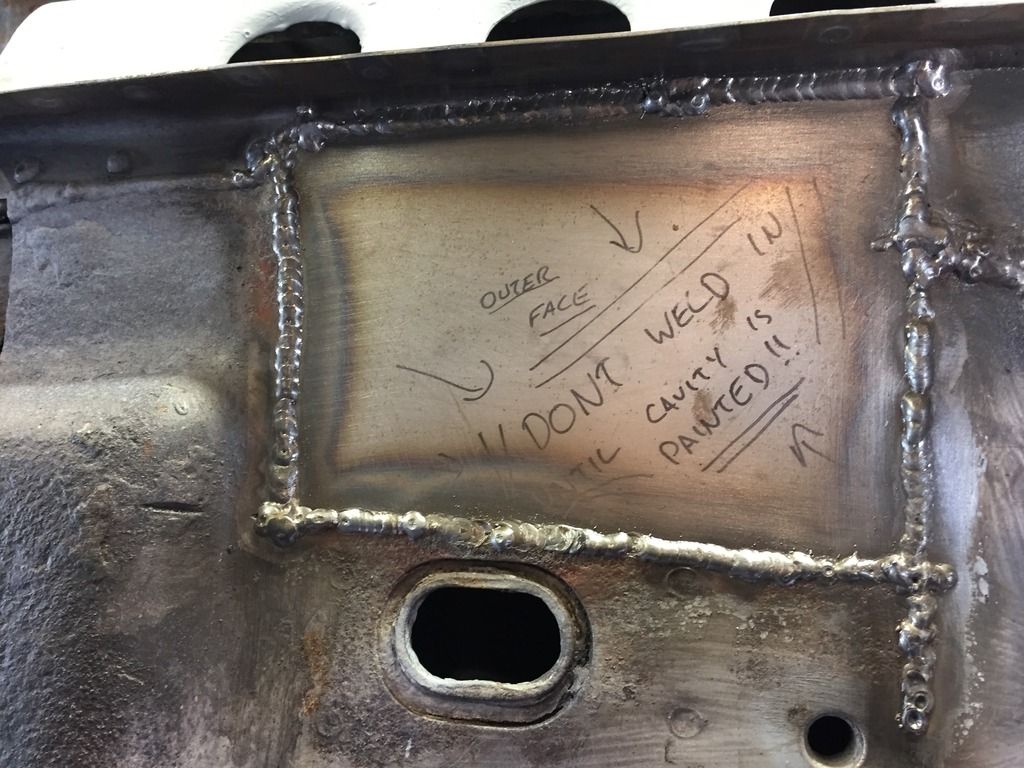
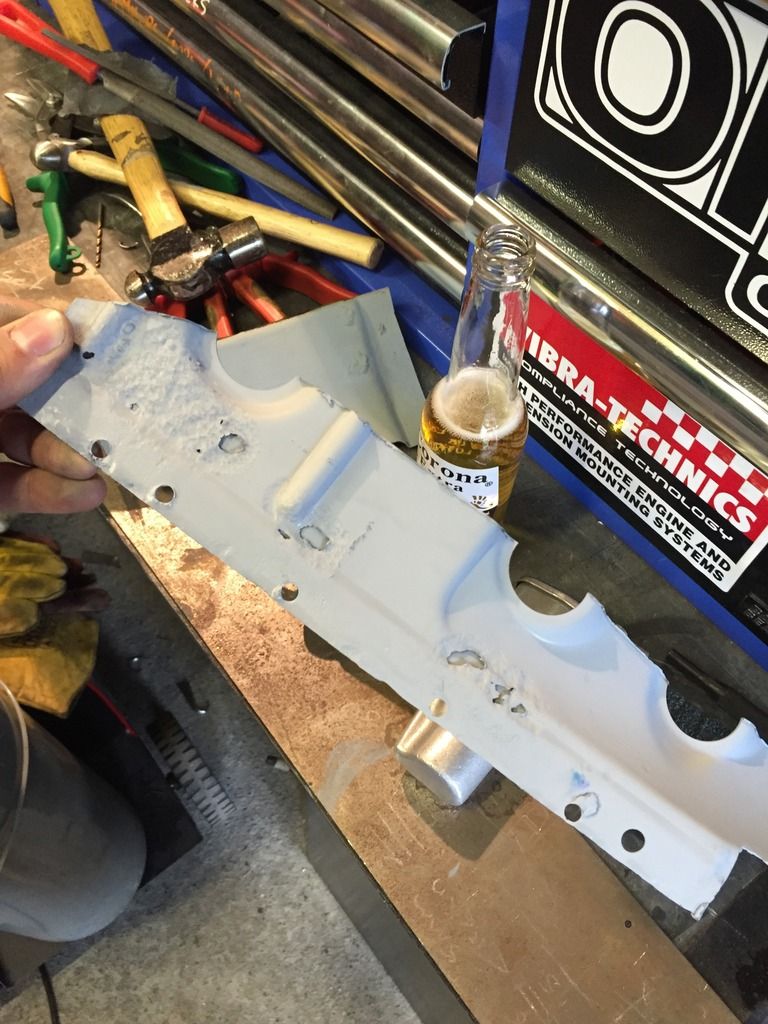
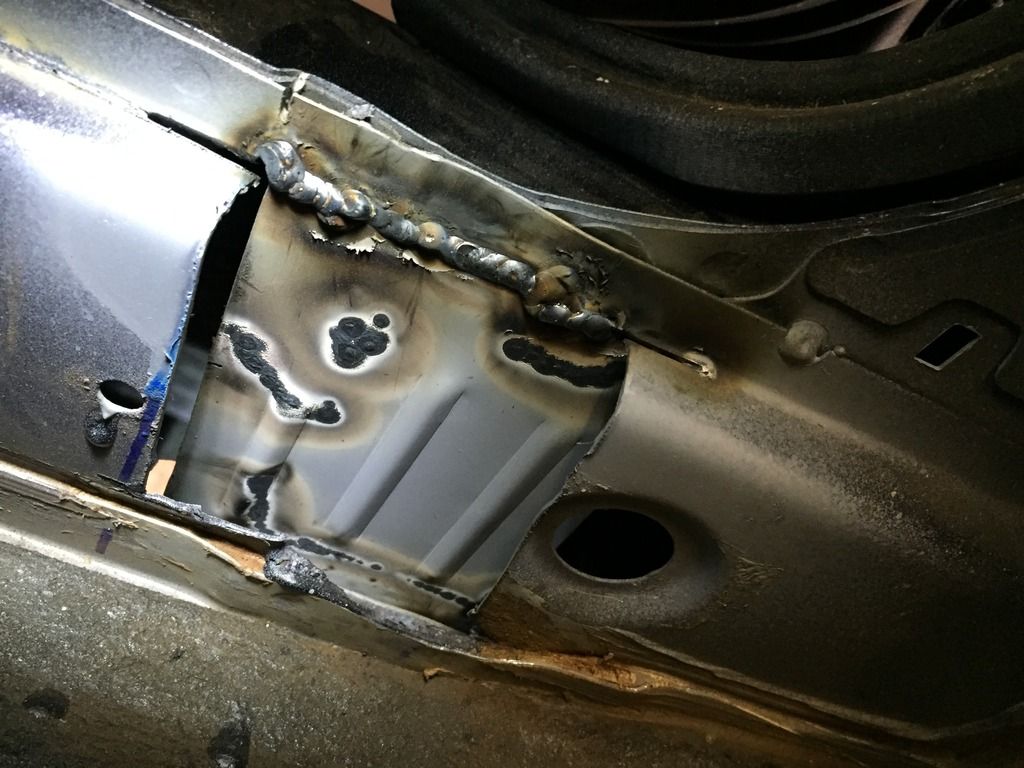
    Started by boxing in the inside front of the sill. welded it half way in then hammered it into the right shape for a decent fit. It's a bit blobby in the corner of the second photo as for some reason my welder blew a half inch hole in one shot?! maybe a flaw in the metal or something.


    For some concurrent activity I painted up this badger and let it dry, just realised the open beer bottle in the background its 5pm somewhere right?


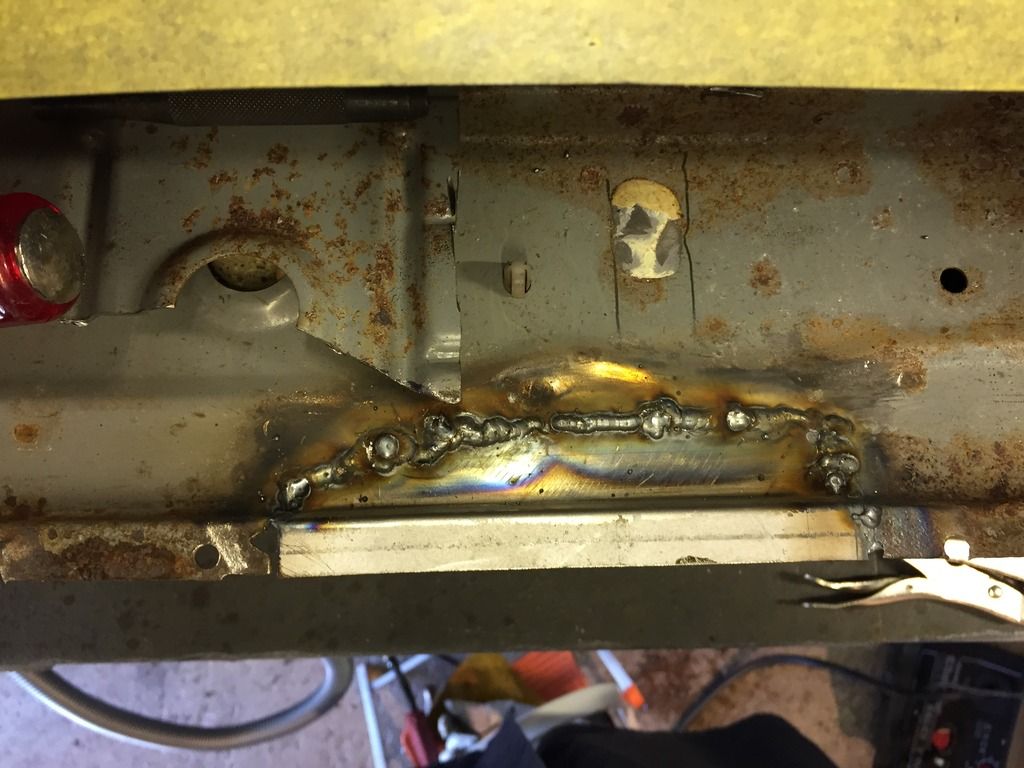
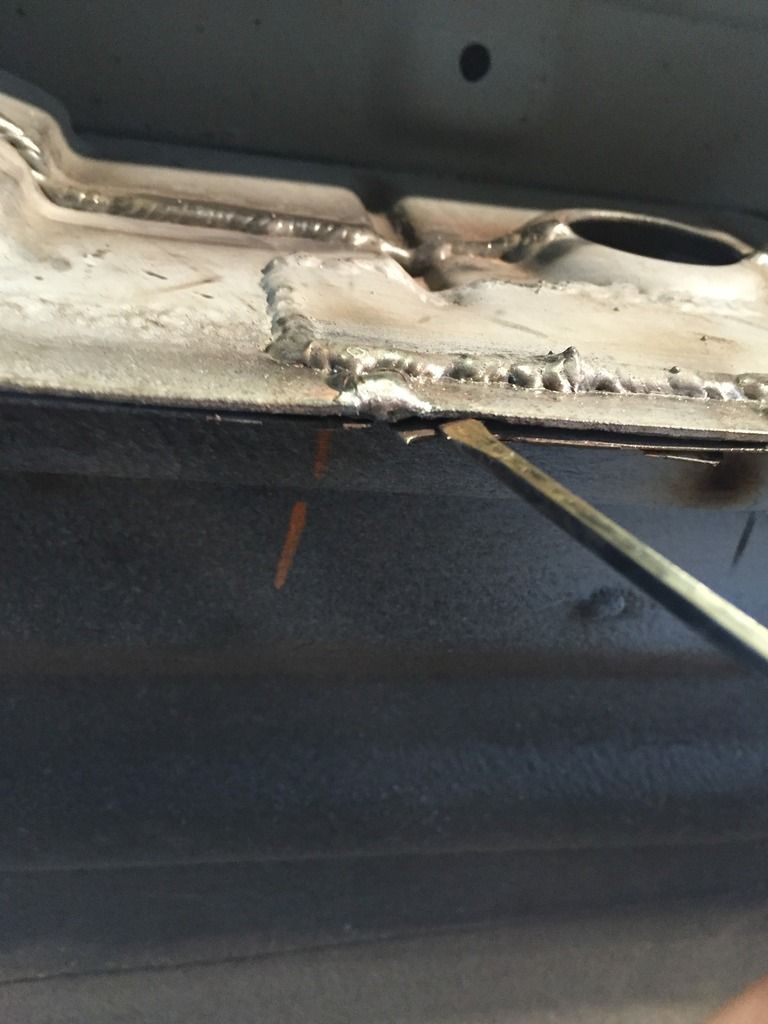
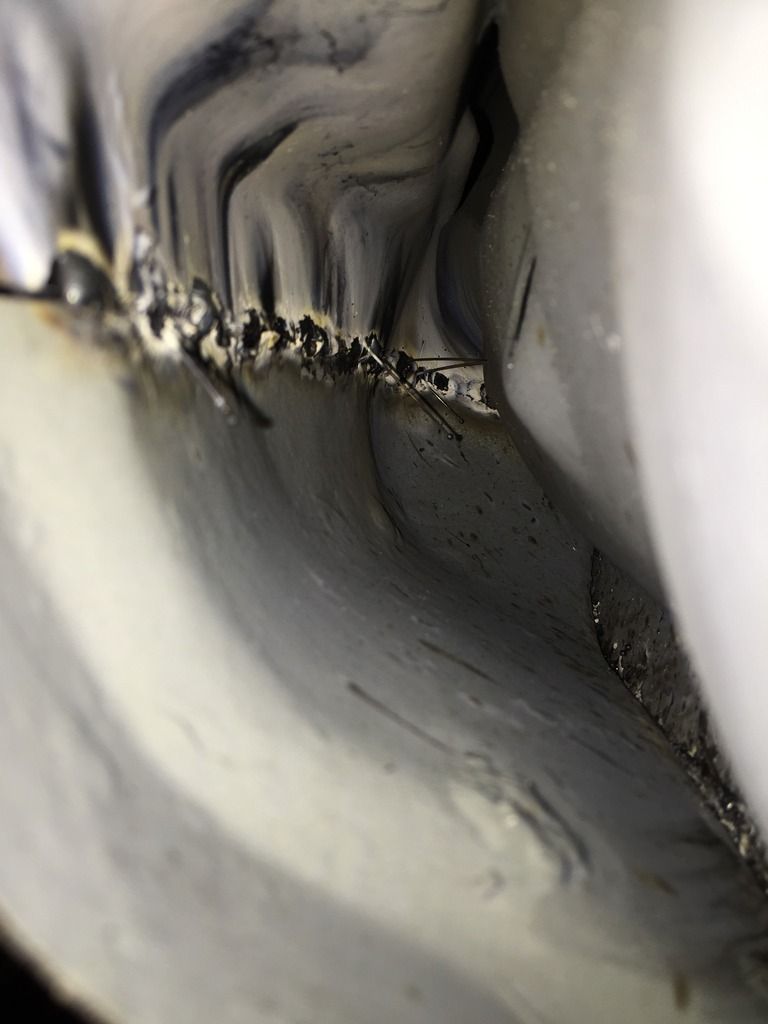
    Took 5 minutes to check my welding from the back side, I have a good level of penetration with it just starting to bulge on the back side of the welds, much more than this and I would be blowing through all the time.


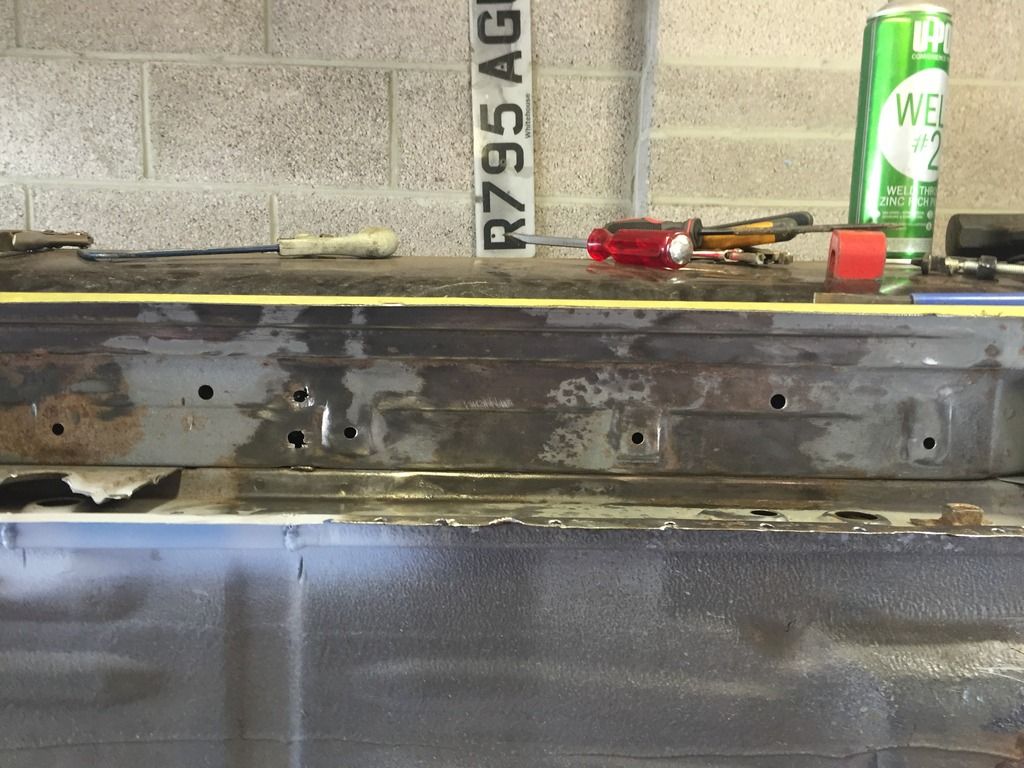
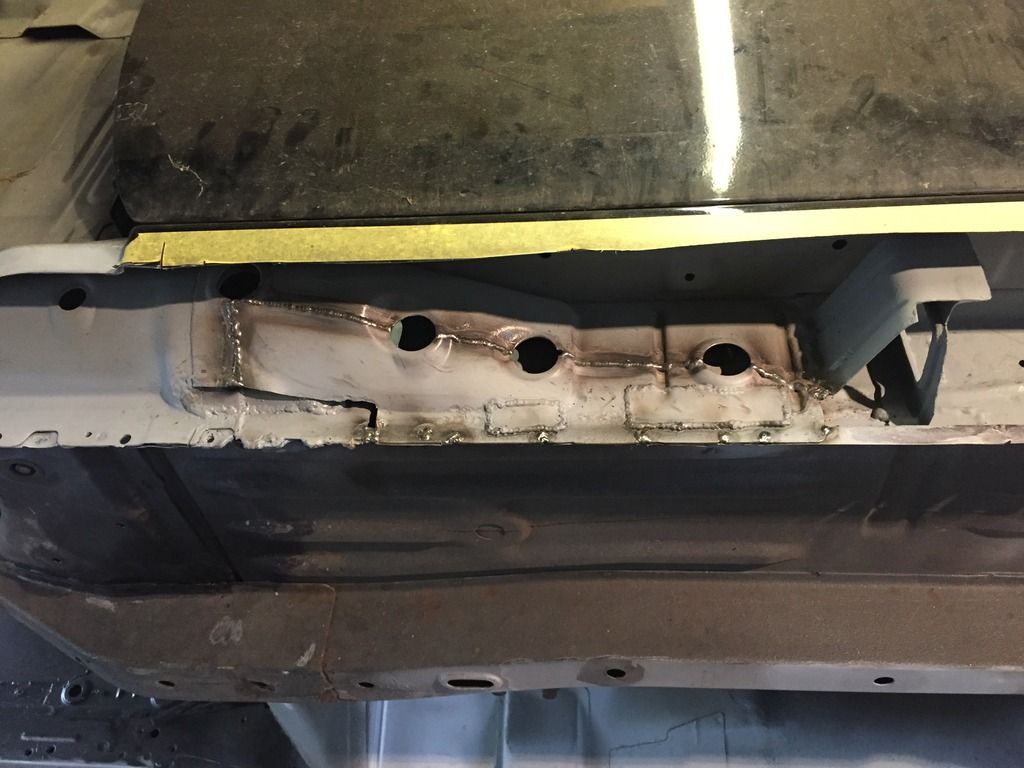
    Then this occurred! It may sound daft but this piece is a beautiful piece. Weirdness over. It made me grin like an idiot when I stood back and flipped my mask up. Felt like the sill was complete, i have one more plate to weld in and then its ready for skin!!


    a few of the sill tacks didnt take very well which was a little bit annoying, but when the skin goes on I will flip the car and weld all three layers together so it will be ok.


    Then the front of the sill went on, was a pain in the butt, constantly blowing holes through but it dressed back ok and I had good penetration along most of it, altohugh the little sticky out bits of MIG wire drive me nuts.


    Crazy - I uploaded a video to photobucket but cant see it on my PC, and cant play it on my phone, i will have a fiddle later and see what I can do.

  20. #160
    Guest CrazySx's Avatar
    Join Date
    Jul 2005
    Location
    Isleworth/Harrow
    Posts
    5,163
    Rides
    0
    Very nice work mate. I see why u had a proud moment, that bit has come out lovely!

    I have a clarke 135te so not far of yours. What settings are you working with?

    And what thickness wire?

    Mine is on 2/min, 0.6 wire and 6-7 wire speed.

    Sent from my SM-G920F using Tapatalk

Posting Permissions

  • You may not post new threads
  • You may not post replies
  • You may not post attachments
  • You may not edit your posts
  •