Page 1 of 13 12311 ... LastLast
Results 1 to 20 of 246

Thread: milsom 93's Project Skids S13

  1. #1
    Guest milsom93's Avatar
    Join Date
    Dec 2013
    Location
    Wakefield
    Posts
    367
    Rides
    0

    milsom 93's Project Skids S13

    So now its finally the time I've pulled my finger out to put a thread up here of my S13 which I call Project Skids

    It started out as a winning bid on eBay(a year ago) and within the next 3 days I was travelling down 150 miles in a recovery truck to pick this up. My plan is to build it nice and slowly learning how to do things on the way and then enjoy it mostly. (when insurance came down)

    It was a fully standard S13 that had been laid up for 13 years in a garage and only 85K on the clock.


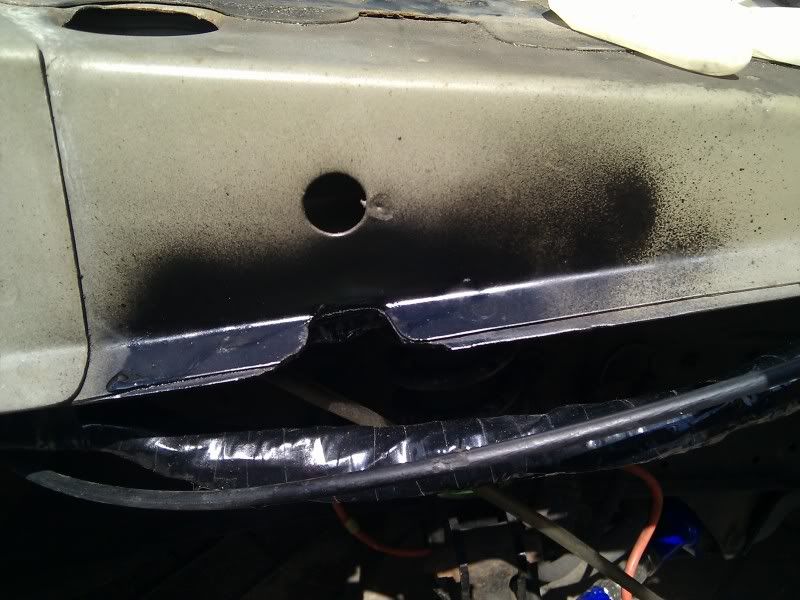
    The boot was more rust than metal but a nice smoothed over one came with the sale, It needed 3 patches welding underneath, a new exhaust, tyres and generally some TLC

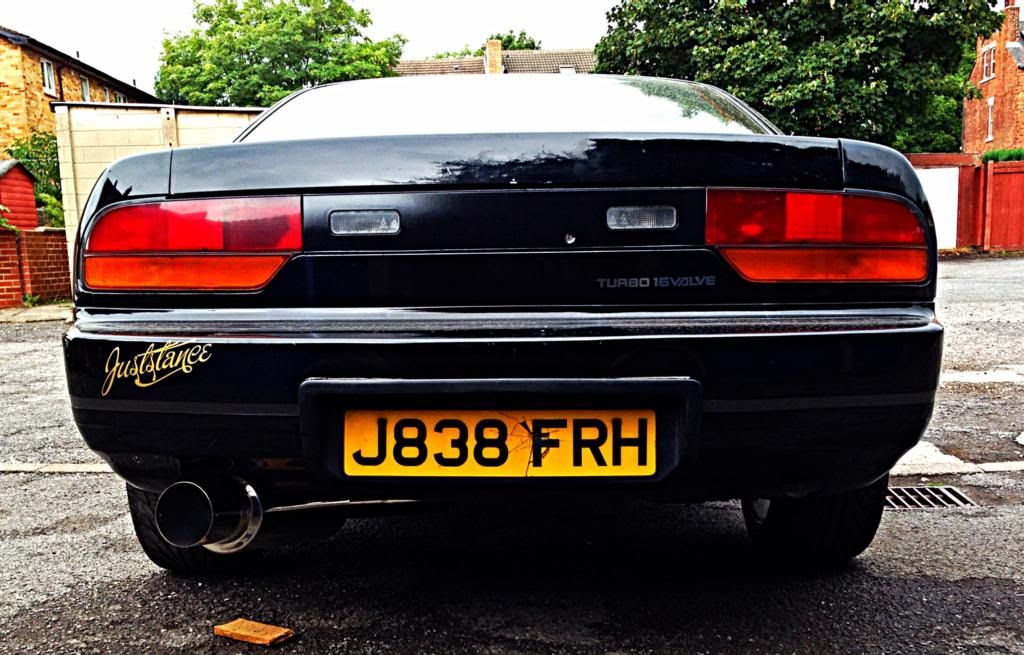
    So the boot was fitted and bought a Japspeed Type 2 cat back.


    Then stripped the rear seats out to see the for rust, but will be staying stripped for now until. I have kept everything though so I can put it all back. The weeks after I spent my afternoons chipping sound deadening off


    Sent the car for its welding to be done. No photos unfortunately

    Bought some TE37's (17x9J ET+40) off a friend with some spacers.


    Sprayed my rocker covers


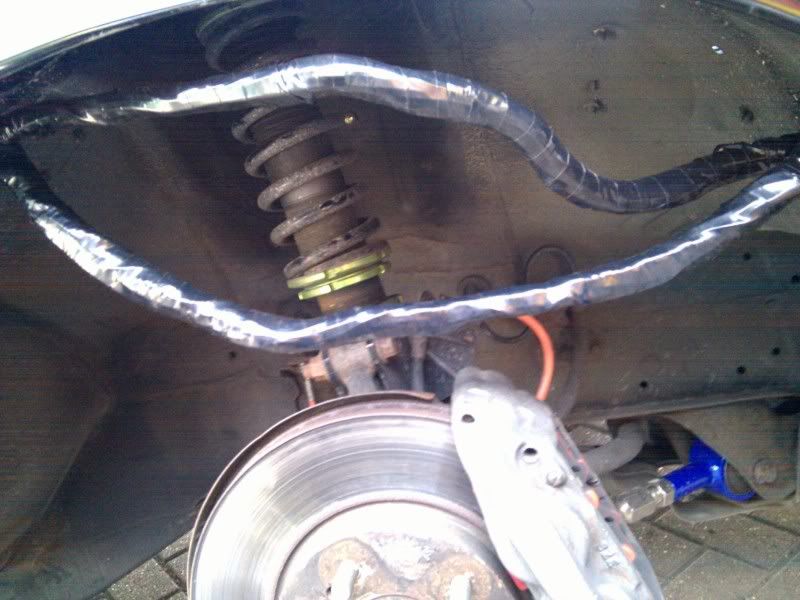
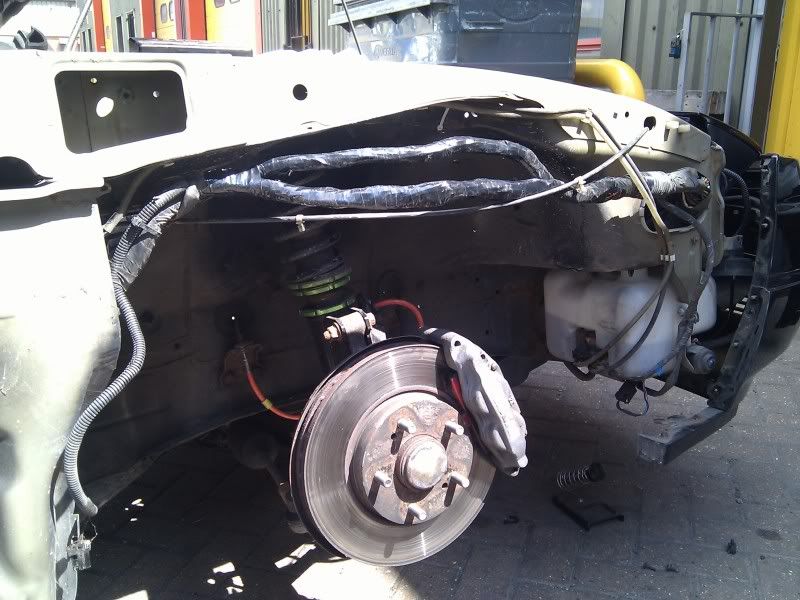
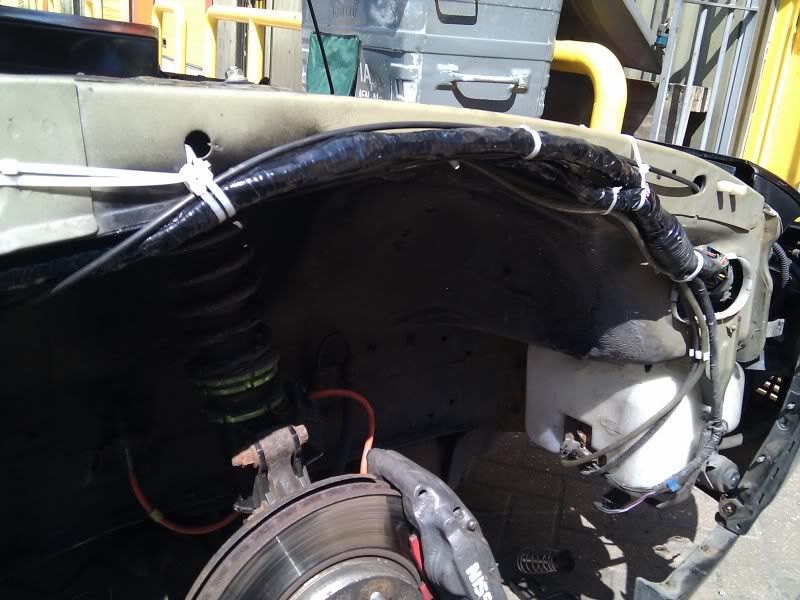
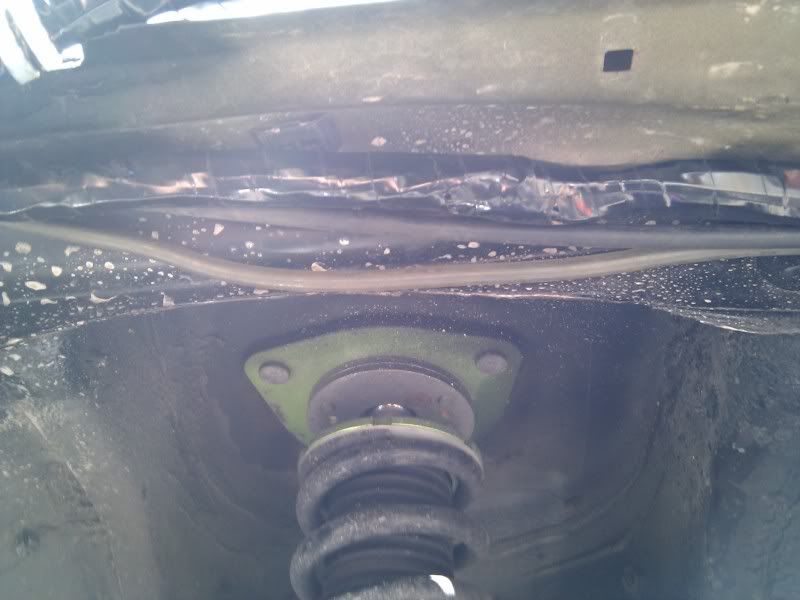
    bought some coilovers, fitment was a lot better than I thought with 20mm spacers.


    Then relocated the battery behind the passengers seat.


    Bought some S14 front brake callipers, conversion lines, braided lines and 280mm grooved discs. Took me forever to fit them as everything rounded off. A few swear words, skimmed knuckles and a whole lot of brake pipe later I got them all fitted and put new Red stuff pads in the rear.


    Put the callipers on the wrong side at first :wack , but managed to realise before I went any further.


    To be continued....

  2. #2
    Guest milsom93's Avatar
    Join Date
    Dec 2013
    Location
    Wakefield
    Posts
    367
    Rides
    0
    I then bought an apex rear bolt in roll cage for super cheap.
    (how most my days off work look like)


    Now my focus turned to getting it on the road and saving up for insurance so the obvious thing to do was but a ducktail spoiler and a roof spoiler..


    So now the saving seriously started so I got on with getting the final bits of sound deadening off and spraying the rear interior.


    Got a sweet flip out stereo from a friend


    so months later I finally saved up a small fortune for insurance and booked it in for its MOT,

    so give it a wash


    Then spur of the moment decided to paint the writing on the wheels white


    and sent it for its MOT


    Come back with the front sill needing all re-welding from some un careful jacking in the past, a spot of welding on the front arch and the steering bush knackered

    The steering bush was replaced for a metal on and all the welding done. No pictures as yet. So 13 years later its now back on the road.

  3. #3
    Guest milsom93's Avatar
    Join Date
    Dec 2013
    Location
    Wakefield
    Posts
    367
    Rides
    0
    So its been on the road now over a month and I soon realised the battery wasn't charging as it should. Thanks to all the nice people on here it have figured that the earth which was placed on the rear seat belt anchor was not good enough so I need to wire an earth to the front. For now I have placed the battery back inn the front as I haven't got an intercooler yet and took me ten minutes. New cable is on order.

    Other than that to say its not driven for so long it hasn't skipped a beat for me. I have just been out and about enjoying it. Such an awesome car to drive.

    Few pictures from the team 440 meet


    Bought an A'pexi air filter this weekend and fitted it


    Also bodged up some brackets to stop movement but will make something at work tomorrow


    So that's it really. I have probably missed a few things off but I'm sure I will mop these up.

    Japfest a week on Saturday which I'm properly looking forward too!!

    Future plans are just to get some skid wheels and now go to a drift day to enjoy the car and learn.

    Also love the presence it has when parked up and driving and the look on peoples faces that don't get what this car.

  4. #4
    Guest jj205mi16's Avatar
    Join Date
    Sep 2009
    Location
    Ayrshire, Auchinleck
    Posts
    1,445
    Rides
    0
    good to see someone actually using and enjoying an s13, most are in bits now! makes me miss mine. looks great

  5. #5
    Guest milsom93's Avatar
    Join Date
    Dec 2013
    Location
    Wakefield
    Posts
    367
    Rides
    0
    Quote Originally Posted by jj205mi16 View Post
    good to see someone actually using and enjoying an s13, most are in bits now! makes me miss mine. looks great
    Cheers mate, love driving it!

  6. #6
    Guest milsom93's Avatar
    Join Date
    Dec 2013
    Location
    Wakefield
    Posts
    367
    Rides
    0
    Just an update on how it's going. Not much change but that's a good thing as it means it's working.

    So last week made the mistake of reversing into my garage door two days before Japfest. Not bad but not the best timing!

    Saturday morning came and a 3:00AM set off to Japfest in silly rain dawned on me. Still I was super excited. Took us 5 hours to get there thanks to the infamous traffic and the stupid 50 zones on the motor ways. Car didn't miss a beat!! After having some issues (my fault) only two days before I expected some sort if issue but it didn't flinch and I can happily say the same for the 4 hour journey home. It just sat at 70/80mph all the way. I didn't get in until half 9 but it was totally worth it. The SXOC stand was amazing and good to meet some of the people from here. I didn't get photos as I was too tired/busy all day but here's a few courtesy of liamjrrhodes.


    To solve the charging issue I plonked the battery back in the front, but I need to move this back. But am I right in saying that it should be okay to earth it to the body in the rear and then wire the engine earth to the chassis in the bay provide a good enough earth all over? Or just put a full wire to the bay from the battery and too the chassis on the rear?

    9 hours motorway driving in the rain meant it got super mucky and the fact I had bought a buffer machine so today i started polishing ready for it's next outing.
    Before

    After (only polished the roof so far before it started to rain)

  7. #7
    Guest milsom93's Avatar
    Join Date
    Dec 2013
    Location
    Wakefield
    Posts
    367
    Rides
    0
    Not much progress on this as time and money are pretty short lately, but I will up date the little things

    Painted the cage gold which looks pretty awesome now. Happy how it has turned out.

     photo F15BF0A2-5D81-4F6A-8C96-993AE7E49EB6_zpsguvhozaf.jpg


    Also decided that its time to fix this oil leak. Its been dripping very very slowly for the last month or two and hasn't affected the oil level, but it needs fixing before it gets worse and causes serious damage. Its coming from the back of the engine some where. So todays job is to find the cause. Any suggestions on common problem would be good to point me in the right direction

    Finally the battery is in the back again and I have wired the engine to chassis to allow a proper earth around the car and it seems to worked

    Picture with the silly England flags on

  8. #8
    Guest
    Join Date
    Jun 2012
    Location
    NW, England
    Posts
    1,761
    Rides
    0
    The gold cage in a black car looks good. I think the oil leak might be from the rubber semi circle things on the back of the engine. That's just a guess though. Don't think there is anywhere else it could leak out from at the back.

  9. #9
    Member alanjuggler's Avatar
    Join Date
    Feb 2004
    Location
    manchester
    Posts
    9,970
    Rides
    0
    dastardly has probably called it - the half moons at the back of the cam covers are a pain - probably the exhaust side, the heat makes them go hard.

    bear in mind it could be the rear crank main seal too.
    white '94 s13 200sx scrapped - mapped to 1.45bar. OS giken box, garrett GT2876R, 950cc injectors, ORC twin plate, nistune. 349bhp/325lbft @ 1.3bar CA18DET
    white '96 s13 180sx - type g with more kouki bits - RB25DET, GTR steel twin turbo conversion, RB26 crank & rods. 2.6L VVT twin turbo, SR20 OSG box, OSG STR twin plate clutch, Z32 ECU w/ nistune.

    current status: 180 a bit broken but to be repaired.

  10. #10
    Guest milsom93's Avatar
    Join Date
    Dec 2013
    Location
    Wakefield
    Posts
    367
    Rides
    0
    Quote Originally Posted by alanjuggler View Post
    dastardly has probably called it - the half moons at the back of the cam covers are a pain - probably the exhaust side, the heat makes them go hard.

    bear in mind it could be the rear crank main seal too.
    Quote Originally Posted by Dastardly View Post
    The gold cage in a black car looks good. I think the oil leak might be from the rubber semi circle things on the back of the engine. That's just a guess though. Don't think there is anywhere else it could leak out from at the back.
    Cheers for the feedback guys, helped me a lot. It's kind of difficult to tell as it's an oily are but it's either the oil feed for the turbo as there was loads of oil on this and slight dripping or the oil return from the turbo as it has a dodgey looking pipe the seemed oily but unsure whether this is just from the leak above dripping. I'm thinking the turbo oil feed personally. Here's some pictures I got from underneath

    This is the best photo of the half moon seal at the back, oily area around it but looks good.


    So just a quick few questions I have:

    1, is it just two coper washers either side of the turbo oil banjo?

    2, is it an easy job to do the half moon seal while I'm changing the turbo feed? Is it worth doing the lot?

    So after this I decided to double check the looms down each side of the front for wear and to also relocate the passenger side as I had already done the drivers side. Whilst everything was off I decided to rub down and paint the sides to stop the surface rust getting any worse.


    So put it all back together and went for a test run, put my foot down on a dual carriage way and something seemed wrong. Got to the roundabout to realise it was stuck at 4500RPM and would rev higher but no lower. Nursed it home to find the throttle body was sticky, some WD40 on it for now sorted it. Will put copper grease on it tomorrow


  11. #11
    Guest
    Join Date
    Jun 2012
    Location
    NW, England
    Posts
    1,761
    Rides
    0
    I can't see the pics clearly enough on my phone but yes there is a copper washer either side of the banjo bolt. I've never had to change the half moons so I don't know what they are like to do. I wouldn't put copper grease on a throttle body either. But that's my opinion.

  12. #12
    Guest milsom93's Avatar
    Join Date
    Dec 2013
    Location
    Wakefield
    Posts
    367
    Rides
    0
    Quote Originally Posted by Dastardly View Post
    I can't see the pics clearly enough on my phone but yes there is a copper washer either side of the banjo bolt. I've never had to change the half moons so I don't know what they are like to do. I wouldn't put copper grease on a throttle body either. But that's my opinion.
    Right I think I'll just change the copper washers out and see if it clears up.

    I've sprayed WD40 on the spring mechanism of the throttle body for now and it freed it up, so this should be ok now. I wont bother putting copper grease on then Thanks for the feedback

  13. #13
    Guest liamjrhodes's Avatar
    Join Date
    Mar 2013
    Location
    Pontefract, West Yorkshire
    Posts
    1,573
    Rides
    0
    Looking good Lewis!

    Sent from my GT-I9195 using Tapatalk

  14. #14
    Guest
    Join Date
    Jun 2012
    Location
    NW, England
    Posts
    1,761
    Rides
    0
    It doesn't look like your oil return is leaking by the way. (I've looked at the pics full size now). However your oil feed might be.
    By the way that pipe on your oil return is standard.

  15. #15
    Guest milsom93's Avatar
    Join Date
    Dec 2013
    Location
    Wakefield
    Posts
    367
    Rides
    0
    Quote Originally Posted by Dastardly View Post
    It doesn't look like your oil return is leaking by the way. (I've looked at the pics full size now). However your oil feed might be.
    By the way that pipe on your oil return is standard.
    Yeah seems to be good and if it's standard I won't disturb it. I'll replace the copper washers on the oil feed and see how it goes cheers for helping dude!! Save me many hours of head banging!

    Quote Originally Posted by liamjrhodes View Post
    Looking good Lewis!

    Sent from my GT-I9195 using Tapatalk
    Cheers Liam!! Looking forward to a drive out with yours for team 440 meet. Hopefully weather will be good for us

  16. #16
    Guest
    Join Date
    Jun 2005
    Location
    Wherever I run out of petrol!
    Posts
    14,548
    Rides
    0
    You can split the loom to maker it easier to reposition


    cut a little notch out of the seam so the wiring could sit nice and safe


    The loom repositioned


  17. #17
    Guest milsom93's Avatar
    Join Date
    Dec 2013
    Location
    Wakefield
    Posts
    367
    Rides
    0
    That's brilliant!!! I'll do that when I'm next fiddling thank you!

  18. #18
    Guest milsom93's Avatar
    Join Date
    Dec 2013
    Location
    Wakefield
    Posts
    367
    Rides
    0
    Nothing much happened over the last couple of weeks lately. Here are the little bits

    Got a braided Driftworks oil feed for the turbo to replace my old leaky one


    Also got a genuine Nissan S13 workshop manual off Chief. Best night time reading book I've had.

    Already come in useful!

    I will change the oil pipe next week when I get chance as I've got the Fueled Society show all weekend which I'm looking forward too.

    A few shots from the team 440 meet. Thanks to Liam Rhodes for one!

  19. #19
    Flamethrower
    Join Date
    Oct 2013
    Location
    North East
    Posts
    535
    Rides
    0
    looking good. i love duckbill spoilers they suit 180s real well.

    makes me want a 180 instead of mine haha

  20. #20
    Guest liamjrhodes's Avatar
    Join Date
    Mar 2013
    Location
    Pontefract, West Yorkshire
    Posts
    1,573
    Rides
    0
    Quote Originally Posted by misterjake View Post
    looking good. i love duckbill spoilers they suit 180s real well.

    makes me want a 180 instead of mine haha
    you want everything instead of yours! Just buy it some nice things and you will love it again!

Posting Permissions

  • You may not post new threads
  • You may not post replies
  • You may not post attachments
  • You may not edit your posts
  •