Results 1 to 10 of 10

Thread: Molding rear overfenders.

  1. #1
    Guest
    Join Date
    Jul 2006
    Location
    Norway
    Posts
    83
    Rides
    0

    Molding rear overfenders.

    My car will be a daily driver and attend track days, I will never blow tires in the rear that ****s up the overfenders.

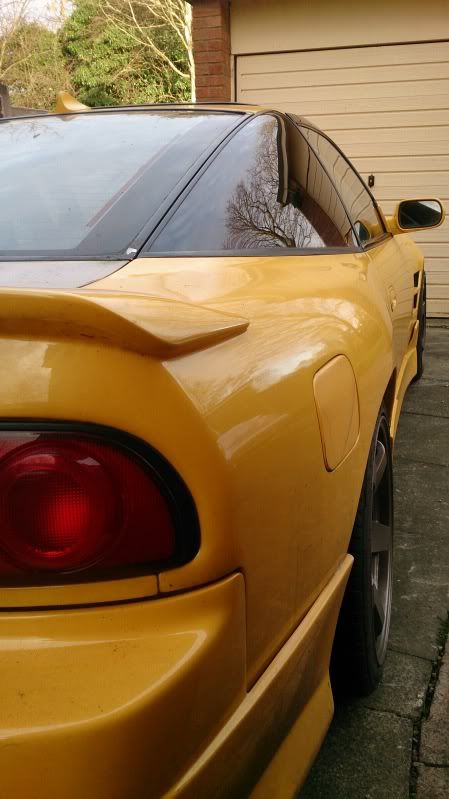
    The rear overfenders is Origin Type-2 and the wheels is SSR Professor SP1 17x11.5 et15. If the overfenders had a better fit I may go with the riveted mounting but they don't, there is space between the stock fender and overfender which I want to fill in. I've read a lot of threads about how dumb it is (on Zilvia.net off course) and that it's gonna crack, but I really like it when it's done right:


    My car is a bare shell with primer on right now so sanding where the rear quarter windows is is no problem.

    My thoughts is:
    1. Sand the area where the stock fender and the overfender meet to make the glue stick with 60-120 grit.
    2. Apply 3m body adhesive to the overfender and the area on the stock fender where I've sanded down.
    3. Fasten the overfender with self-drilling screws
    4. Remove the self-drilling screws
    5. apply 3m body adhesive in the holes from the self-drilling screws and make it sink down in the overfender so I can apply bondo and filler over the holes.
    (5.1 Maybe use expanding foam inside the overfender before bondoing so the overfender gets more support?)
    6. cut away the body adhesive that's sticking out between stock fender and the overfender.
    7. Sand the area where the stock fender is showing with 60-120 grit to make the glass-fiber bondo stick
    8. bondo with glass-fiber bondo
    9. bondo with usual fine bondo

    How does this sound? Any inputs?

  2. #2
    Guest MapBoy's Avatar
    Join Date
    Oct 2008
    Location
    Aberdeen
    Posts
    2,865
    Rides
    0
    Replied on Dw mate :-)

  3. #3
    Guest
    Join Date
    Jul 2006
    Location
    Norway
    Posts
    83
    Rides
    0
    Quote Originally Posted by MapBoy View Post
    Replied on Dw mate :-)
    I've replied you to And sent JTHM a PM. Thanks!

    I just thought it would be smart to post it on SXOC also!

  4. #4
    Guest MapBoy's Avatar
    Join Date
    Oct 2008
    Location
    Aberdeen
    Posts
    2,865
    Rides
    0
    Quote Originally Posted by MeSs View Post
    I've replied you to And sent JTHM a PM. Thanks!

    I just thought it would be smart to post it on SXOC also!

    lol....I am JTHM on DW. I was that on here....but the admin here changed it to mapboy......So I stuck with that.

  5. #5
    Guest Micraplay's Avatar
    Join Date
    Sep 2004
    Location
    Chorley / Preston / Ormiskirk
    Posts
    3,097
    Rides
    0
    If you've not already done this, be careful with the expanding foam. I got my panels nicely bonded and well shaped. Then filled the voids with foam to sound deaden and support. Came back the day after and the panels were all wavy from where the foam had pushed out areas of the fibre glass that was thinner! Took me ages to smooth again.
    Got it ok again in the end tho

  6. #6
    Guest rd_jon's Avatar
    Join Date
    Oct 2007
    Location
    Scottish Borders
    Posts
    524
    Rides
    0
    If you're going to use expanding foam, do it in stages a bit at a time. That way it shouldn't push out too far. Expanding foam cures on contact with moisture, so if it is up inside the overfender it will easily expand downwards, but the top section will take longer to cure and may push the fender off the car. Thin beads will expand more cleanly and shouldn't deform the panels. It will take a lot longer, but it's a lot safer.

  7. #7
    Guest Daz's Avatar
    Join Date
    Jun 2007
    Location
    Essex
    Posts
    16,949
    Rides
    0
    Have a look at what Will @ street options did to Ken's car. By far the best way to do it.

  8. #8
    Guest FireStorm's Avatar
    Join Date
    Jun 2008
    Location
    London
    Posts
    2,887
    Rides
    0
    Il reply later but check mine origin takadasi overs blended in seamlesly

  9. #9
    Guest Micraplay's Avatar
    Join Date
    Sep 2004
    Location
    Chorley / Preston / Ormiskirk
    Posts
    3,097
    Rides
    0

  10. #10
    Guest Micraplay's Avatar
    Join Date
    Sep 2004
    Location
    Chorley / Preston / Ormiskirk
    Posts
    3,097
    Rides
    0
    i used a panel bonding sealer / adhesive, and riveted in place while it cured. Then removed the rivets and sealed the holes. Filled and smoothed. Took a good few days to get the panels smooth but worth the effort.
    I cut the excess original wing off afterwards, but this proved a pain in the arse and I'd advise marking and cutting you quarter before bonding on New wings. Make tabs and fold and weld the two skins back together after cutting them to retain strength and water tightness
    Last edited by Micraplay; 30-11-2013 at 16:45.

Posting Permissions

  • You may not post new threads
  • You may not post replies
  • You may not post attachments
  • You may not edit your posts
  •