Thanks a lot mate!Originally Posted by ChrisMS18

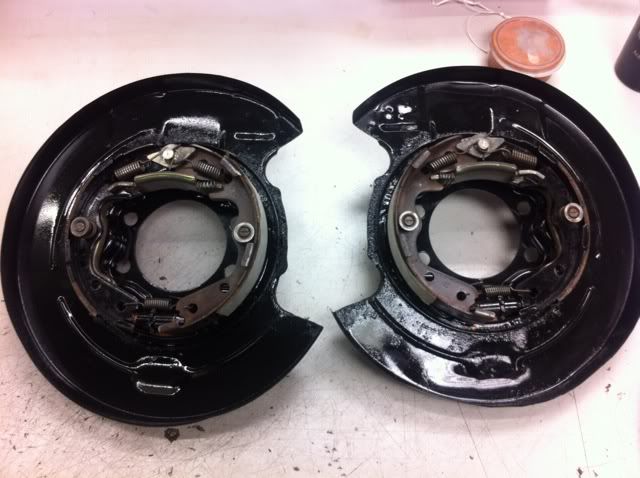
Update
Got all the handbrake assembly cleaned up and put together so just need to grab some pads for the callipers and then I can fit the whole lot and have awesome brakes!

Thanks a lot mate!
Update
Got all the handbrake assembly cleaned up and put together so just need to grab some pads for the callipers and then I can fit the whole lot and have awesome brakes!
Coming a long very nicely I see!
lol you need a big sticker on the passenger side dash saying 'WARNING: CAN LOSE TEETH IN EVENT OF HEAVY BREAKING'!!
Or a complimentary gum shield..
Update
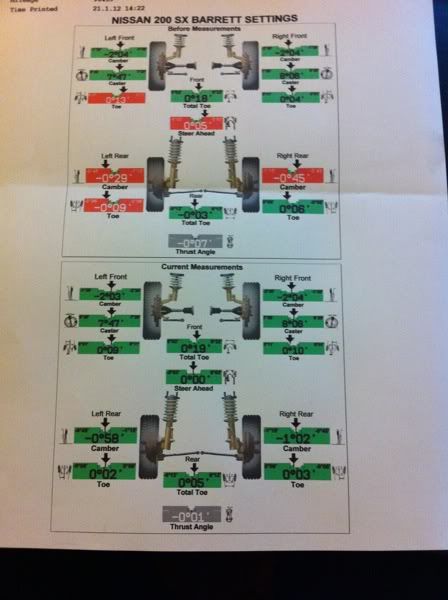
Had my alignment redone after polybushing the rear subframe chucked it out. Only needed the rear altering. Guys down at Aline in dudley really are the badgers nadgers.
i <3 castor
Ace!! I'm deffo gonna be hitting Aline when I get mine sorted
Got a RAS kit (thanks playdude) that I will fit at the same time as the Tomei Poncams I've just bought
Fitting guide for my own reference
http://www.zeroyon.com/index/content/view/26/47/
Last edited by Sean-B; 27-01-2012 at 16:50.
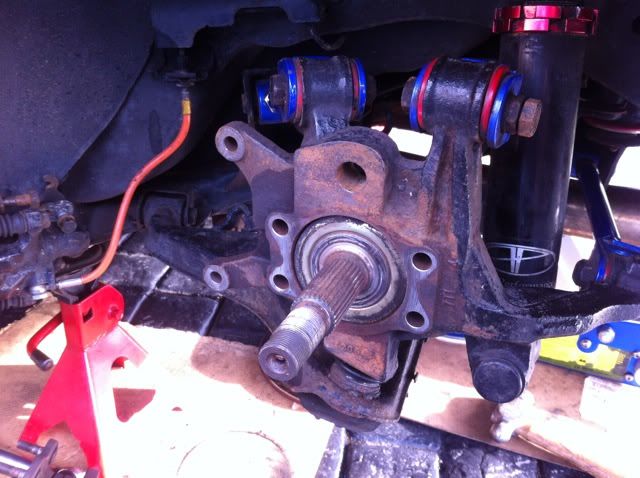
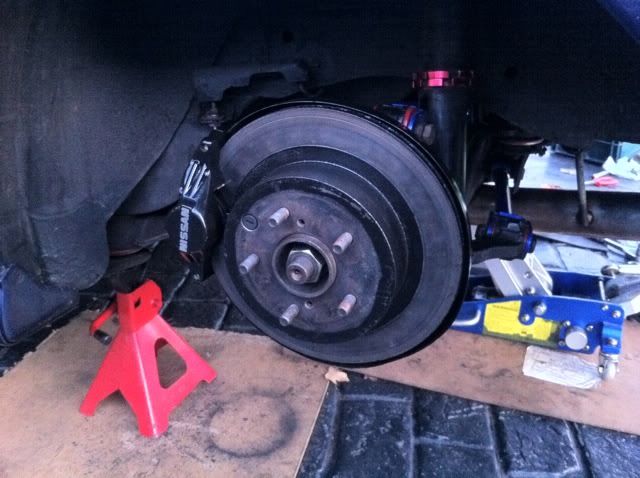
Update
Fitted my Z32 rear setup today
Stripped back, the hub took some getting off on the drivers side but got there in the end using heat and copious amounts of AC90!
Handbrake mech assembled, and R33 GTST handbrake cables installed.
All done!
Just need to setup up the handbrake and bleed the brakes.
Like it dude!! All looking very neat
Bet you can't wait to get the Poncams fitted...
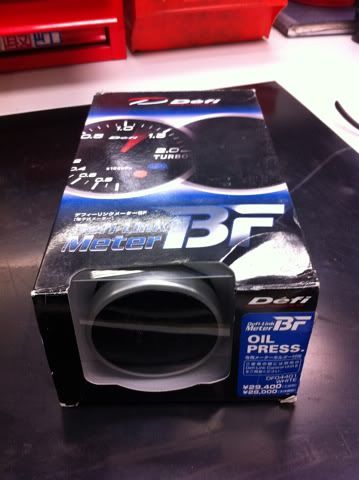
Update
Finally after 15 months of searching a Defi BF white back-lit oil pressure gauge came up for sale so I snapped it up!!
Just fitted the gauge and connected it up, going to fit the sender when there is more light and less ice.
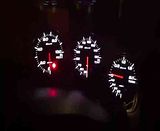
A quick video of all three in action!
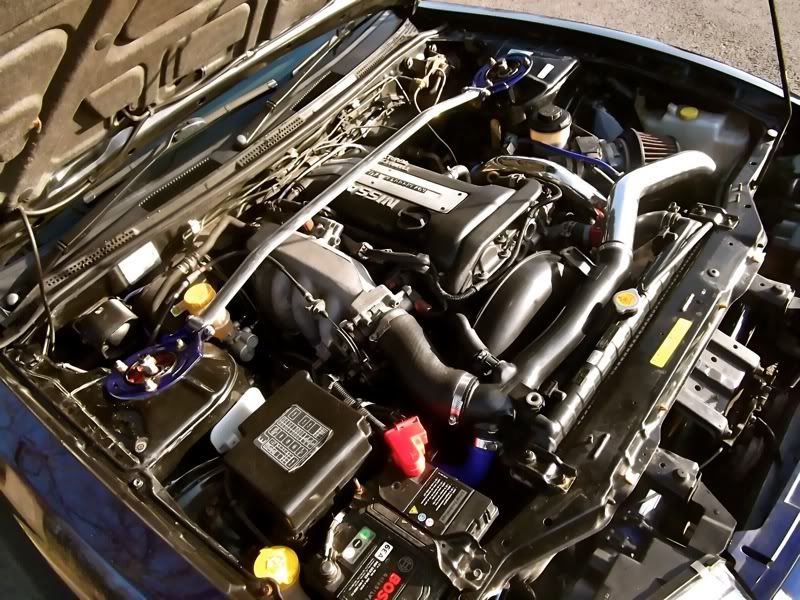
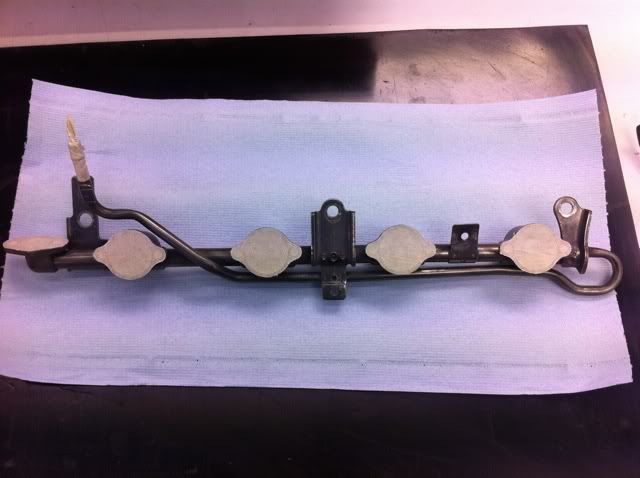
I also cleaned up my spare fuel rail and masked it up ready to paint in an, as of yet, undecided colour.
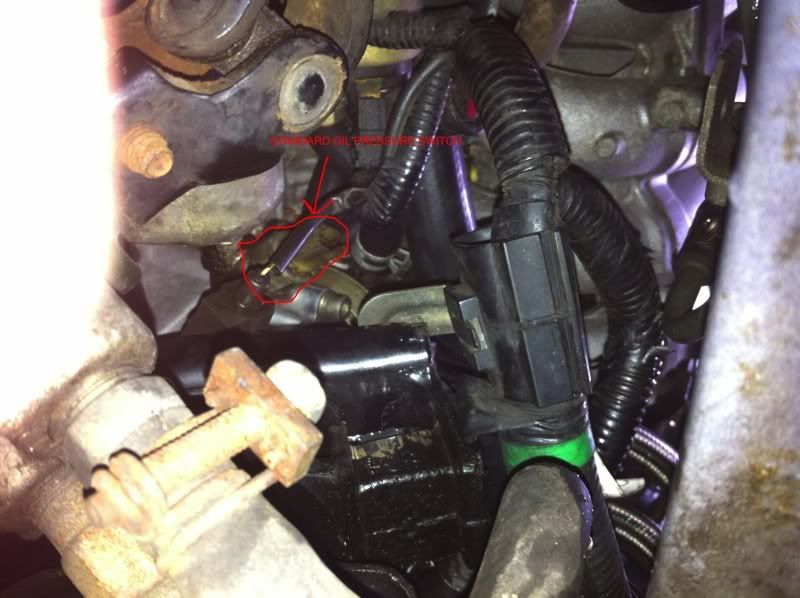
Seems to be quite a lot of confussion around how possible this job is with out removing large amounts of engine ancillaries. I managed to do it with relative ease once I'd acquired the correct tooling.
This is a guide on how to remove the stock sender and replace with a different one, if you wish to retain the stock sender (not necessary as it's set too low to be of any use) then you'll need a T piece.
Tools required
1/4 drive ratchet with 14mm socket
14mm spanner
1/2 drive ratchet,
1/2 drive 4-6" extention
1/2 27mm deep socket (£5 off ebay)
First remove the A shaped bracket that joins the inlet plenum to the bottom of the bock, the top two bolts are easy to access from the top, the bottom is not too difficult when using the 1/4 drive ratchet.
Once removed unclip the connector from the oil pressure switch from the top of the engine bay, the clip for the connector is on the rear most side of the connector. The switch is located to the left of the oil filter
Below is a picture the the standard pressure switch with the connector removed viewed from underneath the car.
Place the deep 27mm socket over this and then undo from the top of the engine bay with the ratchet and extension and finish off by hand
Then simply insert your new sender (loads of room around this hole so even large autometer style senders should fit) however the thread is 1/8BSTP which is perfect for Defi senders but not for a lot of other brands so a simple adaptor (a few £ off ebay) maybe required
It really isn't that hard to do yet is made out to be near impossible without lots of intrusive work first. The deep 27mm socket is the key in this operation and it really is near impossible without it.
Hope this helps people
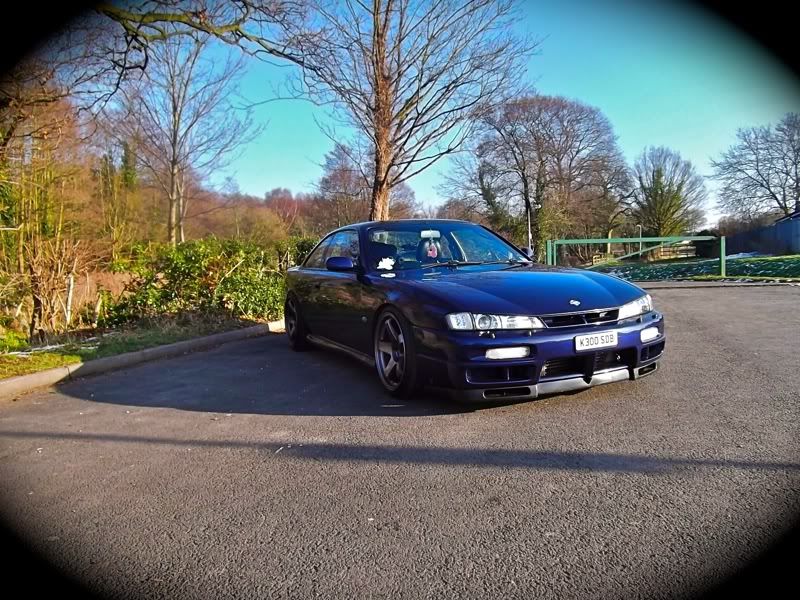
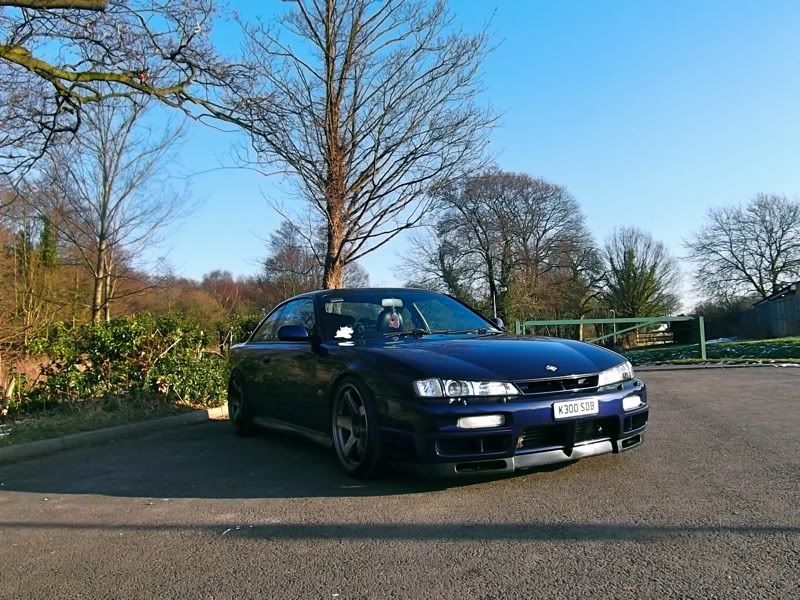
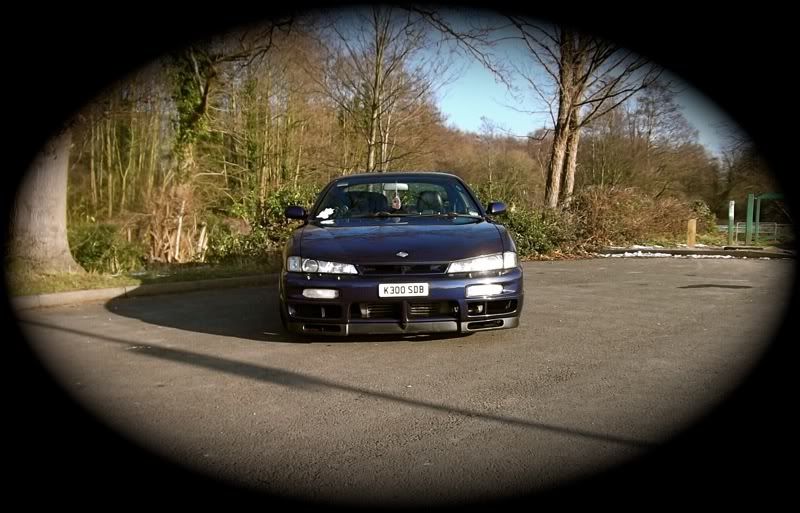
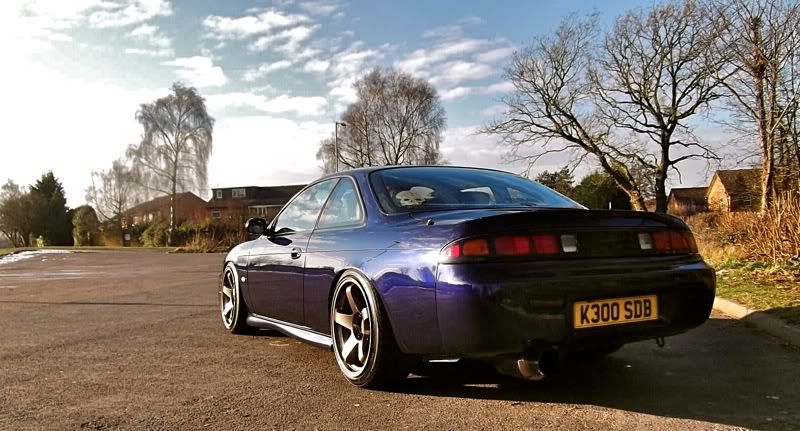
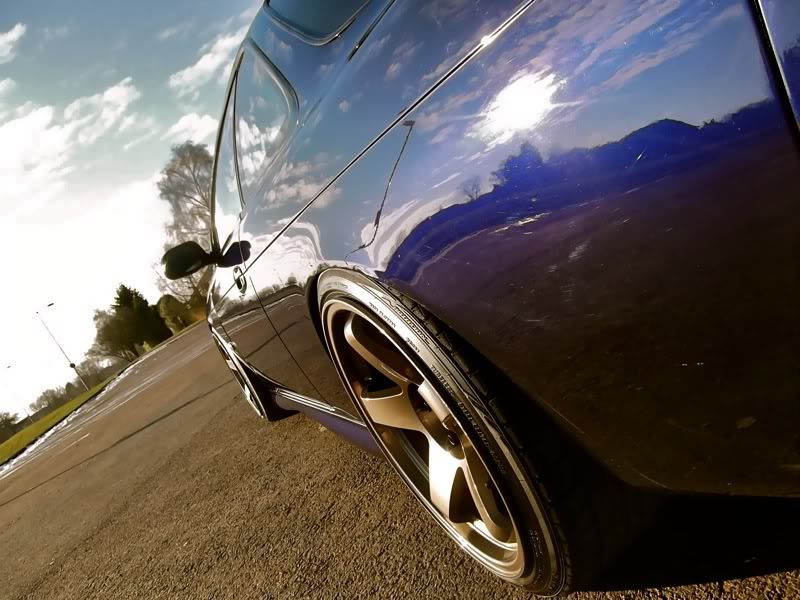
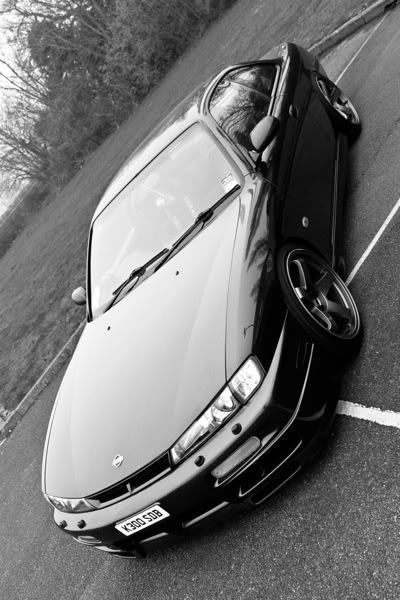
Went out for a couple of quick photos, then had a play around with them just using iPhoto.
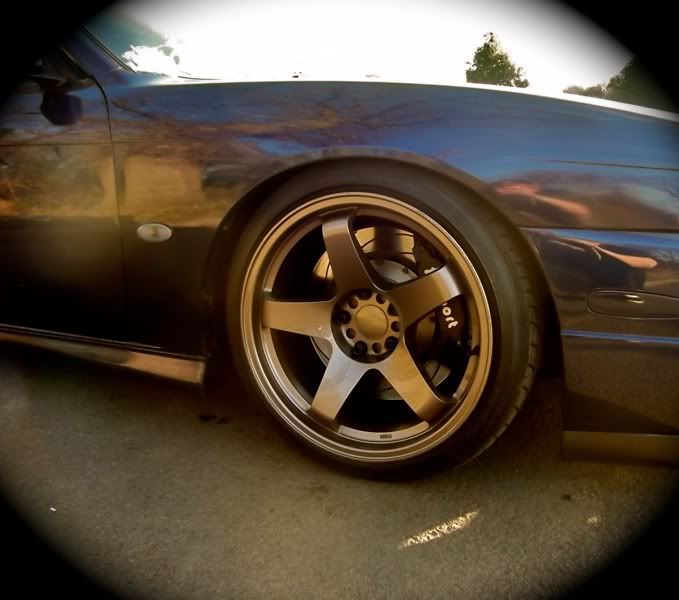
BRAKES!

LIKE!!!!
Never realised you have the Type 2 intercooler which avoids the battery tray... had this on my 15 too
Cheers mate, crappy photos really but oh well!
Yea I don't like it though. I want a type 1, the excessive pipework aggravates me from an engineering perspective.
Ditto!Yea I don't like it though. I want a type 1, the excessive pipework aggravates me from an engineering perspective.
nice work dude
Yeah I was all for Type 2 on my previous car but now I have Type 1 I do see the benefits.
Although I'm not sure how much flow/response you'll actually feel between the two, I'm just happier that access to areas of the car around the engine bay is much less restrictive!
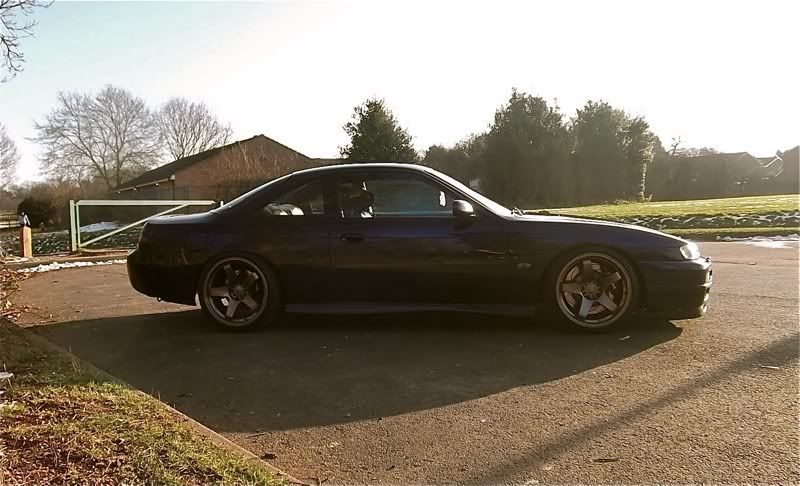
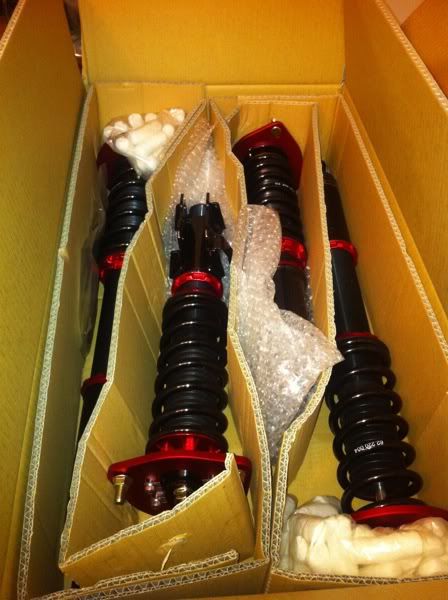
Update
New coilovers
Apex Gen 2 5/4s
Nice. whats wrong with ur current ones?
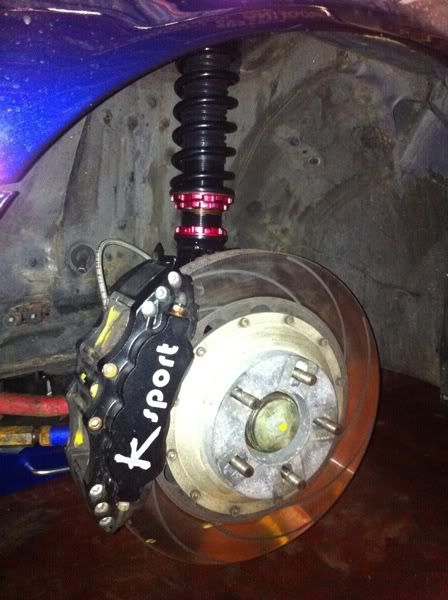
Update
Fit my Apex Gen 2s today
All I can say is wow! What an improvement over my old Apex gen 1s! They are so much more compliant, love how my car is feeling now with the mahoosive brakes and now these, it's just so drivable!
Cheeky picture as well
Love the new bling dude!!
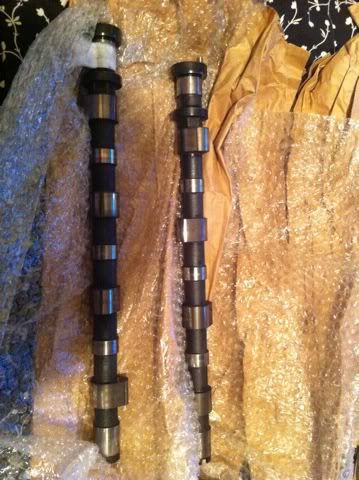
Update
They have arrived
My Tomei Poncams!
They are the final pieces to my @400bhp puzzle! Just need to get some copper washers and a few gaskets and I can fit it all of my accrued parts then off for mapping, should be done by the summer! Can't wait!!
 Posting Permissions

 Reply With Quote