Page 1 of 33 12311 ... LastLast
Results 1 to 20 of 641

Thread: Steves S13 Project

  1. #1
    Guest steve109's Avatar
    Join Date
    May 2010
    Location
    Lincoln
    Posts
    1,194
    Rides
    0

    Steves S13 Project

    Hi guys,
    As posted in welcome lounge I've been looming on here for a while and finally jumped in and bought myself an S13!

    Seems ok for now, will be off the road for a while while I save and go over it with a fine tooth comb to make it all right and the way I'd like it!

    So less of the chit chat and more pics!
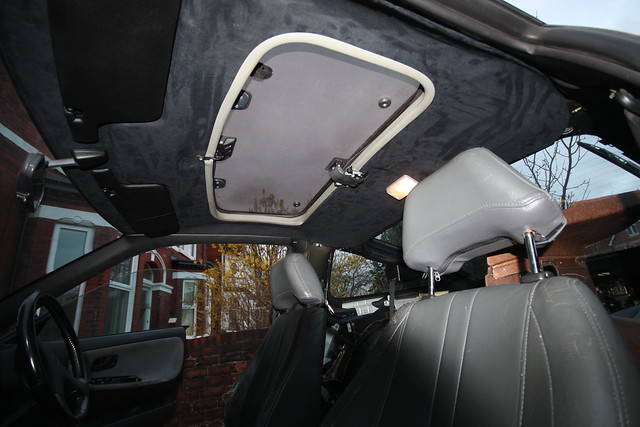
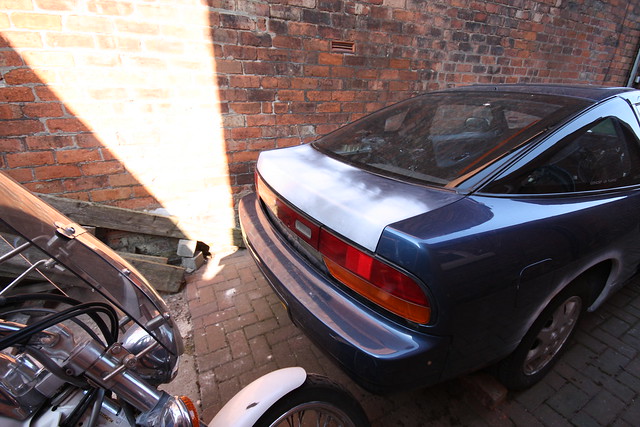
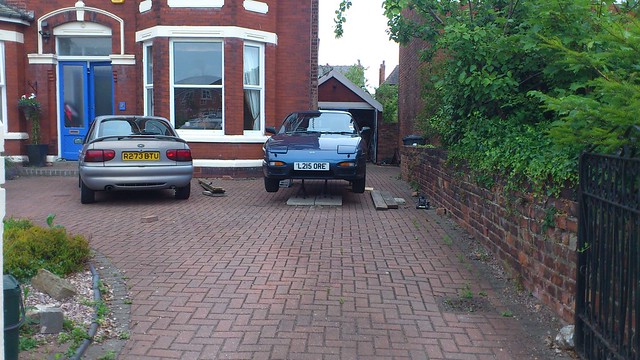
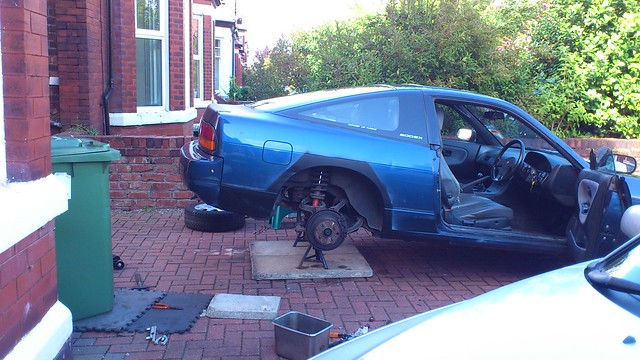
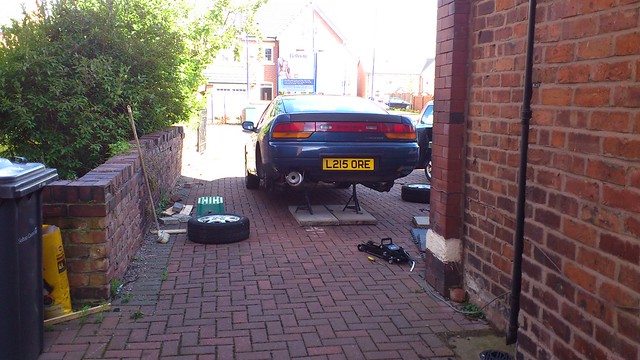
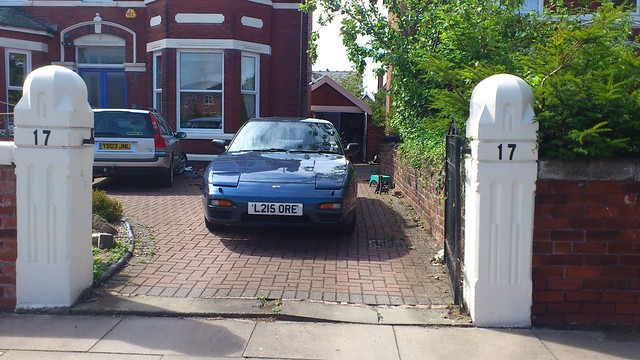
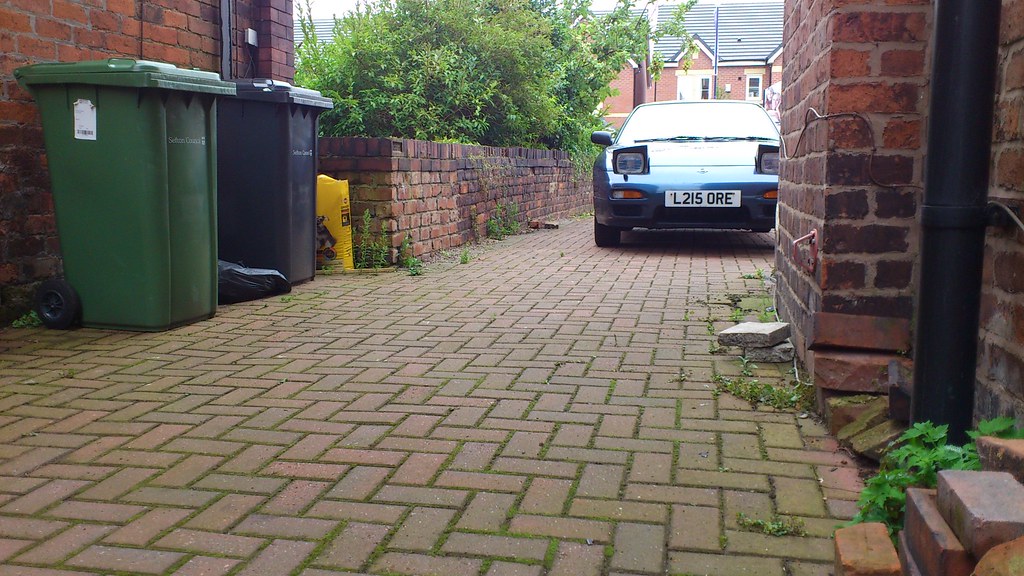
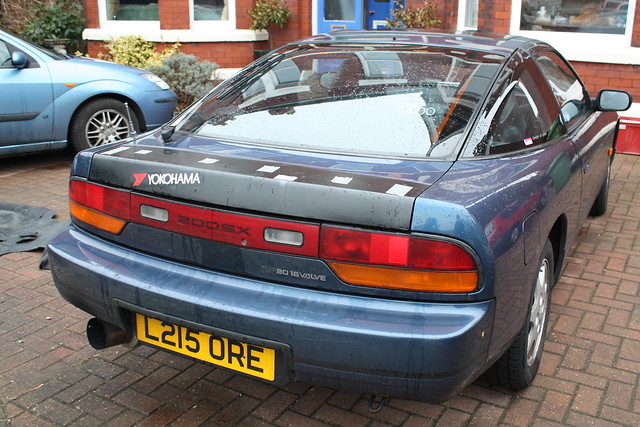
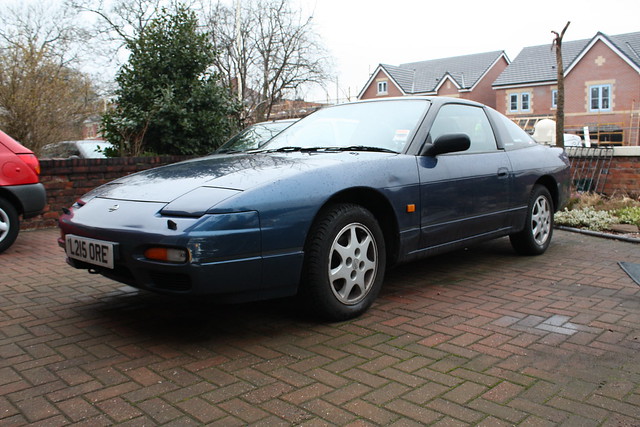
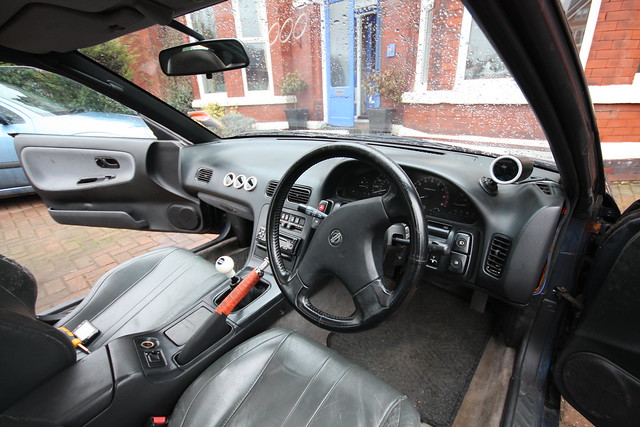
    How I bought her:


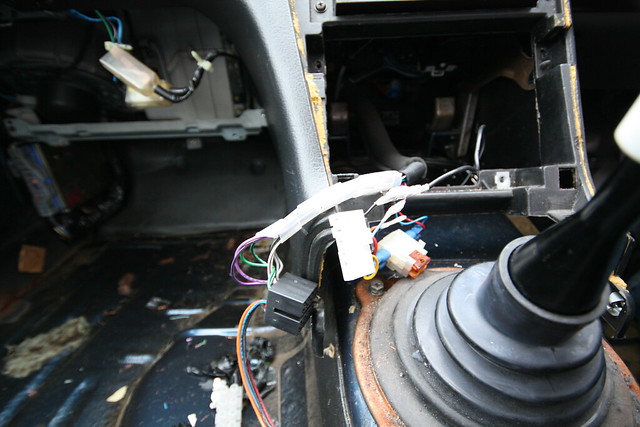
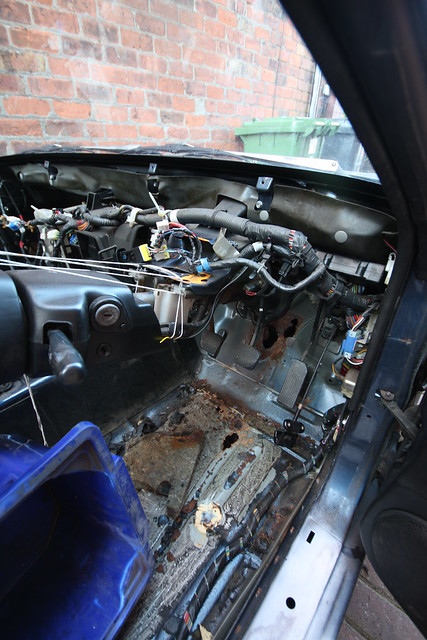
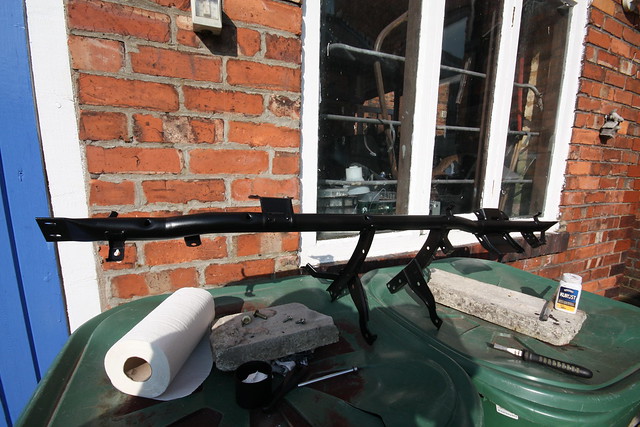
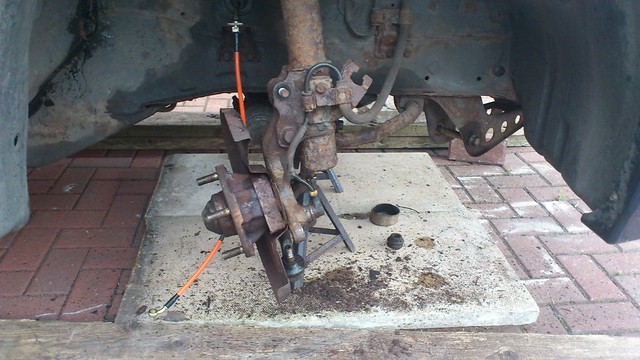
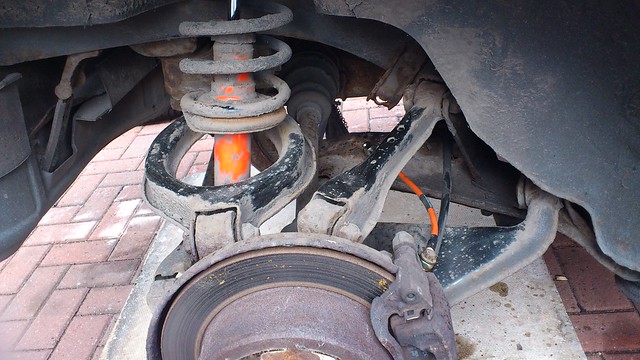
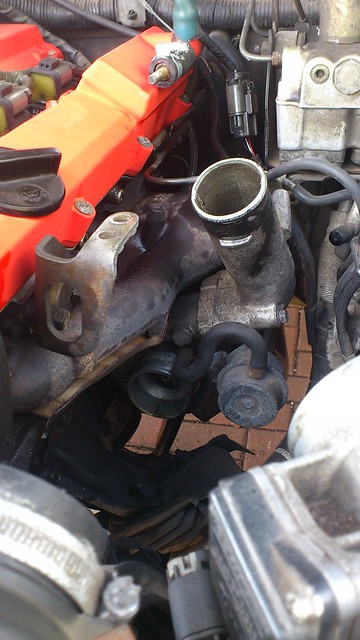
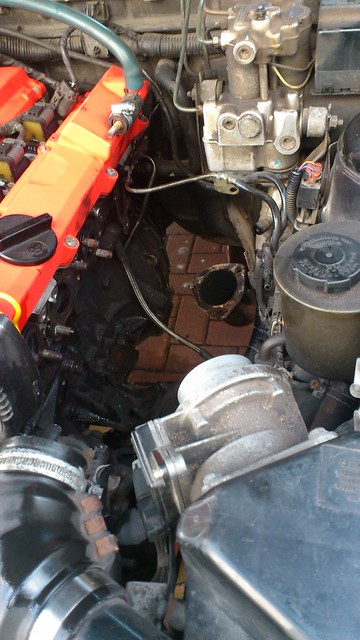
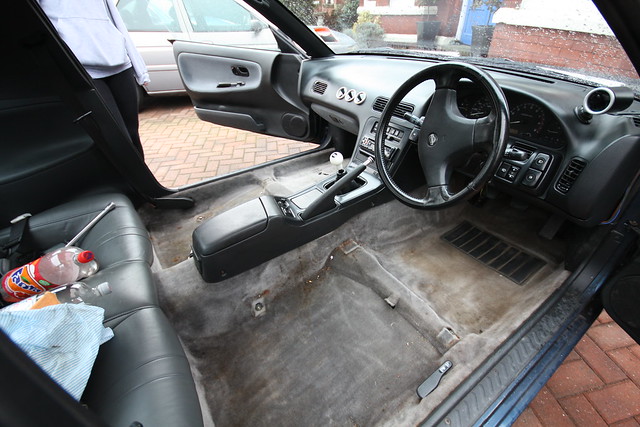
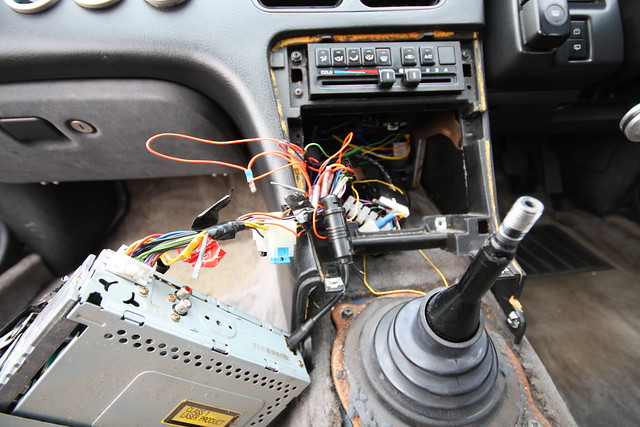
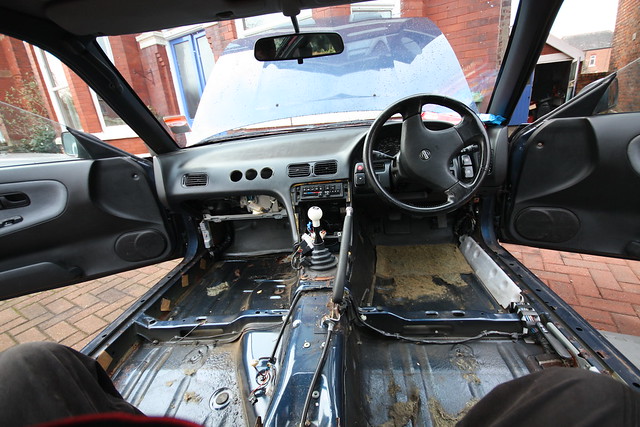
    Soon looked like this to see what I'm dealing with:

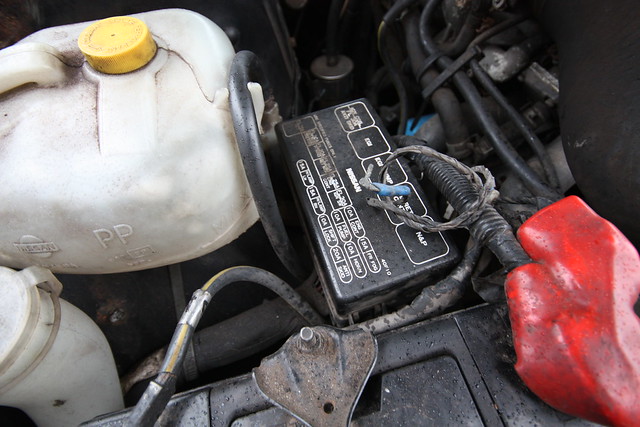
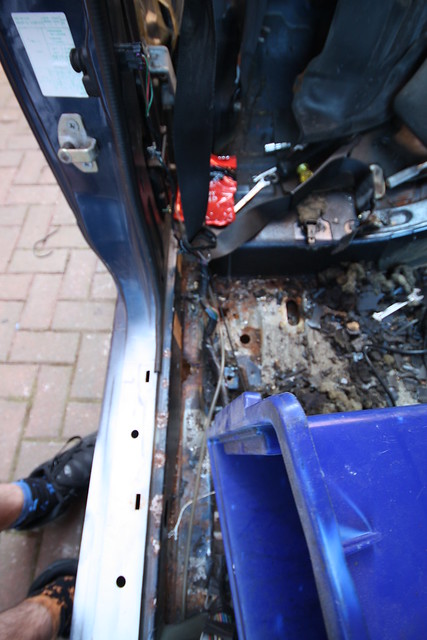
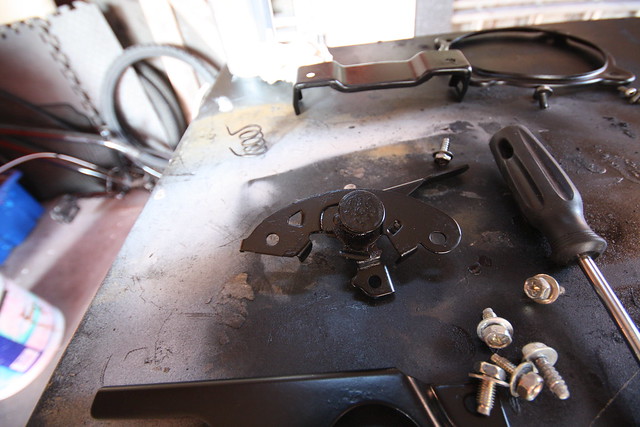
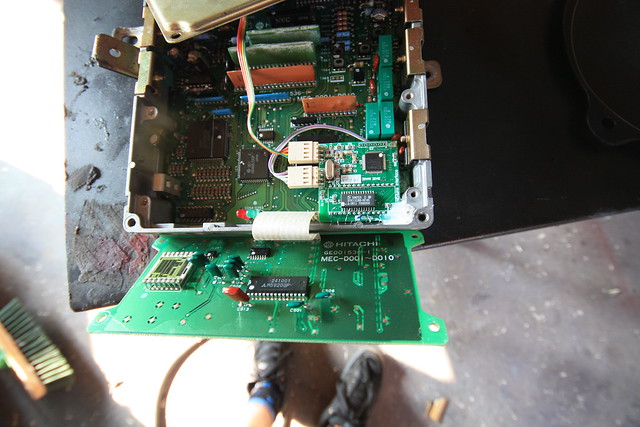
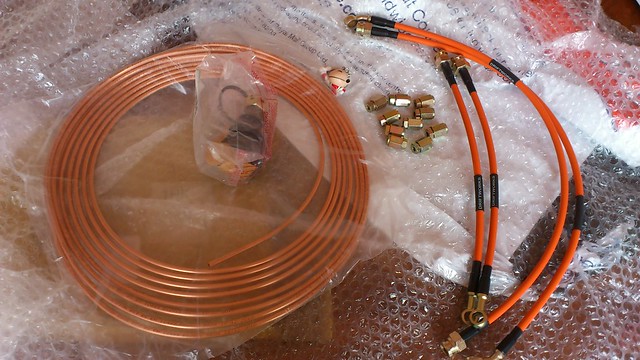
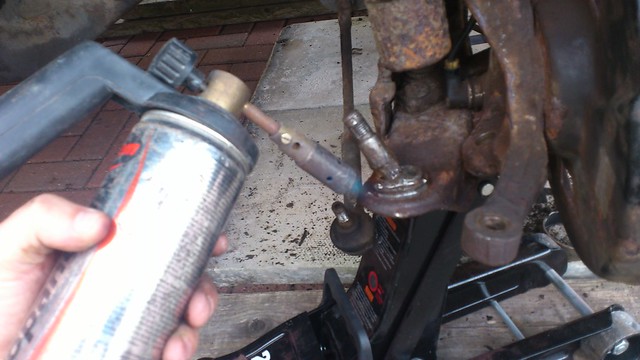
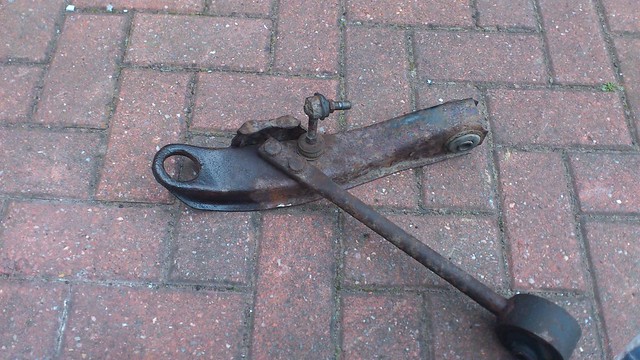
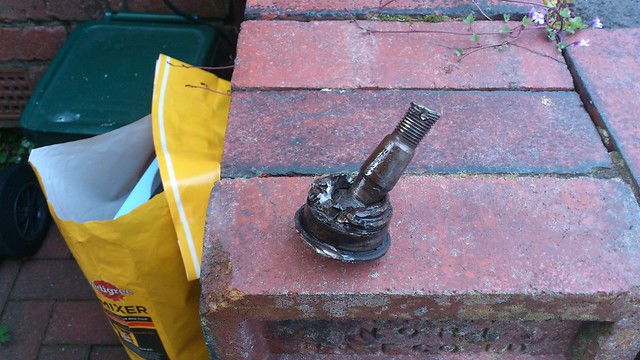
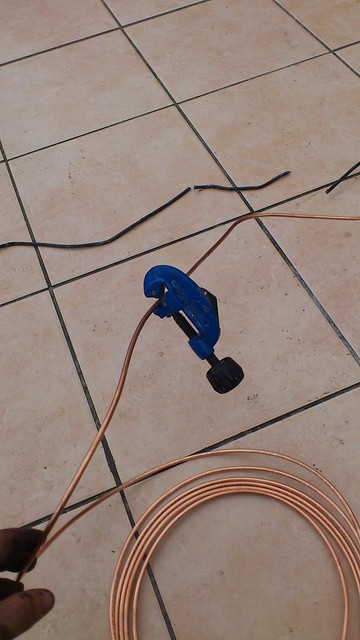
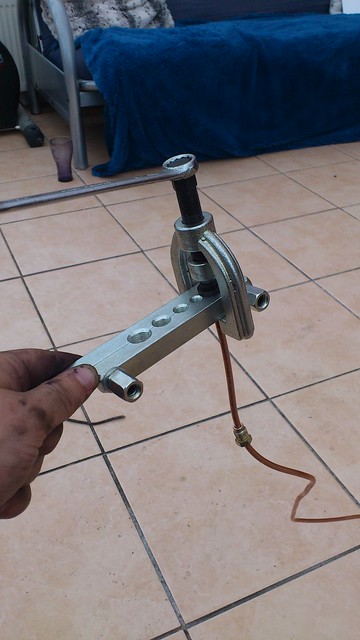
    Then found this, job for tomorrow is sorting this lot out properly!

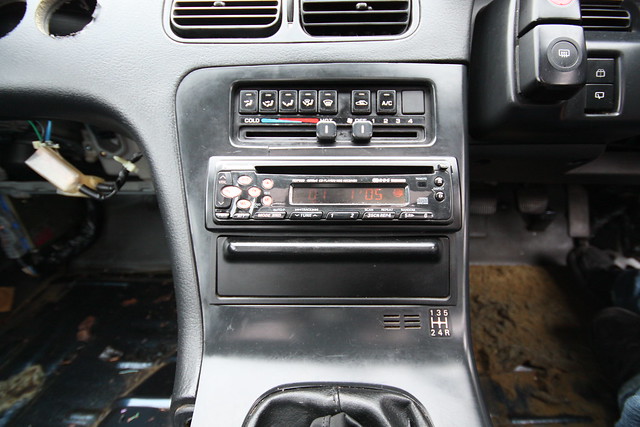
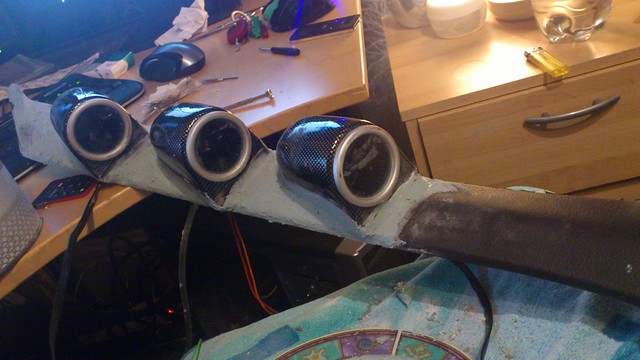
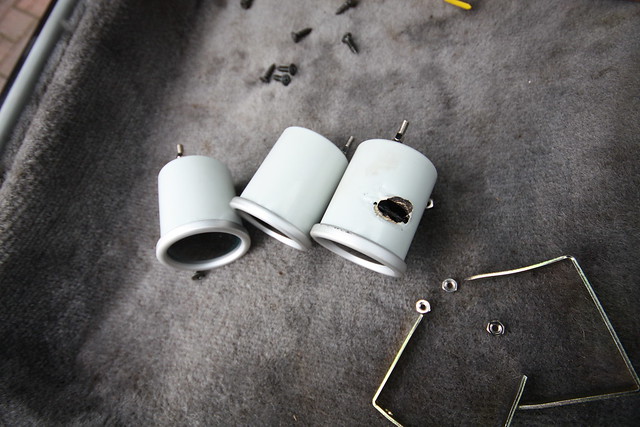
    Melted water temp gauge, eek (dodge wiring to blame I imagine)

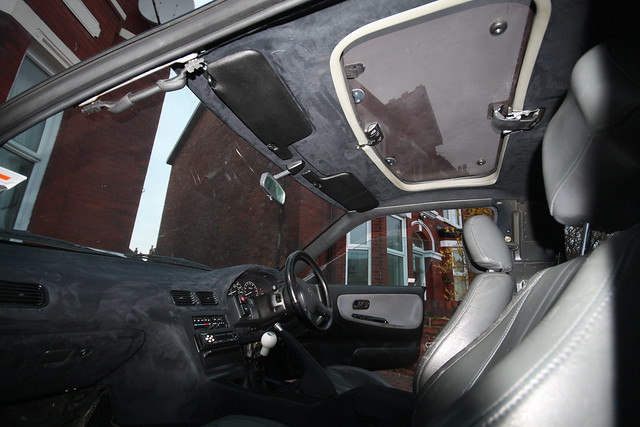
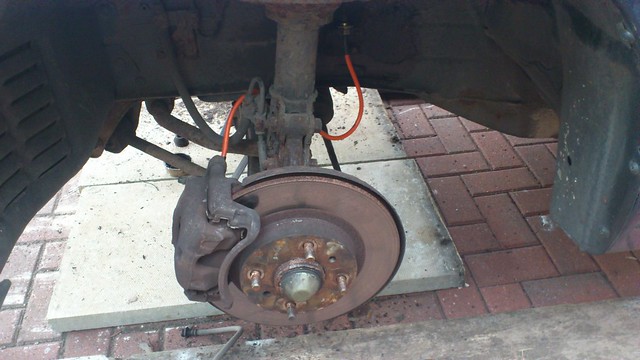
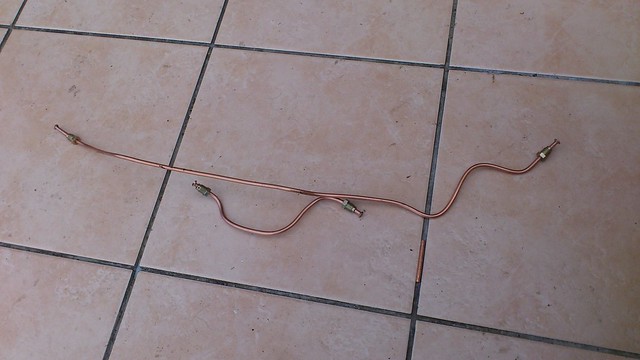
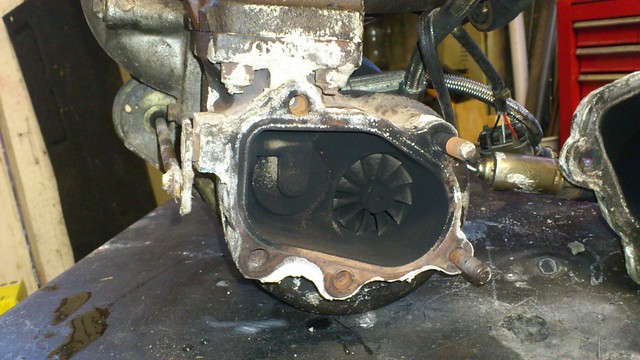
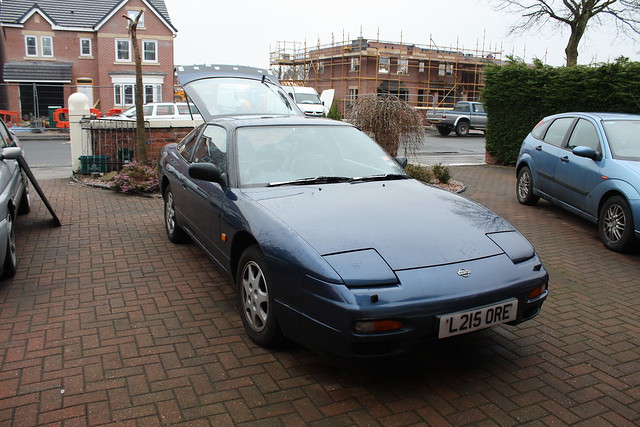
    Finished up looking like this


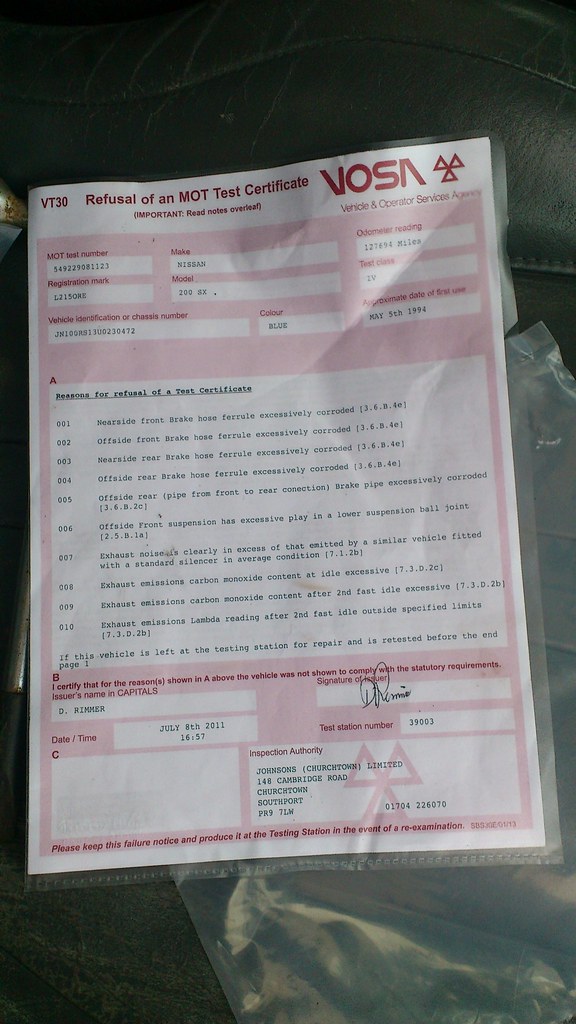
    Overall pretty happy with it! Few bumps and scrapes, usual rust issues one biggy being the passenger footwell and front turrets from what I've seen so far!

    Plans are to first of all, sort out rust problems, get it running right and looking tidy as it will be a daily.
    Soon as this is done stick it through its MOT and then begin with the real work!

    Cheers guys

  2. #2
    Guest samcash88's Avatar
    Join Date
    Mar 2010
    Location
    Herts
    Posts
    624
    Rides
    0
    Looks cool, im liking the look of s13's more and more of late..

    What long term plans do you have for the car?

  3. #3
    Guest Jaymo_sx's Avatar
    Join Date
    Sep 2008
    Location
    Lincoln
    Posts
    4,009
    Rides
    0
    Should see my stereo wiring haha

    Nice work though. Going about things the right way instead of most new owners who go out and buy a mbc and up the boost till the big ends go

  4. #4
    Guest steve109's Avatar
    Join Date
    May 2010
    Location
    Lincoln
    Posts
    1,194
    Rides
    0
    quite a bit but its all money dependant!

    Long term exterior:
    Coilovers, wheels, vertex kit, overfenders, black re-spray

    Interior:
    Probably Brides, dyed carpets and headlining, looking into suade dash with stitching and other small bits (not sure yet though), remove rear bench, and hopefully looking into making a few carbon bits ie centre console surround and the bits around the window buttons for a bit of fun if i can.

    Engine wise, not sure yet but now i have one finally on the drive i can look into it properly!

  5. #5
    Guest steve109's Avatar
    Join Date
    May 2010
    Location
    Lincoln
    Posts
    1,194
    Rides
    0
    Bit of an update:

    Wiring sorted out to this

    Much better! All chock block and bullet connectors gone, fully soldered and cable tidied.
    And it works!


    Found a stray wire coming from the pos terminal of the battery just hanging around! anyone care to tell me what its for and where it should be connected if at all!??


    Then started on the carpets giving them a good old power wash! Seem to have come up alot cleaner, still need some 1001 on it though. Soon as its looking clean enough it will be getting dyed black.

    Also ordered a few lengths of faux suede to sort out the headlining and attempt to have a go on the dash when it rains!

  6. #6
    Guest
    Join Date
    Feb 2004
    Location
    Essex
    Posts
    1,222
    Rides
    0
    nice project...that wire looks as if its been added, just chop it out.

  7. #7
    Guest steve109's Avatar
    Join Date
    May 2010
    Location
    Lincoln
    Posts
    1,194
    Rides
    0
    Well its been a bit of a while! Just started a new full time job so been pretty hectic recently, however i have managed to wrap my dash/centre console and headlining in faux suede! looked amazing inside under artificial light, however in sunlight its very bluey rather than being black, so i imagine i'll rip it out and swap it to some real black material when pay day hits. Also given the light grey fixings a coat of some matt black for now to see how they'd come out and it looks pretty good, camera gives them an odd shine, but in real life they look spot on.

    so pics:


    at the moment the battery died after trying to move it around the drive so thats on charge, taking a decade. Also started to attack the rust, and the footwell appears to be a lot worse than at first glance, but hey ho, out the grinder will come this weekend i imagine to start on all the patches of rust i can find! Bring on the warm weather and light after work so i can keep getting filthy!

  8. #8
    Guest steve109's Avatar
    Join Date
    May 2010
    Location
    Lincoln
    Posts
    1,194
    Rides
    0
    Well its been a bit of a while since an update, and quite a bit has been done, not that it seems like it from my side!
    Started on the boot, has the usual holes from spoilers and a mega rust hole that had been bodge fixed, so out that came, as did the wiper motor and it got primered up.


    Then out came the rest of the interior, stripped it of everything and removed sound deadening to reveal some major rust holes.


    this one is worse than it looks ended up chopping a lot more of the floor pan out than i first wanted, but thought do it once, do it right!

    At this point it was do or scrap from my point of view. But after some deliberation out comes the grinder and mig welder. No pics of the finished action but shall get some soon enough.
    Then instead of moping over how rubbish the shell was, i thought id start on some interior bits that were uber rusty and weren't going back in the same!


    Had a peek inside the ECU, nistune board! This made me a very happy man and explains the fuel cut at peak boost, doubt it has the right map on it.

    Since then all holes have been cut out and replaced with fresh metal, all primered and seam sealed. Also sured up the passenger side footwell with some bracing as i dont want it goign the same way as the drivers side.
    Carpet has been dyed black and everything is slowly being put back together.

    The faux suede on the dash has been whipped off as the finish was far to blue and the glue used hadnt taken properly, and im far too much of a perfectionist to let it stay as it was. In the process of relocating the extra gauges into a pillar pod.
    Exhaust was blowing, so ive had that off and adjusted to sort that, but now its fouling on the underside, so i have some flexi bits to put on this weekend.
    Rear droplinks have been replaced as the old ones were super knackered.
    Its had a sparkplug change to sort out the running, seems to have done the trick, filled up on coolant as it was a tad low.

    To do list is pretty big, but hoping to get the majority of it sorted this weekend to send it for an MOT next weekend. If its not ready looks like i'll be burning the midnight oils!

    More pics to come when i take a camera outside with me! Just cant wait to get her roadworthy!

    Also have purchased some paint to go on this when its passed as a bit of a treat...

    still undecided as to whether i'll like it, but i'll start with the boot lid and go from there!

    Enjoyy

  9. #9
    Guest steve109's Avatar
    Join Date
    May 2010
    Location
    Lincoln
    Posts
    1,194
    Rides
    0
    Time for an update;

    Managed to get the car looking like a car once again, sorted all the rust patches out, filled primered and mat blacked (all the top coat paint i had going spare) seamsealed and undersealed the underside bits i'd chopped and welded.

    Threw it in for an MOT to see whats left, hoping it was pretty close.
    No suprise it came back as a fail, however not as bad as i was expecting!


    well three are because he put it through as an s14 on the emmisions! not happy about that.. will get told when it goes back.

    and for the rest

    in comes some quick parts

    with a nice keyring present from the drifworks chaps, super chuffed always great service!

    and something to shut the exhaust up


    first of was to get it like this

    do a bit of this

    then start on the lower arm ball joint... my my my what a PITA that was, taken 2 nights at least half a finger, blood sweat and tears, and mucho swearing plus a tonne of this..

    before this happened..

    state of the ball joint after

    and onto some easy stuff, fitting the break lines this is as far i i managed to get between 7 and 9 tonight

    and will sort the rest of this mess out after the new ball joint is in


    and thats how i've left it outside looking sorry for itself, i was hoping to clean up the arches and underseal in there but with it needing to be done and ready for MOT by the weekend i dont really have the time. however i have a week off work in a few weeks, so it'll be up like this having the whole underside treated to some nice underseal!

    in the meantime indoors ive been working on a pillar pod as i couldnt find anything i liked so decided well try something

    so far

    will see how it tunrs out, not overly confident it'll be any good, but who knows!

    thats it for now, next update proabbly friday when i start the front to rear brakeline!
    Last edited by steve109; 12-07-2011 at 21:48.

  10. #10
    Guest steve109's Avatar
    Join Date
    May 2010
    Location
    Lincoln
    Posts
    1,194
    Rides
    0
    Just a quick one! Just had the dreaded call from the garage.... IT PASSED! taken some time! Shall post up some more photos when i get back from work and upload them! but for now, super chuffed and should be fully legal by next week!

    WOO!

  11. #11
    Guest
    Join Date
    Apr 2010
    Location
    East sussex
    Posts
    1,356
    Rides
    0
    Congratulations

    When an S13 passes it's MOT it feels even mores special.

  12. #12
    Guest steve109's Avatar
    Join Date
    May 2010
    Location
    Lincoln
    Posts
    1,194
    Rides
    0
    Quote Originally Posted by ADZS13 View Post
    Congratulations

    When an S13 passes it's MOT it feels even mores special.
    Cheers man! Yes it is, especially after 3 months hard graft so far however im sure there'll be plenty more of it to come!

    Update time, so to get it through i needed to re-do front to rear brake lines. whilst trying to get this off which i thought would be easy turned out to take a lot longer! the 2 10mm bolts decided to round, so ended up having to chop 2 rear lines and replace the lot. At the front i undid the bolt from the master and pull the lot through the bay.
    So started like this


    turns out the rear shocks are orange...? connected the braided hoses to the caliper ready for later on both sides


    looks like the arms will clean up, lots of dust and road muck on there, something to do later on after the MOT.


    then did a bit of this


    and this


    which made these. No photos of the front to rear line


    exhaust bung in, made a massive difference to the noise levels, super suprised. Will get swapped most likely to a HKS silent when i have the funds as i will be using it as a daily and its far too loud without the bung and looks rubbish with it in!


    and back on the floor after bleeding the brakes with no leaks!


    Have a bit of a problem as the ABS light now comes on, probably knocked one of the sensors whilst hammering the ball joint out, or putting in the braided hoses.
    any tips on how i know if ones buggered? Had a look on the search and found about the LED box behind the drivers seat so will whip that out to look at to find out which on it is.
    Also now that the exuahst is quiet i can hear the engine properly, sounds like I have a blowing turbo-mani gasket as theres quite a loud constant tsh tsh tsh tsh noise when running all through the revs. Don't think it is the bottom ends as ive had a good listen to the clips on here and doesnt rattle on the way down, when under load it makes the noise but when off accelerator it goes away completely and is super smooth, ideas anyone? Also could be over fueling a little as the manifold is getting pretty hot pretty fast, timing?

    Soo next up is sort that and then body work out, along with finishing my gauge pod and all the other little bits that are still in my garage that weren't essential for putting it through the MOT. But at least for now its road worthy and hopefully after all my graft i'll get some use out of her from the start of the month (not paying a month of tax for 5 days worth!) We'll see how long for!

  13. #13
    Flamethrower Pablo13's Avatar
    Join Date
    Aug 2006
    Location
    Wanstead
    Posts
    7,763
    Rides
    0
    Defo worth checking the timing

    Nice little project, like the suede and the paint colour too, will look forward to seeing it all done
    bstmeetbllk

  14. #14
    Guest steve109's Avatar
    Join Date
    May 2010
    Location
    Lincoln
    Posts
    1,194
    Rides
    0
    Quote Originally Posted by Pablo13 View Post
    Defo worth checking the timing

    Nice little project, like the suede and the paint colour too, will look forward to seeing it all done
    cheeers, never done anything this involved before, most I've ever done was swap lower my last car on the old escort and do body work and spraying. So its been a bit of a learning curve, and ahve also swapped timing belts and water pump on the escort that creeps into a few of the photos. Deffinately loving getting propperly stuck in!

  15. #15
    Guest Jonny Mac's Avatar
    Join Date
    Sep 2009
    Location
    Scotland
    Posts
    2,098
    Rides
    0
    haha i too have a silver escort as a daily!

    try run a bottle of 'cata clean' through your car see if that helps the emissions

    brake pipes look good, take it you bought it all on ebay? good luck with next mot

  16. #16
    Guest steve109's Avatar
    Join Date
    May 2010
    Location
    Lincoln
    Posts
    1,194
    Rides
    0
    Quote Originally Posted by jonny mac View Post
    haha i too have a silver escort as a daily!

    try run a bottle of 'cata clean' through your car see if that helps the emissions

    brake pipes look good, take it you bought it all on ebay? good luck with next mot
    Aha yeah the old escort, done me proud over the last few years, taken a lot of travelling miles with being at uni, but now its gone to my brother as he's off to uni as well now.

    i'll give the cata clean a look and see if that helps out, emmisions were pretty close to what it should have been with a cat on, even though it has a de cat and the test was for the s14, so pretty happy with that

    Yeah got the piping, flaring tool and ball joint off ebay, about £25 iirc, braided was from DW though, hard to get everything I need on minimum wage at the moment but hopefully not for long if I can help it

  17. #17
    Guest steve109's Avatar
    Join Date
    May 2010
    Location
    Lincoln
    Posts
    1,194
    Rides
    0
    Well decided to attack the turbo this week to sort out the tractor noise!
    what a mega job getting the mani and turbo off is! Glad i read through some of the guides on here as it saved me a bit of time. Took about 3/4 hours to get off, those last two bolts where ok but time consuming. Whipped it off and the elbow was barely finger tight, flopping around and had a nut missing, so out came the gasket set and I swapped mani-turbo, turbo-elbow and also the oil drain as this was looking very worse for where. Also fitted locking rings to the nuts as-well as coating them n a bit of exhaust paste to ensure they lock tight (read someone did it on here and had it to hand, and why not!)

    Swapped the manifold to head gaskets while i was at it, turns out whoever had put it back on last time had these the rond way round so the holes barely lined up and cut the outlet size by about half! So installed the new ones, the correct way round, whacked the lot back in. First error was to drop one of the rear under nuts, which managed to find its way behind the oil feed or coolant banjo and stick itself. After a lot of swearing and finger grinding I just pulled the lot out and started again. This time it went pretty well until the last 3 bolts for the exhaust, which i'd clouted with a hammer to get the thing seperated when i took it out. While hammering this, managed to mangle the end of the studs, out came the file, 5 mins later whole thing back on.

    Makes it sound easy doesn't it! Well i did all the re-fitting in about 4 hours in the pouring rain, utterly horriffic but i'm glad its done and back together again and i didnt manage to stuff the turbo reinstalling it, again super great guides on here, much appreciated as its the first time i've pulled out a turbo and seen one close up! Et Voila, no more tractor noise! Super chuffed that it now sounds normal!


    Exhaust paste around the turbo to japspeed downpipe


    All cleaned up before putting back on but no pics of that


    Still waiting on a lovely credit card to be able to get my insurance, should have been here last week! but the wait will be worth it when finally get to drive it now that everything is sorted! In other news I've been offered a new job, which i now start next week for more cash, so that means hopefully more parts! next up is swich my stereo across and then I'll asses what bits i want to purchase first!
    Last edited by steve109; 12-05-2012 at 11:51. Reason: Found photos!

  18. #18
    Guest steve109's Avatar
    Join Date
    May 2010
    Location
    Lincoln
    Posts
    1,194
    Rides
    0
    Bit of an update, since passing its MOT I've been using the S13 as my daily and put a good few thousand miles on the clock, pretty much issue free! So pretty pleased with that!
    Had a few little niggles that I thought I'd address mainly warped discs, unbalanced wheels, and Tension Rods going on the front. So I went for the whole hog and got myself new discs front and back incl. pads and a full adjustable arm set as I plan to swap to coilovers in the near future!

    So new brakes:

    New Arms:

    Not great quality but I got them at a price I couldn't really turn down, I also bought at this point some rose joint protectors as I don't want the rose joints to get rubbish in them. Silicon greased the joints up after sticking these on. Same as from Rally Design, I got 8 1/2" ones to do all the rose joints.

    And fitted:


    No pics of the front, was spannering on my own and completely forgot till i got to this side!

    Didnt manage to do the camber arm on the drivers side as the subframe bolt rounded both sides and couldnt get in there with the grinder to get it off, So will change this side when I drop the subframe later in the year when the weathers better to do all the bushes and a good de-rust! All arms set to same as originals as I'm not lowering it just yet.

    Whilst underneath I spotted that my fuel tank straps where rotten, one all the way through the other close to being so. So went ahead and made myself some new ones! £12 for 2 strips of stainless steel 1m long by 30mm wide x 2mm thick and set to work.


    Fitted these tonight, the one sat closest to the middle of the car was a right pain to get at with the subframe in the way. but a good half hour of spannering saw this off and another 20 mins to get the new one back on again!

    So tomorrow hopefully its brake bleeding time and back on the road!

    Oh and happy new year all!

  19. #19
    Guest
    Join Date
    Dec 2009
    Location
    Herts
    Posts
    613
    Rides
    0
    Great little project ya got going

    Keep up the good work!

  20. #20
    Guest M.D.'s Avatar
    Join Date
    Jul 2005
    Location
    plymouth
    Posts
    10,631
    Rides
    0
    nice little tidy up project mate, should feel like a new car when its back on the road

Posting Permissions

  • You may not post new threads
  • You may not post replies
  • You may not post attachments
  • You may not edit your posts
  •