


Assembly lube is a rip off, just use EP90 gear oil

Assembly lube is a rip off, just use EP90 gear oil
Originally Posted by silverzx

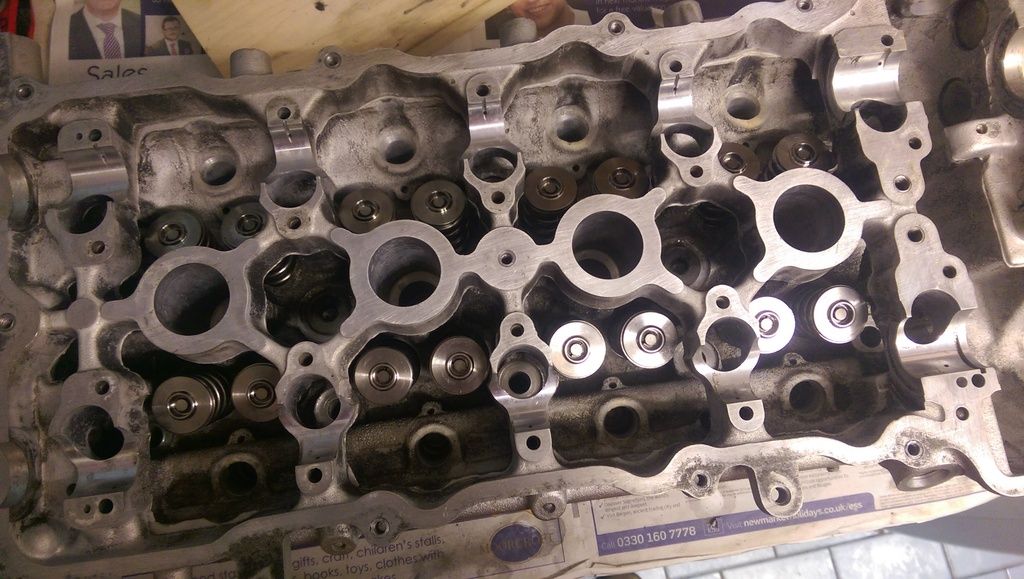
I decided that I will be going for some Tomei 260 Procams so along with those are some uprated valve springs.
I found one of the brand new valve stem seals was damaged but luckily I had another set so sorted that out.
Sexy shiney......
All done.
Nice job
I run 260 procams toomake sure you double and triple bleed the lifters as its a ball ache to strip it all down to bleed them again

1998 Nissan 200sx s14a , 2000 std 5 speed with nismo supercoppermix clutch bn6 Sapphire Blue
Which spring rate Springs did you go for? Are they BC Springs and standard valves?
These are the valve springs I've gone for. Valves are standard.
I'll speak to Mark about that. They've been left soaking in oil whilst the rebuild has taken place.
Mark came over on Saturday for the next bits of the engine build. First up was to fit the rear crank seal and cover plate.
Then on went the timing chain sprocket, timing chain guides and a new timing chain.
This was followed by some brand new oil pump rotors going into the oil pump housing then fitted to the front of the block with stainless steel bolts.
Oil pickup and baffles were fitted.
[IMG]http://img.photobucket.com/albums/v232/DemonEscortS/200sx%20Project%20Thread/IMAG2070_zpss***b6f3.jpg[/IMG]
As anyone that's used the gasket fluid will know it's quite an effort to get it out easily and neatly, so I put together a tool to make application faster and neater and easier.
What's this bit called? upper sump panel of something? who knows, anyway, sealant applied and ready to fit.
Next up was to fit the Cosworth 1.5mm head gasket. Love the little tag sticking out the front of the engine.
Actually starting to look like an engine again now.
Once the head was in place we started to fit the ARP studs and we noticed one was sitting lower than the rest which was odd. Took a few measurements and then removed all the studs to make sure we didn't have an odd stud in the kit. Turned out they are all identical and we now have an issue as can be seen in the photo's below.
The stud on the inlet side at the front of the engine is about 6mm lower. Both inlet and exhaust side centre studs are slightly taller which is also odd but not an issue.
This shows the stud without the nut but with the washer in place.
With the nut wound down hand tight.
One of the other studs for reference.
Nut wound down hand tight and you can clearly see the difference.
So that completely stopped progress at the weekend until we can sort it out. I've contact ARP so hopefully they will be able to advice what the best solution for this is.
Is there anything in the hole?
Have you checked the depth of the holes with a caliper? Seems very odd
1998 Nissan 200sx s14a , 2000 std 5 speed with nismo supercoppermix clutch bn6 Sapphire Blue
All holes are clear. Checked depth to thread in block and that one is lower than the rest so yeah, very odd.
Sent from my iPad using Tapatalk
Just wind the stud out to match. Its will just be a slight difference in the block.
After some confusion with the ARP studs, we got everything sorted. My bad on that.
So lasts nights task was to get the head fitted. So out came the torque wrench.
I was slightly nervous about it I must say lol.
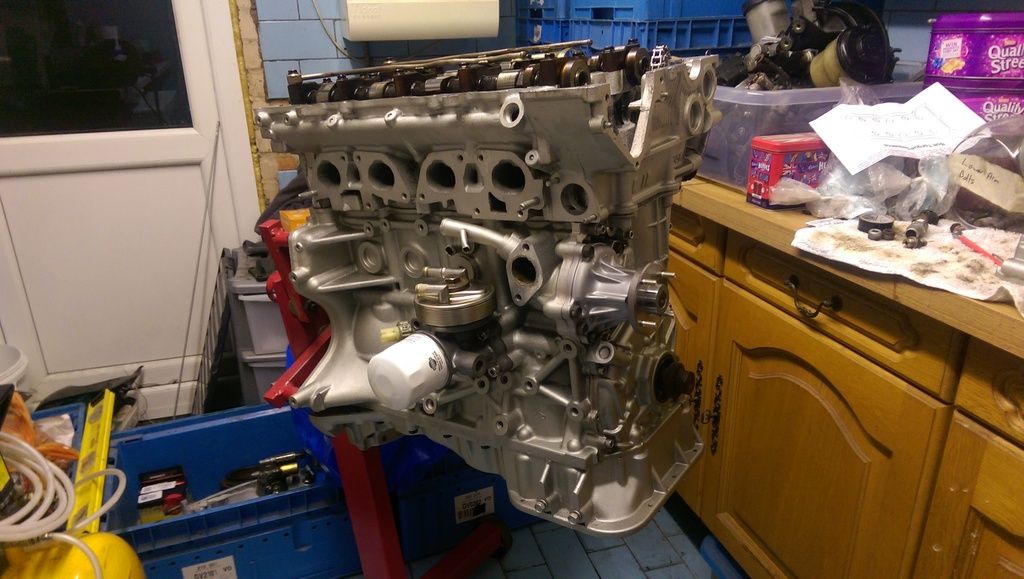
Head is on.
Cams are in. Coming along nicely
nice job
good thinking about not going ahead without checking with ARP first
got to love assembling an engine hehehe
Would you mind telling me (via PM if you want) what mistake you made so that i dont make the same mistake when i fit my ARP Head studs in a few weeks time?
There was no mistake, it would seem Nissan quality control on their block line is appalling and the head bolt threads are at different depths in the block. If you follow the ARP instructions then you might find that the odd stud sits too low to get a nut on properly. As its an alloy block you need 2x bolt diameter thread engagement so as the studs are M11 x 1.5 thats approx 15 threads. There are about 20 on the stud. An easier way of doing it is to put the nuts on the studs just enough so the top of the stud pokes through and then wind the studs in the block. Dont forget to use the lube they give you.
Glad to see its coming on now.
if you was nervous about the head studs wait till the you have to start the thing.
Mark came over before Christmas and we sorted out the timing on so that's done which is all good. No photos though I'm afraid.
The other day I decided to tidy up a couple of parts so they are ready to go on the car. This was the brake servo, master cylinder and clutch master cylinder.
They were a little grubby to start with.
A nice lick of paint and she looks good as new.
Looks loads better.
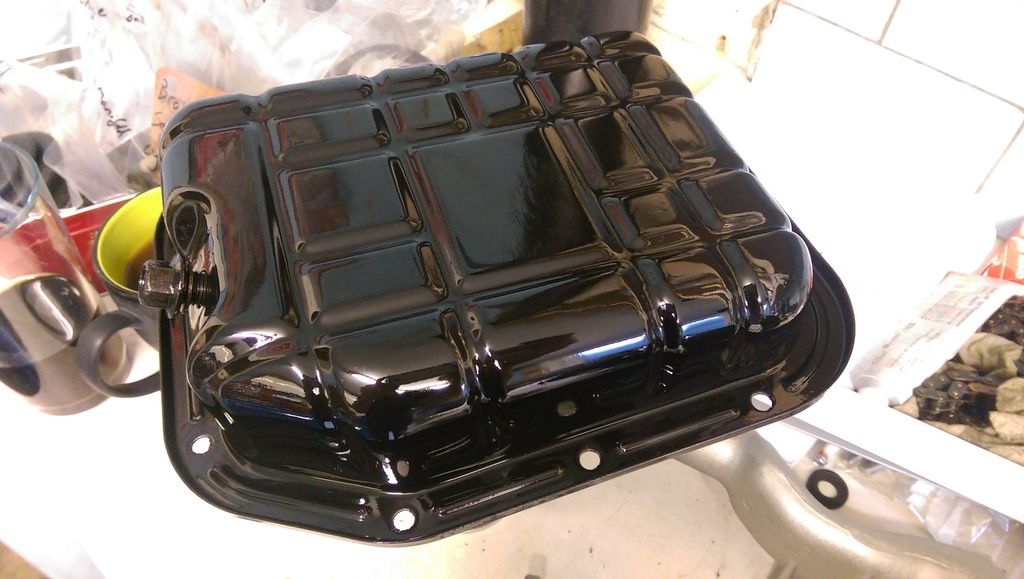
Also gave the sump a nice spruce up so that's ready to get fitted now
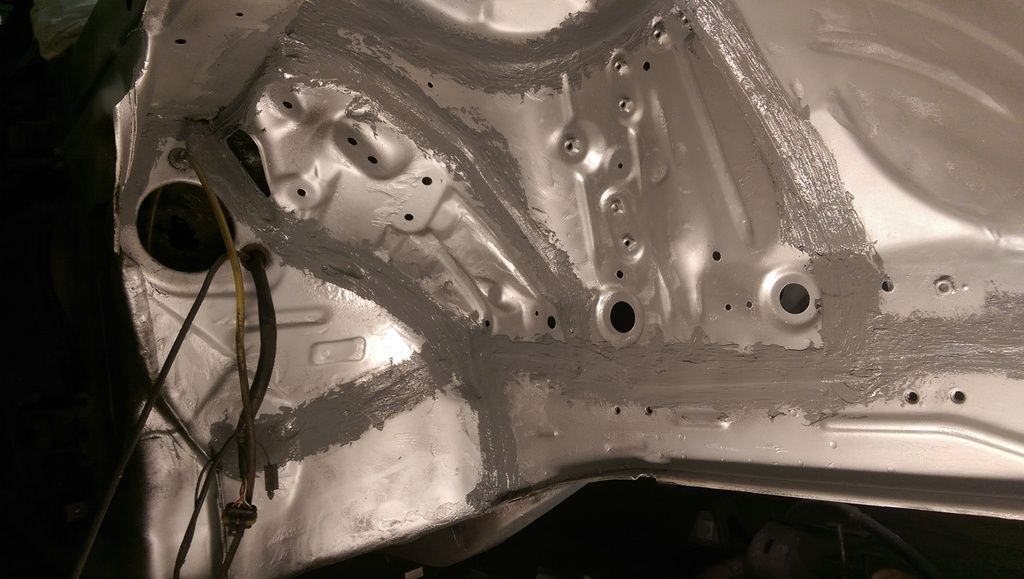
Last night was sticky, I have finished all the welding and have moved onto sanding and smoothing the engine bay. In the meantime I've applied the brush on seam sealer to the inside of the archs. Will let this cure for a few days then I'll apply the stonechip over the top.
Passenger side wheel arch.
Drivers side arch before.
Drivers side arch afterwards
Good progress mate. This time next year should see it back together right?
1998 Nissan 200sx s14a , 2000 std 5 speed with nismo supercoppermix clutch bn6 Sapphire Blue
It will be on track at this year's weekender.
 Posting Permissions

 Reply With Quote


