Page 61 of 71 FirstFirst ... 11515960616263 ... LastLast
Results 1,201 to 1,220 of 1418

Thread: My S14 Reshell/rufurb/rebuild. Major project so will take a long time.

  1. #1201
    Guest zeppelin101's Avatar
    Join Date
    Sep 2008
    Location
    Leicester
    Posts
    9,760
    Rides
    0
    Longer arms isn't such a bad thing - it will reduce the amount of camber change at the wheel for a given amount of travel.

    More consistent geometry under bump and rebound is not a bad thing, provided the arm is at a reasonable angle and not pointing up into the sky.

  2. #1202
    Guest
    Join Date
    Oct 2003
    Location
    Carms.
    Posts
    1,010
    Rides
    0
    Quote Originally Posted by spice_weazle View Post
    Here's the little update regarding the body work.

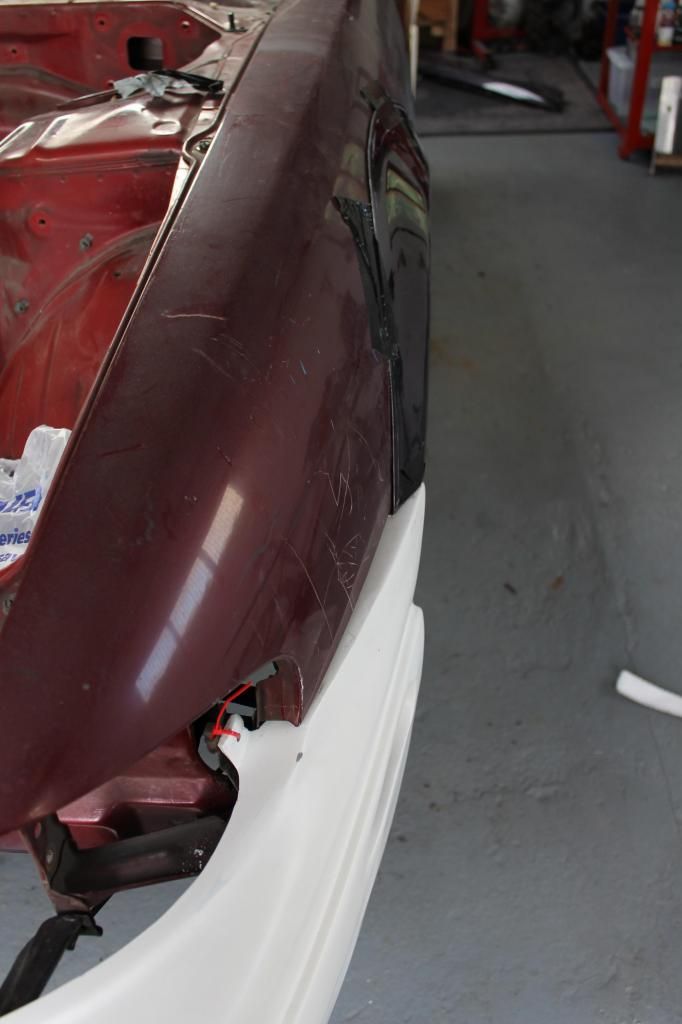
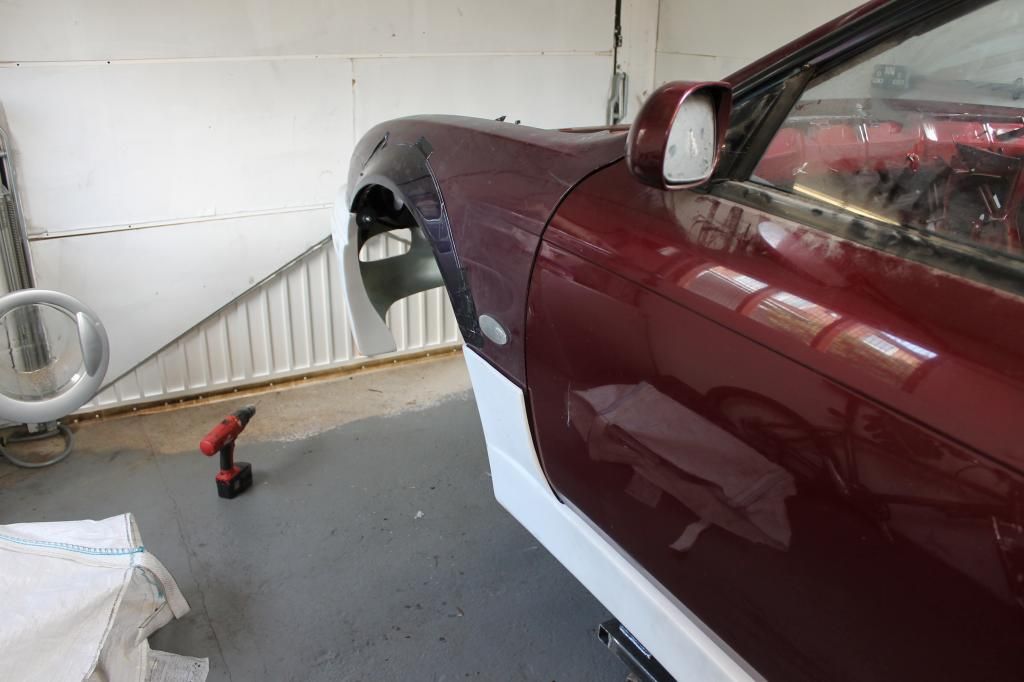
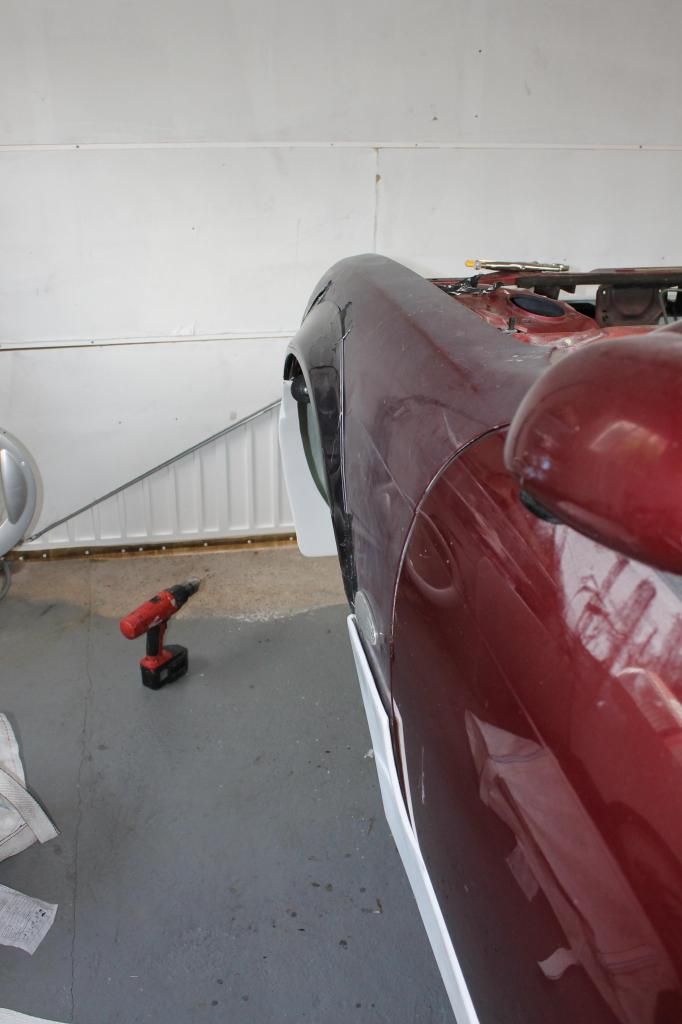
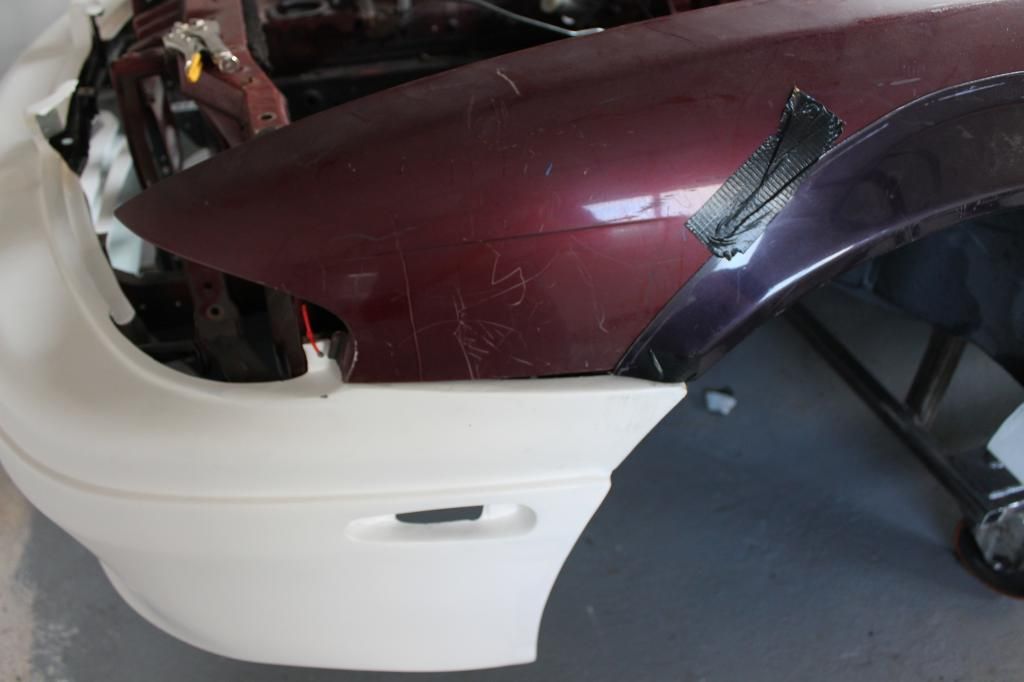
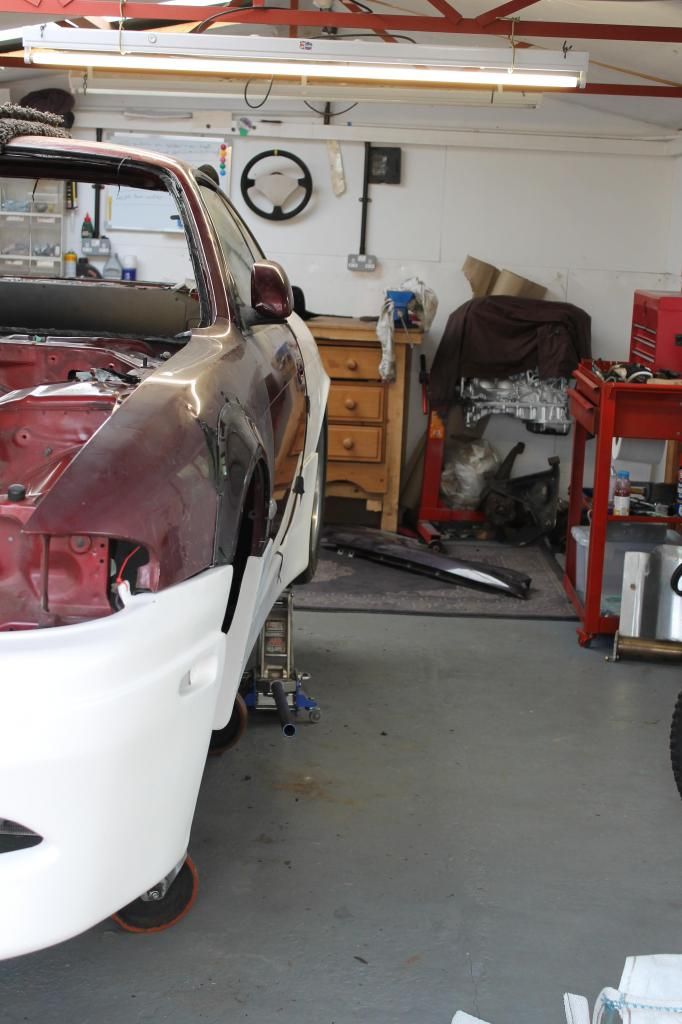
    Not much to report but Ive been looking at the front wings. Im wanting wider fronts to go with the rears but I dont to just go down the charge speed or rocket bunny route. I dont like the supermade front wings so Im going to do do my own wide fronts by modding the standard wings.


    The donor wings cost a grand total of £0 IIRC from my friend Jankes and should look really good when done. Sort of keeps the smooth lines of the zenki front end and the supermade kit.


    Been thinking along the same lnes for the front wings myself,be interested in your out come.

  3. #1203
    Guest spice_weazle's Avatar
    Join Date
    Oct 2004
    Location
    nottingham
    Posts
    3,483
    Rides
    0
    Quote Originally Posted by zeppelin101 View Post
    Longer arms isn't such a bad thing - it will reduce the amount of camber change at the wheel for a given amount of travel.

    More consistent geometry under bump and rebound is not a bad thing, provided the arm is at a reasonable angle and not pointing up into the sky.
    Im wanting a wider track but with out silly offset wheels or mega wide wheels and if pos with out spacers or at least the smallest pos if I do need them (depends on some thing else I have in mind). The further you move the knuckle out the bigger the angle from vertical the coilover body will be and in my mind thats going to put a lot of extra strain on the bearing at the top of the coilover, also the dampers will work more efficiently with them as close to vertical as pos.

  4. #1204
    Guest zeppelin101's Avatar
    Join Date
    Sep 2008
    Location
    Leicester
    Posts
    9,760
    Rides
    0
    I actually misread your post sorry.

    Yes what you're doing makes sense. The more vertical the damping unit the more force will be transmitted directly to it. Tied in with wider arms you can get back to stock or improve upon it.

    Might be worth calculating what the new shock angle is and the lever force on the shock (there will be more instantaneous torque on the shock due to the longer arm) versus stock so you can work out if it's worth messing about with spring rates.

    Of course if you're going for stock shock angle then it might just be worth considering the lever force on its own. A bit anal but you've gone to this much effort so far...

  5. #1205
    Guest spice_weazle's Avatar
    Join Date
    Oct 2004
    Location
    nottingham
    Posts
    3,483
    Rides
    0
    I have been thinking about trying lower spring rates due to the extra leverage. I'll look into that a bit more once I've made up the arms so that I'll have the correct measurements to do any calculations.


    Sent from my iPhone using Tapatalk

  6. #1206
    Guest spice_weazle's Avatar
    Join Date
    Oct 2004
    Location
    nottingham
    Posts
    3,483
    Rides
    0
    A bit of an update. Not too much because I've been busy doing other things.

    I measured up for the main hoop of the cage and drew it up on cad and them marked it out full size. I then cut some strips of steel and tacked them together using my marked out profile to get a full size template that I could try in the car to check the fit.


    I'm happy with it so I've cut a length of tube and marked it out ready for bending.

    I dusted the tube bender I made down and bent up a test piece of tube just to see how things go before going for it on £30's worth of tube and to see how much spring back there would be.


    I had a bit of rust to sort out too. When I cut the holes for the pieces of tube that will tie the main cage to the front turrets I noticed that that was a fair amount of rust on part of the seam that runs along the top of the engine bay. I had to open the seam and put some gel in it to clean the rust away and then treat it.


    I'll be so happy when the derusting is finally done.!!!


    Sent from my iPhone using Tapatalk

  7. #1207
    Guest
    Join Date
    Mar 2013
    Location
    Bucks
    Posts
    278
    Rides
    0
    Awesome stuff mate.

    Any more posts on the tube bender? Im looking at building one myself. Where did you get the dies from?

  8. #1208
    Guest spice_weazle's Avatar
    Join Date
    Oct 2004
    Location
    nottingham
    Posts
    3,483
    Rides
    0
    Double post.
    Last edited by spice_weazle; 04-09-2014 at 19:49.

  9. #1209
    Guest spice_weazle's Avatar
    Join Date
    Oct 2004
    Location
    nottingham
    Posts
    3,483
    Rides
    0
    Quote Originally Posted by ratgreen View Post
    Awesome stuff mate.

    Any more posts on the tube bender? Im looking at building one myself. Where did you get the dies from?

    Heres most of the info I have for the bender. I used the gotrikes plans for the bender, http://www.gottrikes.com/Tube_Bender.htm, dont know if you have plans or a design. It was easy to make if you can weld and use a lathe.

    The ram and the dies where expensive. The ram I got was this one:- http://www.northerntool.com/shop/tools/product_200311799_200311799. Not cheap but the only ones I could find that where similar to the one used in the plans was the Northan Tools one and a Harbour Frieght one. Harbour frieght wanted $120 for shipping though!!!! All in all the the Northern Tools one cost around £170 shipped. I couldnt find any where in the UK that sold air rams, only manual ones. You could use a manual one but that sounded like hard work.

    The dies I got from here:- http://www.stakesys.co.uk/. Again they where the only UK suppliers of the Pro tool style dies used in the plans. I got the 1.75'' (45mm) 240 deg die set with a 6'' bend radius. The blokes at stakesys where very helpful and gave good advice.

    Hope that helps.


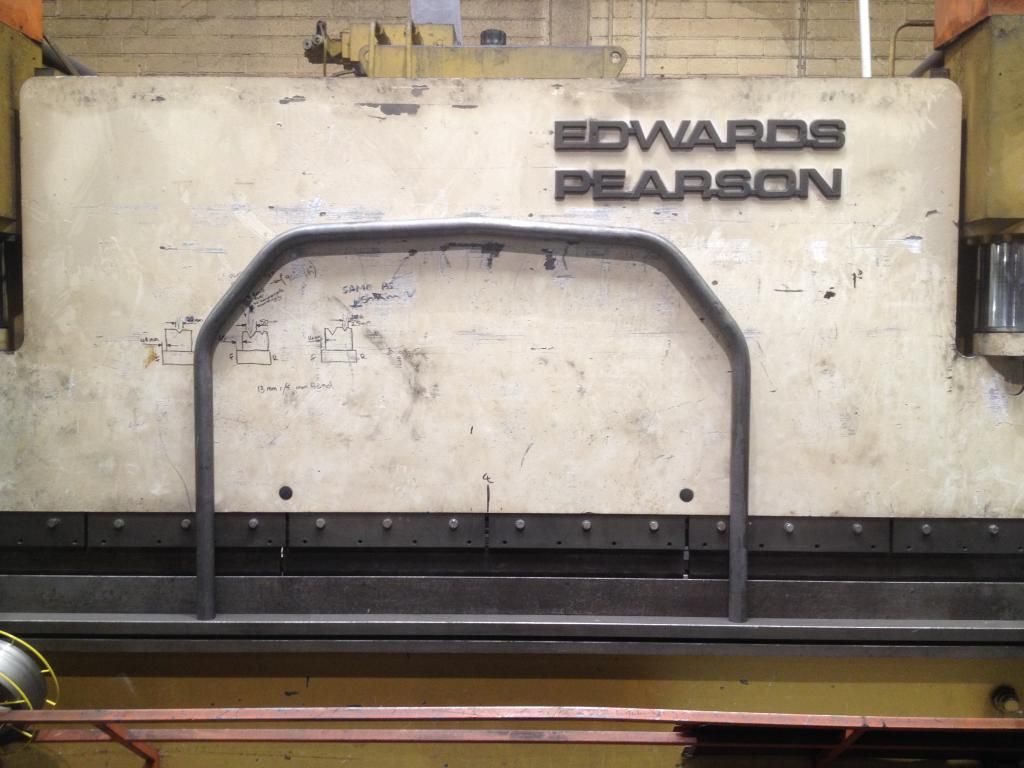
    I bent the main hoop today. I have to admit I was a little unsure of how it would go because its the first time Ive bent any tube into a proper profile. There was no need to worry though as it was a piece of piss. I marked my tube to the measurements I got from my CAD drawing and started bending. I used a little digital protractor to measure the angles and it came spot on. Ive run a tape measure over it and it looks like its within a few mm's of the drawing. It took half an hour to bend it up, which is pretty good I recon, but I havent had time to check it in the car so tomorrow I may be eating my words!!!
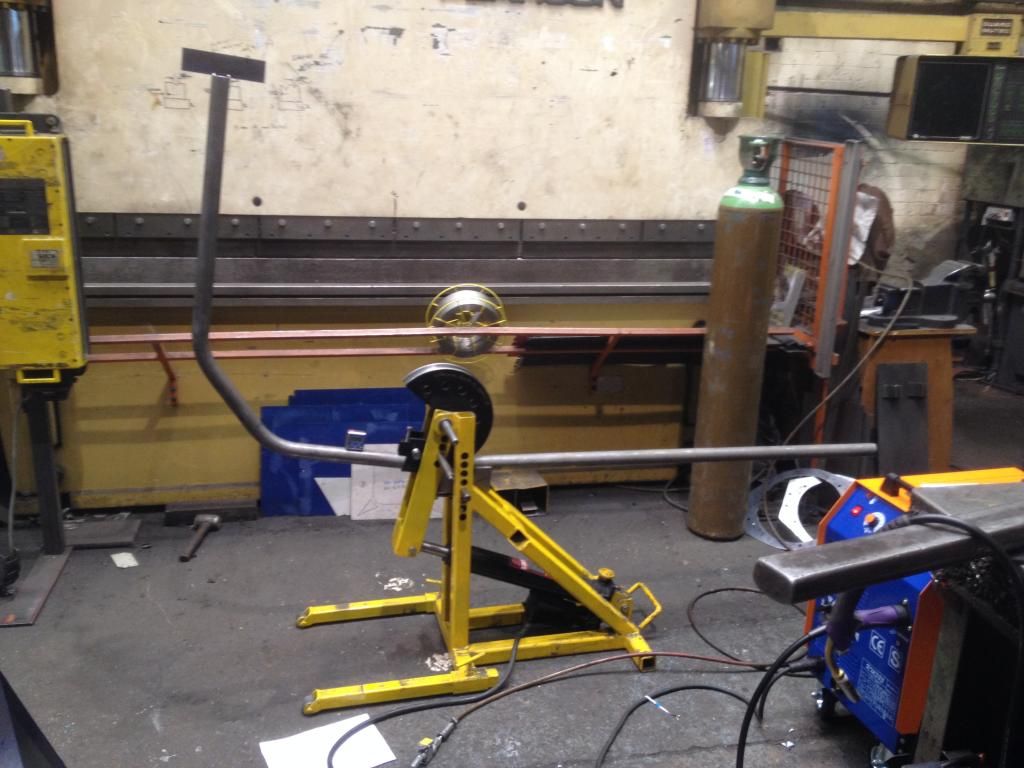
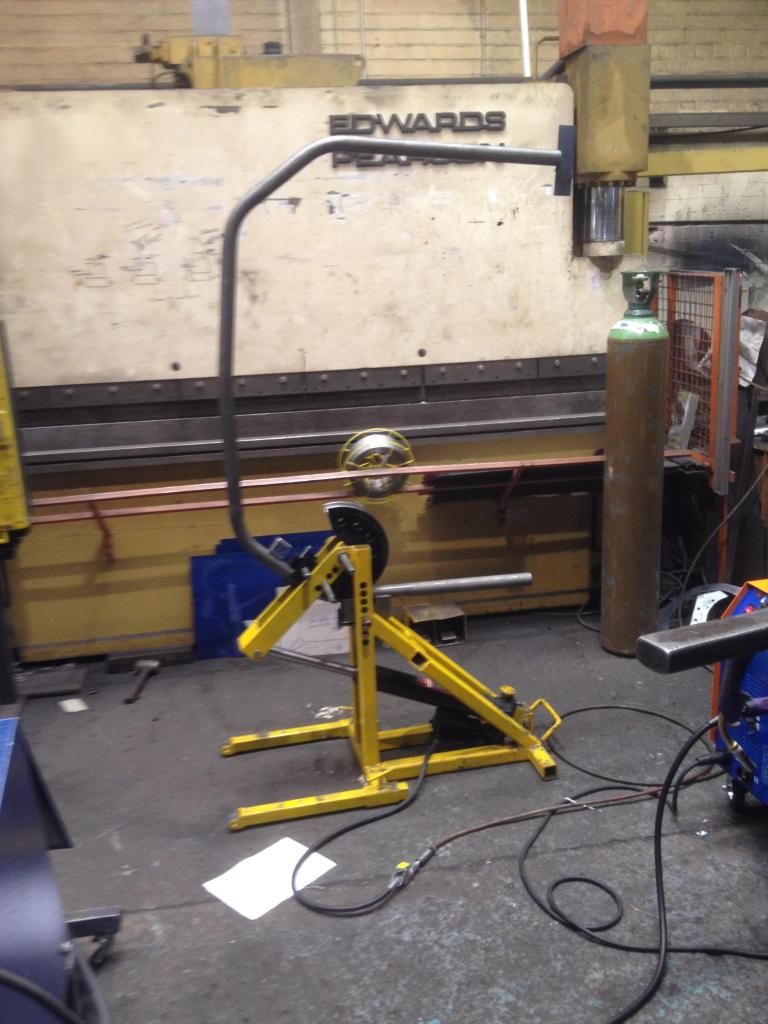
    A few crappy pics, only phone pics because I was taking them on the go so they are very blury.


    Im really chuffed with it, sad I know.

  10. #1210
    Guest blackbullet777's Avatar
    Join Date
    Nov 2013
    Location
    Edinburgh
    Posts
    78
    Rides
    0
    Just gets better and better! 👌


    Sent from my iPhone using Tapatalkf

  11. #1211
    Guest spice_weazle's Avatar
    Join Date
    Oct 2004
    Location
    nottingham
    Posts
    3,483
    Rides
    0
    Quote Originally Posted by blackbullet777 View Post
    Just gets better and better! 


    Sent from my iPhone using Tapatalkf


    I cut the excess off the ends of the main hoop and put it in the shell and put a couple of tacks on each side. It is a perfect fit, I couldnt of got it better if wanted to. There is only approx 8mm gap between the upright parts of the hoop and the shell. Ive tried to show the fit in the pics but it was hard to get a true representation of the fit.
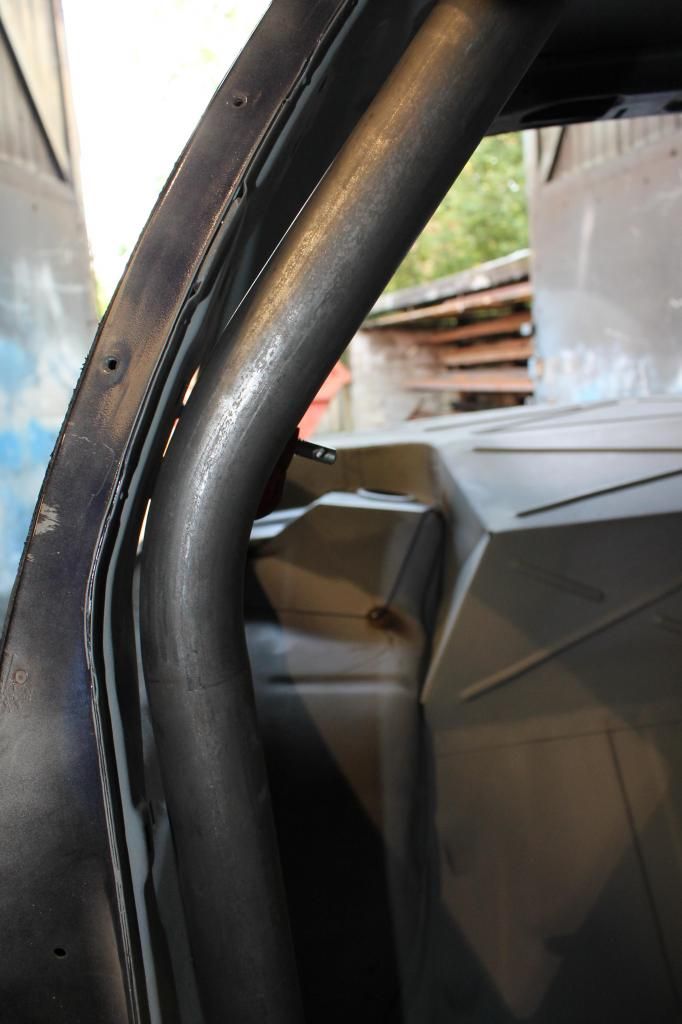
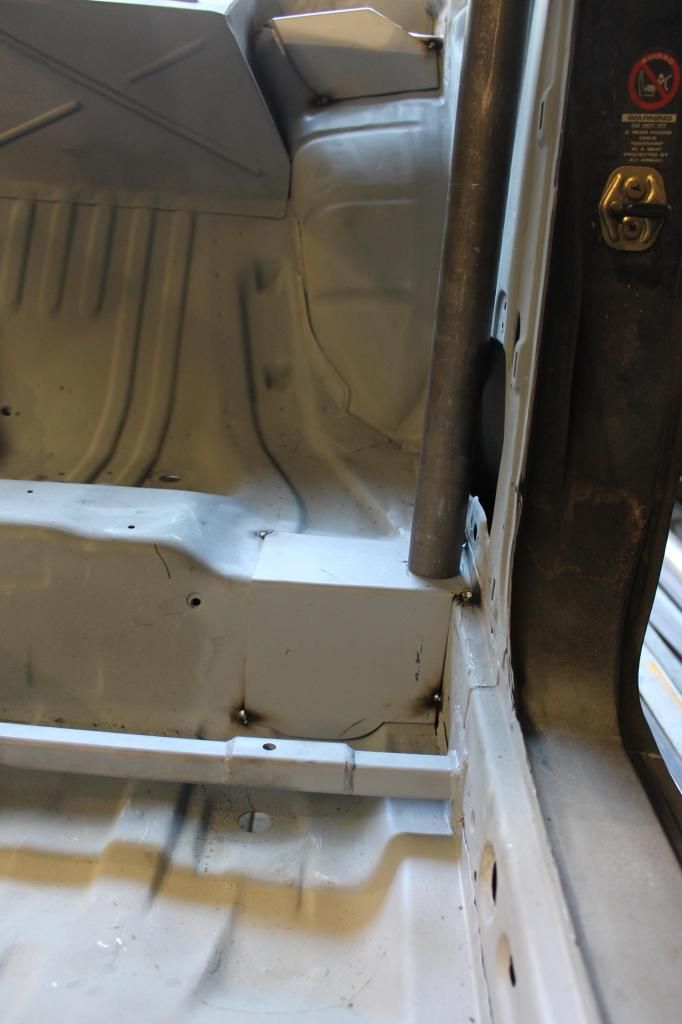
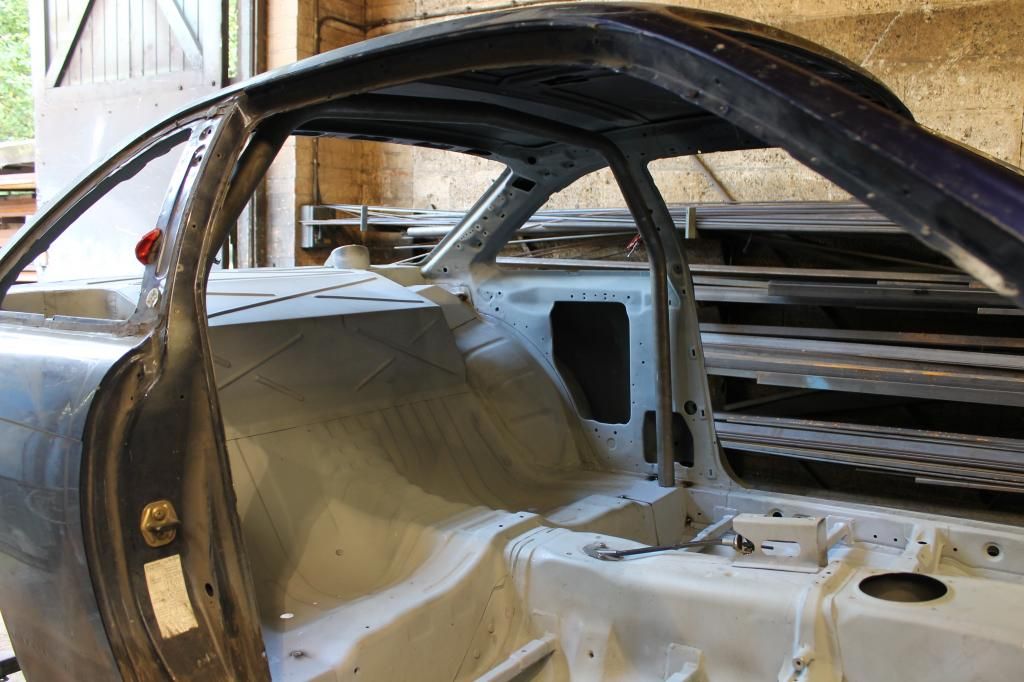


    Now thats tacked in place Iv e measured up for the front bars that go from the main hoop over the door down near the dash. Ill do the same as what I did with the hoop and mark it out full size and then make a template out of strips to check the fit before cutting and bending the tube.

  12. #1212
    Guest
    Join Date
    Jun 2010
    Location
    Norwich
    Posts
    597
    Rides
    0
    Impressive bender work!

  13. #1213
    Guest blackbullet777's Avatar
    Join Date
    Nov 2013
    Location
    Edinburgh
    Posts
    78
    Rides
    0
    Damn! Wish you had finish this by now to make me a cage! 🙈 i so need to enrol in a fabrication course!


    Sent from my iPhone using Tapatalkf

  14. #1214
    Guest
    Join Date
    Apr 2014
    Location
    Northampton
    Posts
    203
    Rides
    0
    Nice work, really like how you did the front arches, top work.

  15. #1215
    Guest
    Join Date
    Apr 2013
    Location
    West sussex
    Posts
    1,060
    Rides
    0
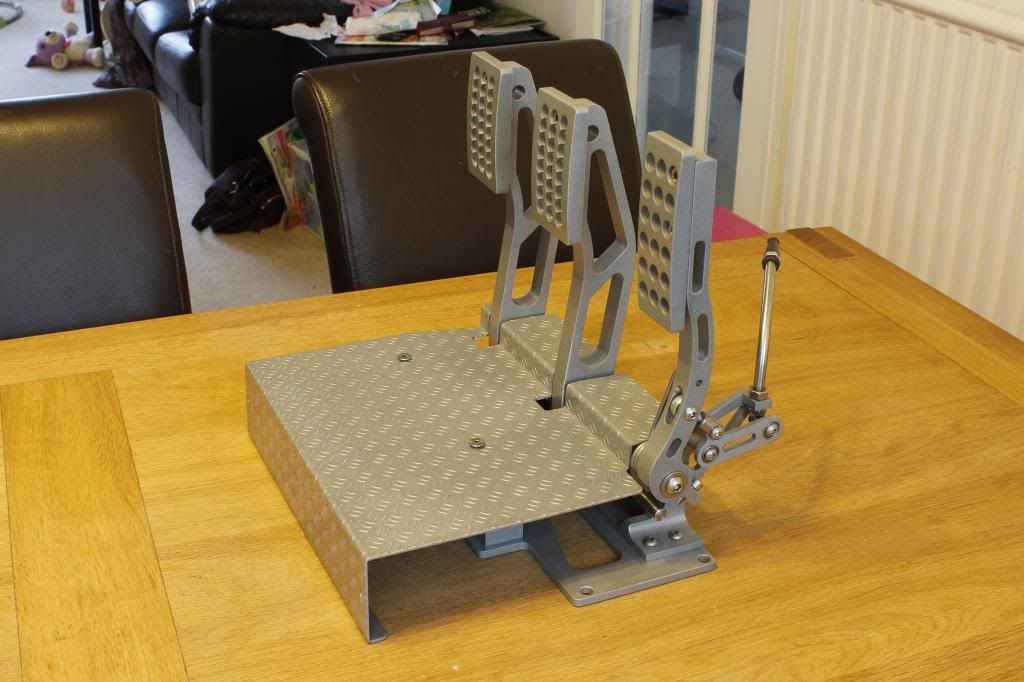
    DOOOD!!! I have just read this from start to finish! Shame about the early pics but I can tell from the later ones the quality of your work is amazing. Reminds me of a guy I have been watching on an RX7 forum building himself a 4-rotor. I was hoping that by the time I got to the end you would have finished so I could read the whole story in one but I am going to enjoy following the rest in real time! Impressed is not the word! Do you have any pics you could repost of your pedal box? There are some bits of it in the pics of your cage feet and I want to see more!!!!

  16. #1216
    Guest spice_weazle's Avatar
    Join Date
    Oct 2004
    Location
    nottingham
    Posts
    3,483
    Rides
    0
    Quote Originally Posted by pippin89 View Post
    DOOOD!!! I have just read this from start to finish! Shame about the early pics but I can tell from the later ones the quality of your work is amazing. Reminds me of a guy I have been watching on an RX7 forum building himself a 4-rotor. I was hoping that by the time I got to the end you would have finished so I could read the whole story in one but I am going to enjoy following the rest in real time! Impressed is not the word! Do you have any pics you could repost of your pedal box? There are some bits of it in the pics of your cage feet and I want to see more!!!!

    Cheers for your kind words. Ill post up some pics of the pedal box for you.

  17. #1217
    Guest spice_weazle's Avatar
    Join Date
    Oct 2004
    Location
    nottingham
    Posts
    3,483
    Rides
    0
    Quote Originally Posted by van_denton_san View Post
    Nice work, really like how you did the front arches, top work.
    Cheers

  18. #1218
    Guest
    Join Date
    Apr 2013
    Location
    West sussex
    Posts
    1,060
    Rides
    0
    Quote Originally Posted by spice_weazle View Post
    Cheers for your kind words. Ill post up some pics of the pedal box for you.
    Thanks buddy!

  19. #1219
    Guest spice_weazle's Avatar
    Join Date
    Oct 2004
    Location
    nottingham
    Posts
    3,483
    Rides
    0
    Quote Originally Posted by pippin89 View Post
    Thanks buddy!

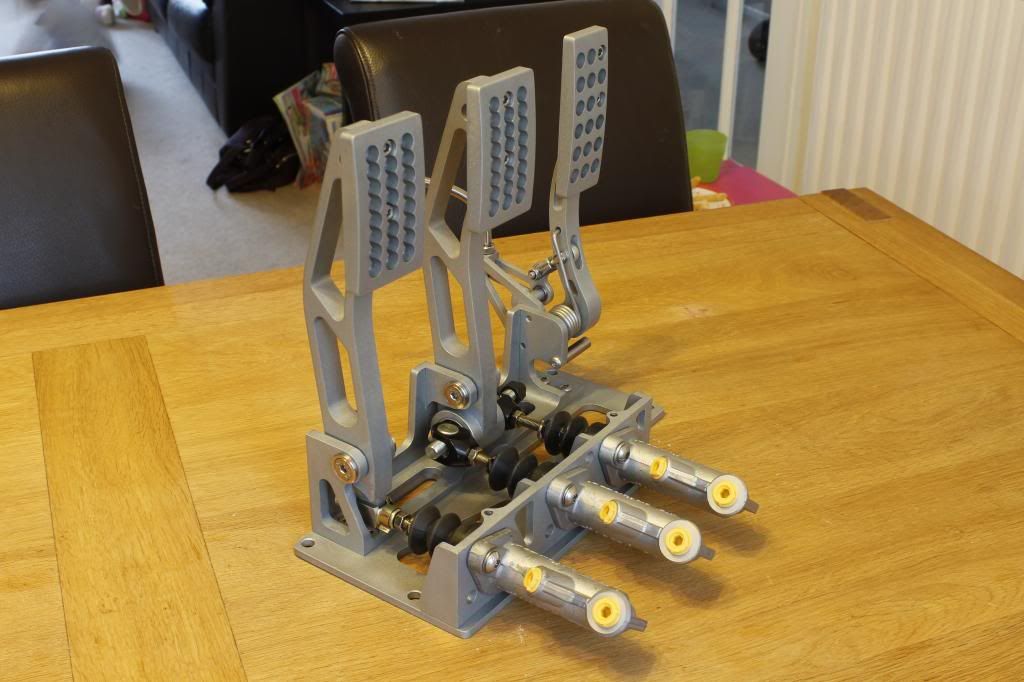
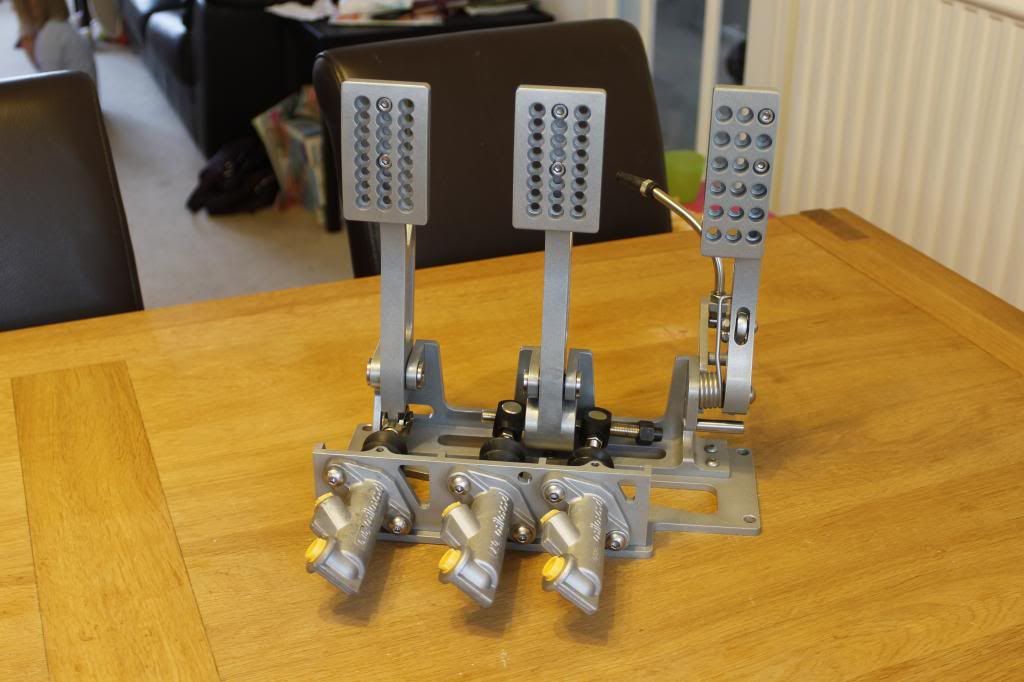
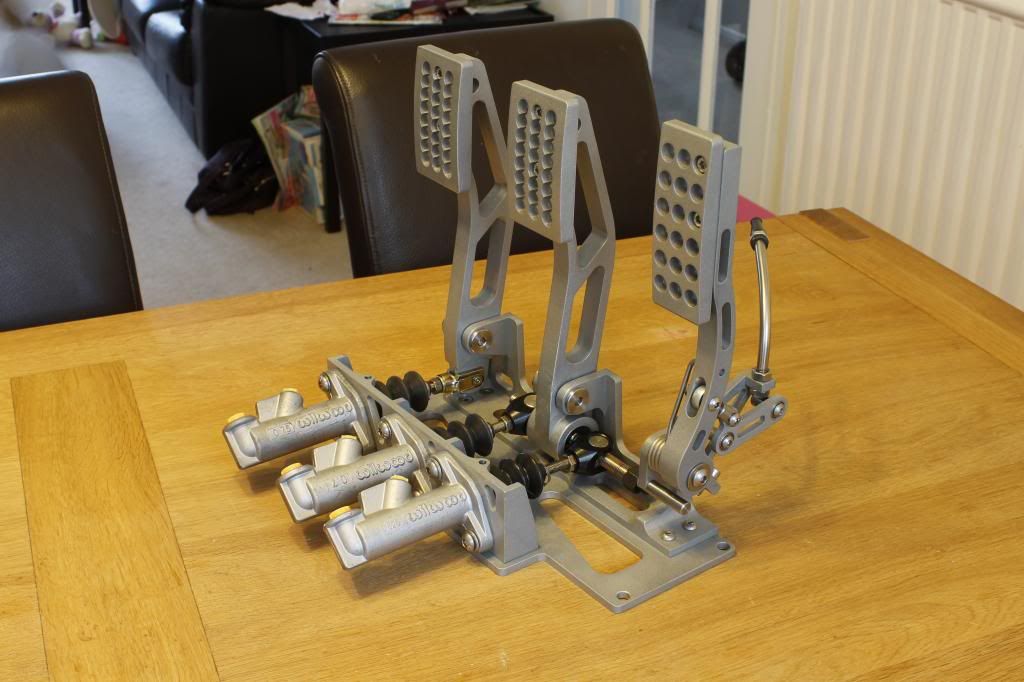
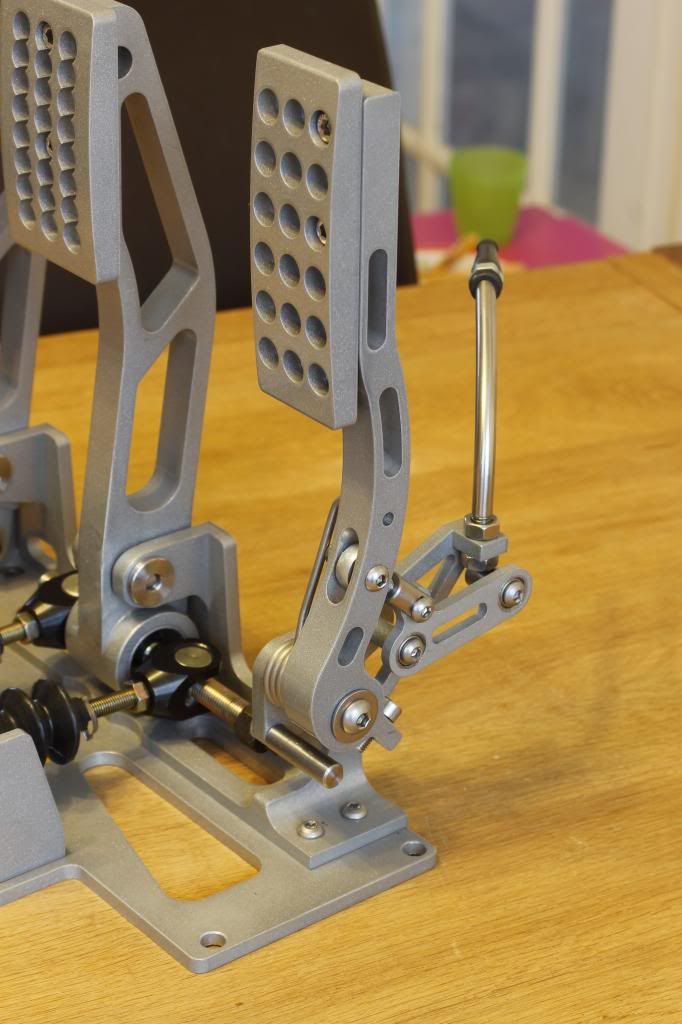
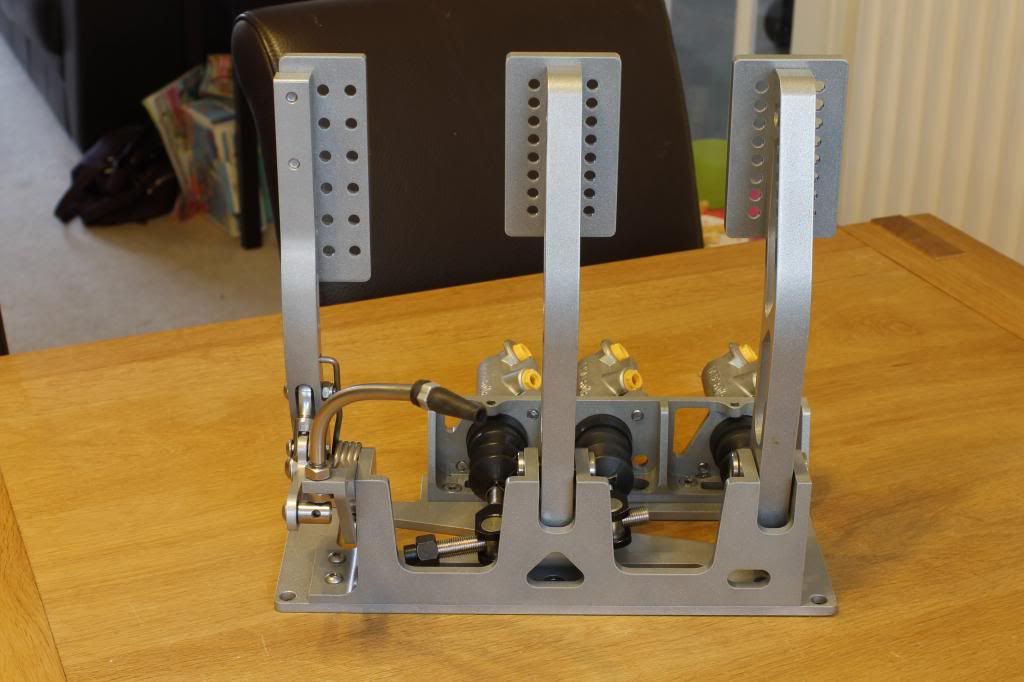
    Here you go.


    I want to alter it slightly, I want to add a return spring on the clutch pedal and I want to add a pedal stop on the clutch pedal other than that Im very happy with it.

  20. #1220
    Guest
    Join Date
    Apr 2013
    Location
    West sussex
    Posts
    1,060
    Rides
    0
    Dude that's amazing! The machining on those pedals it awesome! I work as a design engineer and I would be happy with that with parts that I have modelled in 3D and sent straight to a CNC machine! Have you considered putting some rubber plugs in the holes to help your feet grip them better?


    Sent from my iPhone using Tapatalk

Posting Permissions

  • You may not post new threads
  • You may not post replies
  • You may not post attachments
  • You may not edit your posts
  •