Page 1 of 3 123 LastLast
Results 1 to 20 of 57

Thread: The Wasp

  1. #1
    Guest JCD's Avatar
    Join Date
    May 2003
    Location
    Belgium
    Posts
    1,441
    Rides
    0

    The Wasp

    First a word about the name of my project.
    The wasp دبور because of the funny noise it makes and because it is the name of a place where young people gathered in the town where I was born. Not to be confused with the legendary Wasp-engine.


    To get this project-thread in its context I found it useful to start with a bit of history.

    A friend told me that he was looking around for another car and that he might have found a very interesting one because of its high power but low displacement and thus low taxes.
    In the end he didn't buy it but on my side the interest had aroused.
    That time I was driving my old Peugeot 104. That was a hybrid made with the cylinder head from the 1219cc engine with two Weber DCOE's and a 1360cc lump and also a lightened flywheel.
    Pretty nervous car, weighting less than 800kg :-) But it was getting very rusty and because bodywork has never been my thing I was more or less looking for something else too.
    You can imagine what happened, a couple of months later I was driving a S13.
    That was end 1999.

    Not that much later it was also the time for my first PC and the first steps on the internet.
    Since then, a lot of things happened.
    Crashed the car in 2005 (my bad), bought another one a couple of weeks later. Same color, the colleagues didn't even notice the difference LOL

    Over the years there's probably not much that I haven't been touching on this car.
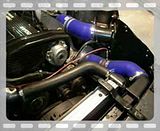
    I'll post some pics very soon.
    In the beginning it was all mainly engine related.
    Then a couple of years ago, regulations here became more and more strict and these days only very few is allowed to mod legally. First I have been re-fitting stock exhaust, ARB's, brake callipers and hoses for the anal, sorry annual tech check but after two times I got fed up with this bullshit and I decided to keep the car track/hobby/illegal only and I bought me a grandpa-car as daily driver.
    With the first trackdays it became clear that engine mods are not enough to be fast and that was the time that suspension works started.

    After some time I found myself with a pretty well driving and handling car, not the max but enough to have decent fun
    But in fact, the aim was not to drive on track, the aim was to modify and test on track.
    In all this modifying with no beginning and especially no end, the wet dream was to try something that had been laying on the shelf for some time.

    To be continued...
    Last edited by JCD; 21-01-2009 at 06:15.

  2. #2
    Guest JCD's Avatar
    Join Date
    May 2003
    Location
    Belgium
    Posts
    1,441
    Rides
    0
    Some pics


    Last edited by JCD; 21-01-2009 at 06:19.

  3. #3
    Guest JCD's Avatar
    Join Date
    May 2003
    Location
    Belgium
    Posts
    1,441
    Rides
    0


    Last edited by JCD; 21-01-2009 at 06:31.

  4. #4
    Guest JCD's Avatar
    Join Date
    May 2003
    Location
    Belgium
    Posts
    1,441
    Rides
    0

  5. #5
    Guest SM's Avatar
    Join Date
    Nov 2003
    Location
    Todmorden & Apex.
    Posts
    34,442
    Rides
    0
    Quote Originally Posted by JCD View Post
    Direct link
    http://www.sxoc.com/vbb/showpost.php...&postcount=139


    Good to see your Project here

  6. #6
    Guest JCD's Avatar
    Join Date
    May 2003
    Location
    Belgium
    Posts
    1,441
    Rides
    0
    I might as well make a list of the accessories.

    • Apex G2 coilovers. 8kg/6kg.mm I left them at their default setting, damping adjustment is turned 6 clicks out.
    • Driftworks rose joined suspension arms.
    • Michelin Pilot Sport Cup 225/45ZR17.
    • Front 330mm K-Sport brakes. Rear Z32 brakes. Ferodo DS2500 on all four.
    • Whiteline ARB's. Front at hardest, rear at lowest stiffness.
    • Apex strut braces.
    • Apex engine- and gearbox mount.
    • Some kind of a cheap Sparco seat and 4-point harness.
    • 300mm Steering wheel.
    • Gauges for boost, engine oil pressure and cooling water pressure.
    • LCD temperature indicator selectable for outside, engine oil, gearbox and diff.
    • Striking alarm indicator lamp on dash goes on (and latches) whenever brake or diff light blinks on or when water temp goes over 110°
    • B&M short shifter
    • Z32 AFM and 440cc injectors.
      Stock ECU with Nistune type 1 board. Logs EGT and boost as well.
      LM-1 wideband O2 sensor.
    • Volvo IC and rad. Electric fan.
    • One-off expansion tank.
    • SS catch tank.
    • The exhaust is a 2.75inch Mongoose.
    • Fuel pump is Walbro.
    • Nissan pistons +0.5mm. ACL bearing shells. HKS metal HG.
      Balanced pistons, rods, crank, flywheel and front pulley.
      Mobil 1 "synthetic" 15W50.
      Since the overhaul the engine has done 40000km of which 1850km on track.
    • Stock flywheel lightened to 9kg. Still alive after all that abuse.
    • Mocal 17 row oilcooler with thermostatic sandwichplate.
    • Arctic airbox with fishstick style K&N filter (= not a cone) from Captain Iglo.
    • RPS Max Street Organic clutch.

  7. #7
    Guest JCD's Avatar
    Join Date
    May 2003
    Location
    Belgium
    Posts
    1,441
    Rides
    0
    Part 2 of the project

    It came to me by some whim of fate, a warranty issue, a boat accident, you know what I mean.
    It’s an Eaton M45 supercharger and it came of a Mercedes M271 1800cc engine.
    The engine came in different tunes of which the most powerfull produces 190hp with 0.9bar boost.
    Unfortunately I have no specs about the camshafts used.


    's Not so easy to plumb that shit in.
    It has a bulky outlet manifold with a large flange where in the original setup connects an elbow with integrated noise damper. That elbow was pointing in the wrong direction so I ditched this assembly and made a flange with an outlet tube heading as straight as possible towards my IC inlet.
    Unfortunately, the charger’s -single- rear mounting bolt appeared to come awkwardly close to the left engine mount.
    The bulky manifold did not allow the thing to be mounted under any angle.
    Finally I ended up with a relatively simple part as front support and a modified engine mount to accomodate the rear support point of the charger.
    The space left for the engine mount is shorter than stock, 45mm instead of 70mm, and I used an industrial style rubber damper thiny for it (called "silentbloc" over here).
    The PAS pump was moved down approximately to where the AC compressor sits on gay cars.
    The support for the pump is used as a base for the support that holds the two front bolts of the charger.


    The turbine part of the turbo was replaced by a bypass-tube with a bung for the WB O2. Thanks to Jan for welding these weird shapes.

    The oil and water delivery elbows were plugged as well as the oil drain into the sump and the water connection to the mess under the inlet plenum.
    With no turbine in the exhaust, the car was much louder than before. To overcome that, I added a third muffler, inbetween the two existing Mongoose boxes.


    For the hoses in and out the charger I got myself some SiliconHoses parts; they are a lot cheaper than Samco and I'm convinced that they will do the trick.
    The inlet hose and the bypassvalve actuator do come very close to the exhaust manifold and tube. To avoid frying these parts, I made an insulated heatshield that sits under the manifold and a simple aluminium shield next to the tube.

  8. #8
    Guest JCD's Avatar
    Join Date
    May 2003
    Location
    Belgium
    Posts
    1,441
    Rides
    0
    First test was with the stock crank pulley (from the AC disc) and that gave me about 0.3bar of boost.
    That was not very spectacular but anyway it was noticable when the boost kicked-in (when the bypassvalve closes).

    Some details about the electric bypassvalve.
    A bypassvalve is needed to prevent the kompressor to pump against a closed throttlevalve at idle and during cruising.
    All american systems use a butterfly valve operated by a diafragm connected to the inlet plenum.
    At idle you have vacuum which opens the bypass. The charger is then just pumping around on itself.
    Once throttle is applied, vacuum drops causing the bypassvalve to close and allowing the charger to pump its volume towards the inlet.
    The valve that comes with this charger is also a butterfly valve but it is actuated by a DC electromotor. A spring holds the butterfly open; the motor counteracts the spring to close the valve.
    It might not be impossible to plumb-in a diafragm-actuated valve but why should I, this existing electric system is by far more flexible. It has disadvantages as well; it reacts rather slowly, the motor shaft is connected to the valve shaft over a gear reduction and the motor has to do several turns before the valve is closed. In the other way around, the spring needs some time to rotate the valve shaft and make the motor spin in the other direction.
    I haven't measured its response time but to my opinion it is acceptable. So far, I couldn't notice this as a delay during driving. Other disadvantage is that some circuit needed to be designed to drive the motor.
    There are a pair of potentiometers connected to the valve shaft, making a servo approach possible.
    For the time being, I made the circuit react to the throttle position, via the TPS voltage. So obviously it reacts differently then the diafragm actuated valves but I plan to connect it to my MAP-sensor later and compare both strategies in terms of drivability.
    The circuit itself is composed of a comparator LM319, a PWM-driver DRV101 and a MOSFET final IRF9640.

    Then I got my modified pulley back from balancing and fitted that one.

    When I mounted this, it became clear that if I would like to go larger in diameter, I'll have to keep in mind to foresee clearance between the pulley disc and that of the waterpump. Even now, my belt was sitting so close to the edge of the waterpump pulley that I went looking for another solution. I tried the aftermarket aluminium waterpump pulley that I had in the cupboard for ages and that seemed to give a tad more clearance, enough to run things safely. Belts tend to go orbiting at high RPM and I don't want them to touch.

    This pulley gives me something like 0.6bar and that starts to be more like it
    There is more noise too. It clearly comes through the airfilter but it is still an acceptable level. OK, it's a project car, not a saloon nor a daily driver.
    The noise decreased when I fitted the cover of the cold air box. Perhaps it's not to bad to hear it, that gives me some more feeling about what's happening under the hood.
    Both the 0.3 and 0.6bar testruns were logged with Nistune. The engine still runs an AFR of around 11 over 4500RPM so there is some work to do on that.
    During the 0.6bar run, the AFM voltage went up higher than the last records on Spa during summer but that was with a stock T25.
    With the absense of the turbine in the exhaust track, the fairly long overlap with these Tomei 252° cams might be a problem. It doesn't make sense to blow air at the cylinders if it's escaping through the exhaust before having burned fuel.
    I retarded the exhaust cam 5° to have a bit longer power stroke and the inlet cam 10° so the result was 5° less overlap.
    Althought I knew this was still far from optimal, I decided to go for a dyno session.
    That was best interesting. We fixed the AFR to around 12 and advanced the ignition till no more gain and then 2° back.
    Result is what you saw in the Library of Power figures
    http://www.sxoc.com/vbb/showpost.php...&postcount=139


    Then I decided to fit the stock CA18DET EDM cams again.
    Only did a short drive here around the block to check if nothing explodes.
    Weather conditions have been very bad so things have been at hold for more than a month now.
    Meanwhile I started to build the MAP-based bypass driver. I expect this to be ready in a month or so.

    I would like to have more boost but there is no hurry.
    First the temperature of the air leaving the charger should be measured.
    When winding up boost, these compressors seem to loose efficiency and heat up considerably so I want to monitor this.
    Also, the boost that Nistune logs from my MAP sensor (via a aux input on the WB O2) has some ripple that didn't show up before. Probably I'm having a ground loop somewhere.
    You see, stilla lot to do.
    But that's why it's a project isn't it

  9. #9
    Guest JCD's Avatar
    Join Date
    May 2003
    Location
    Belgium
    Posts
    1,441
    Rides
    0


  10. #10
    Guest M.D.'s Avatar
    Join Date
    Jul 2005
    Location
    plymouth
    Posts
    10,631
    Rides
    0
    im very very impressed with this install, have you had any vids taken or dyno run vids since the charger install???

  11. #11
    Guest JCD's Avatar
    Join Date
    May 2003
    Location
    Belgium
    Posts
    1,441
    Rides
    0
    No media yet and honestly I think that a video wouldn't show exiting things but the audio might. I'll try to fix something

  12. #12
    Guest M.D.'s Avatar
    Join Date
    Jul 2005
    Location
    plymouth
    Posts
    10,631
    Rides
    0
    im just interested to see how the boost and power comes in compared to even the stock turbo,

    great work, you sound like you really know your stuff

  13. #13
    Guest
    Join Date
    Jun 2003
    Location
    Bonn, Germany
    Posts
    343
    Rides
    0
    Also very impressed! Good to know that you still work on S13`s!

  14. #14
    Guest Dave270r's Avatar
    Join Date
    Apr 2006
    Location
    Sudbury
    Posts
    5,490
    Rides
    0
    That's a bit different

    Good luck with it mate

  15. #15
    Guest
    Join Date
    Jun 2005
    Location
    Wherever I run out of petrol!
    Posts
    14,549
    Rides
    0
    Wasnt there someone else on here contemplating wacking the s/c from a jag (eaton i think) onto a CA

    Tidy install and cant wait to see a vid to check out power delivery

  16. #16
    Guest Paul_S13's Avatar
    Join Date
    May 2001
    Location
    Milton Keynes
    Posts
    9,514
    Rides
    0
    Quote Originally Posted by MEL View Post
    Wasnt there someone else on here contemplating wacking the s/c from a jag (eaton i think) onto a CA

    Tidy install and cant wait to see a vid to check out power delivery
    That was me, i gave up, ran out of money and effort.

    I still have this shiny lovely tubular N/A manifold if someone's interested in gaining more bhp.....

    Last edited by Paul_S13; 15-04-2009 at 20:22.

  17. #17
    Guest JCD's Avatar
    Join Date
    May 2003
    Location
    Belgium
    Posts
    1,441
    Rides
    0
    A bit of update.
    Winter was long and the opportunities to test on dry roads were very rare.
    The first -short- tests with thie MAP-based bypass driver look promising.

    Engine has more low end torque with these stock cams than with the Tomei 252° cams.
    Last time compression was measured was with the Tomei 252° cams fitted.
    I am wondering how much compression pressure I would measure now.
    Shure it will be more but it gets interesting only when there are values to compare.
    It's on the "to do"-list

    These graphs show the path to a certain improvement.
    Y is MAP in bar (scaled to 0 = atmospheric), X is TPS in volts.
    On the second graph, compared to the first one, the gain of the MAF amplifier has been increased what makes boost build up over a wider range of TPS.
    Then for the third graph, the offset between the MAF and TPS signals is reduced.
    Boost buildup is more "the extension" of the manifold vacuum.
    Obviously, that was the setting yielding smoothest throttle response.


    What has to be refined? The slope of the positive pressure as function of the throttle position is still steeper than the vacuum as function of throttle. I think drivability might benefit from stretching even more this part of the action.
    Last edited by JCD; 07-07-2009 at 11:20.

  18. #18
    Guest JJ's Avatar
    Join Date
    May 2003
    Location
    Germany...yeah i know....weird huh
    Posts
    6,591
    Rides
    0
    stunning project mate

    Absolutly love these "weird" things people do to their cars

  19. #19
    Guest JCD's Avatar
    Join Date
    May 2003
    Location
    Belgium
    Posts
    1,441
    Rides
    0
    Finally succeeded to post some noize

  20. #20
    Guest JCD's Avatar
    Join Date
    May 2003
    Location
    Belgium
    Posts
    1,441
    Rides
    0
    Here's a brief report of the tests carried out lately.

    There is no noticeable rise in charge temperature when the bypass valve is on its way between open and closed.
    I feared that this would have been the case for the short time the system is operating on the slope part of the boost graphs posted earlier.
    In real world all-day traffic situations this might be happening more than for a short time.
    Also I just found out that on the twincharged VW TSI engine there is a "regulating flap" that is bypassing the charger and also regulating the boost delivered. So it's probably not such a bad idea after all.

    Air coming out of the charger does not exceed 90°C.
    That is at WOT with the M45 spinning at 16200RPM and a boost of 10-11PSI.
    I would have expected the air getting hotter when stepping into the lower-efficiency part of the charger performance map.

    As for the timing related issue that's where I found it getting particularly interesting.

    (average numbers, all counting from start=0)
    Time needed to floor the throttle 130ms
    Time needed for the bypass valve to close 215ms
    Time needed for the boost pressure to rise till 95% of its nominal value in the plenum 510ms
    That last one explains the lag that I noticed when testing on the track and I believe this can be improved only by decreasing the volume of the inlet path, in particular intercooler and tubes.

    For reference, Kenne Bell states that supercharger reached maximum full boost in approximately the same "split second" (400ms) as the throttle being floored.
    http://www.kennebell.net/techinfo/ge...comparison.pdf
    I could conclude that reaction time of my electric bypass setup is not bad at all and my right foot is almost supersonic because it reaches WOT 3 times faster than his
    You see how easy it is to make publicity with good looking numbers
    Under these circumstances I don't find it necessary to look for a way to increase the speed of the valve actuator, especially knowing that it's a straight DC motor and not a stepper (these are easier to speed up) and the drive consists of plastic gears.

    An air-to-water intercooler might help in decreasing this lag because it has a lower volume.

    So what's next? When I have some time I will try to fine tune the response curve of the valve.
    And then I'll look out for a larger supercharger because this one is far not dangerous enough

Tags for this Thread

Posting Permissions

  • You may not post new threads
  • You may not post replies
  • You may not post attachments
  • You may not edit your posts
  •