Looking good Pete
Ikram, you can also buy the U-POL acid etch in a tin, probably works out cheaper if you're using a lot.
Pete, do you shotblast into a tank, or just make a mess all over the floor!!??

Looking good Pete
Ikram, you can also buy the U-POL acid etch in a tin, probably works out cheaper if you're using a lot.
Pete, do you shotblast into a tank, or just make a mess all over the floor!!??
Great thread guys.. I see a summer project on the horizon and for once, it doesn't consist of mmmmore pooooowaaaaa.
Rich
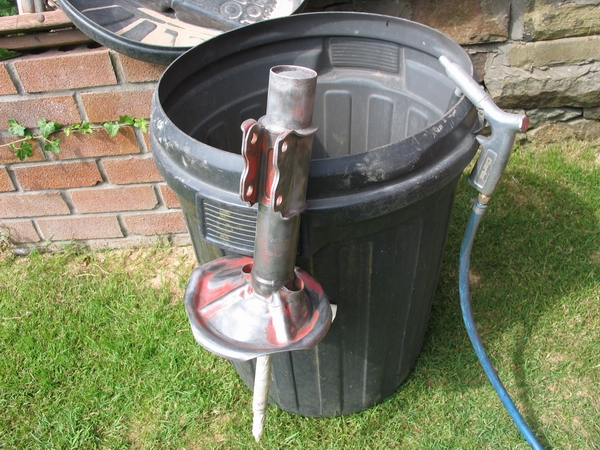
A bit of both reallyI tip the bag of sand into a dustbin and attempt to contain it but it does get everywhere. A polythene sheet underneath helps as you can sweep it up and reuse it. I always blast on the lawn though and its starting to look like a bunker now, this was when I did the S13
Most of the suspension is going off for pro bead blasting and spraying, it's just the calipers, hub bearing carriers and diffy that I am doing
Pete
SXOC Member Number : 317
What do I need to shotblast Pete?
I have a few suspension bits wouldnt mind cleaning up myself
Scot you need a Huuuuuuuge compressor really. Mine is a twin cylinder jobbie with a 58 X 18 tank but you only get about 30 secs out of it, then your waiting for it to build the pressure back up. The gun was only about £20 from Machine Mart but my advice would be to have them professionally blasted.
Pete
SXOC Member Number : 317
Ok Pete cheers
are you shotblasting under the car?? i have an ok compressor and am tempted to buy the unit to get rid of the rust underneath. looks exactly like yours!! does it make much mess??? i have a sandblaster in a cabinet and that makes so much dust you cant see what your doing after about 10 seconds.
Bloody good questionOriginally Posted by j4mes

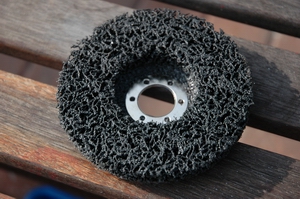
That's why I havent started on the shell yet, still deciding the best plan of attack. Some of the areas will be easy to clean up with a strip clean disk. I wont be using a grinding disk though
Other areas look difficult to get to so I might end up masking up to shotblast
Pete
SXOC Member Number : 317
strip clean disc?? those red fibre brushes?? i think thy are brill. its what i have used to do my engine bay, where can you get them, as i hav worn my dads ones down.
I bought this one from Frost. Are the red brushes better?
I am still learning about the best way to combat corrosion. The best way to "wet" protect clean steel is to spray a coat of zinc rich paint on followed by 2 coats of epoxy paint. This is what I will be doing with the subby and suspension components. I have bought 2L of Electrox from here http://www.bilthamber.co.uk/electrox.html The preparation of the steel has to be suitable for the product being applied and I would like to thank Peter Hamber for his time and expertise
This guy really knows his stuff and I will be posting up the best methods of preparation and protection when I have all the info
Pete
SXOC Member Number : 317
i think i'll wat to do my subby until your doing yours
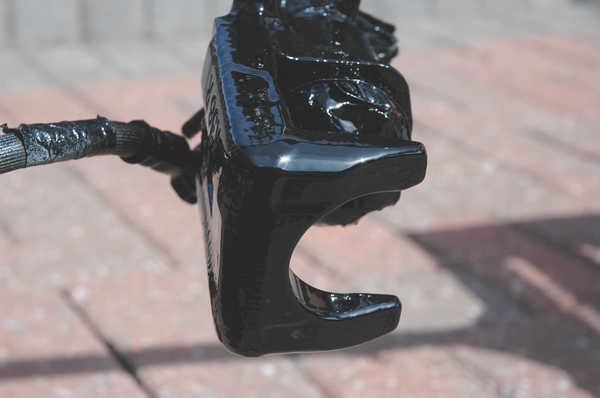
Painted the calipers with 3 coats of 2K. Don't know what colour to do the fronts though
Pete
SXOC Member Number : 317
Black to match the rears Pete else will look odd...
Quick question - what paint are you using and how are you thinning it?
Got a lot of spraying to do myself shortly and dont have a clue about thinning paint down ready for the gun ...
What are you painting Scott? Suspension?
Pete
SXOC Member Number : 317
Check with paint supplier Scott, but most 2K is 2:1 then around 10% thinners, depending on pressure, temperature, etc.
Cheers mate
Planning to go to Autopaint today to get what I need and get stuck in
They should sort you out, but for 2K you'll need the paint, activator and 2K thinners. If using basecoat you mix that 1:1 with basecoat thinners. Also get some cheap std thinners for cleaning the gun out.

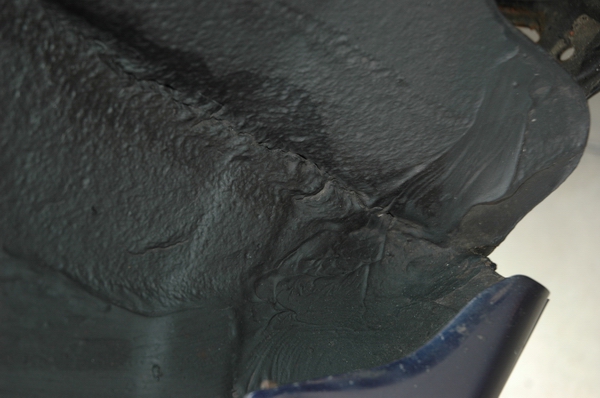
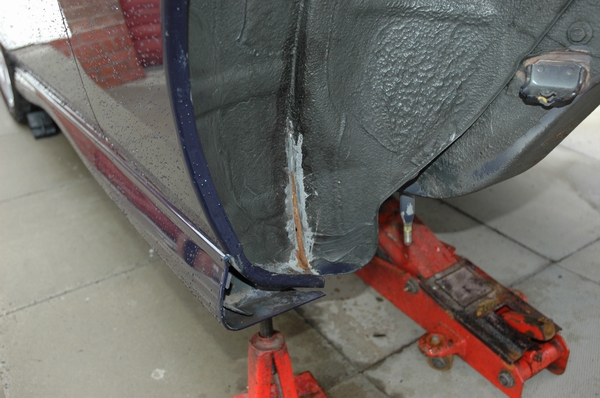
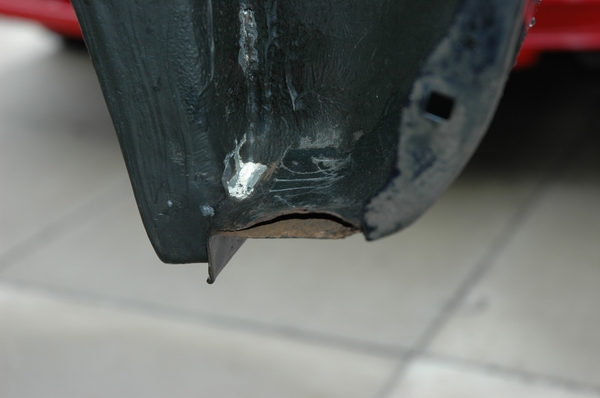
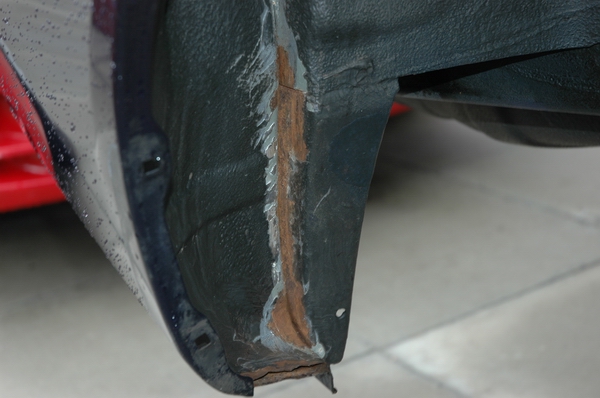
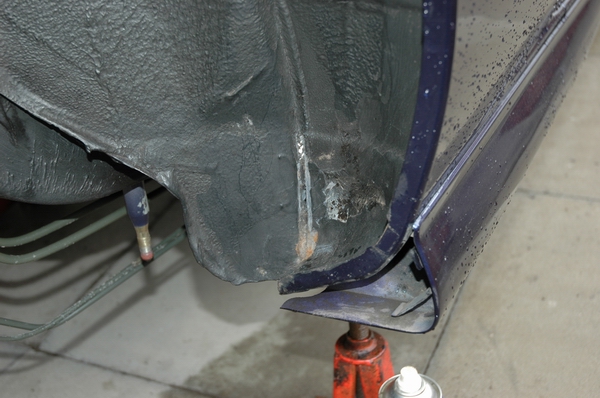
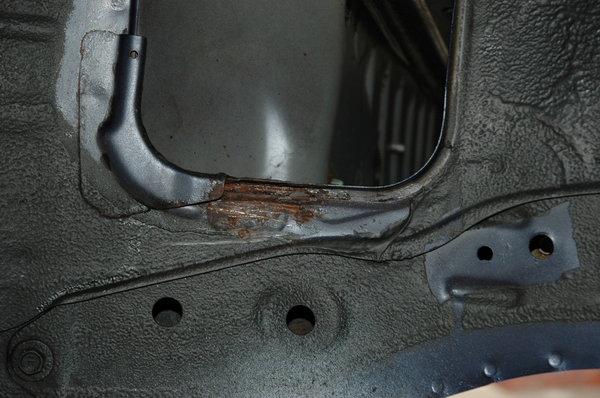
Yer right. Thought I would scrape off some of the stonechip and seam sealer just to check behind. Looks like there has been no rustproofing whatsoever from the factory and its corroded behind the sealer.
N/S seam at back of arch
O/S
Well it looked intact, good job I decided to scrape the sealant off and have a look.
There's also this where the fuel filler neck goes through
Pete
SXOC Member Number : 317
Thats EXACTLY where mine is starting to show Pete... check the front seams as well - they are even worse...
I think mine will be coming off the road shortly to have this sorted out... it seems most of the seams on the 200 suffer from water ingress.
Poxy Nissans! - 8yr old car and dealing with rust already!!
those arch seams are a shock,looks like i'll be checking mine in june when it next goes up in the air!
Loving this thread
You only need two tools in life - wd-40 and duct tape. If it doesn't move and should, use the wd-40. If it shouldn't move and does, use the duct tape.
And if you can't fix it with a hammer,you've got an electrical problem!
 Posting Permissions

 Reply With Quote