Page 1 of 2 12 LastLast
Results 1 to 20 of 36

Thread: How to shim a diff - guide

  1. #1
    Guest immy21's Avatar
    Join Date
    Mar 2009
    Location
    Edinburgh
    Posts
    7,176
    Rides
    0

    How to shim a diff - guide

    PART 1

    I couldnt find a guide here but found a couple elsewere so thought il put one together

    Disclaimer: I am by no means competent in this department and am only educated by people on the tinterweb who maybe just as incompetent as me, shimming a diff is still a pikey solution, to properly refresh a diff the viscous unit needs replaced which is ££££, this is based on my late manual uk spec s14a, if I F up on anything here just say so and il edit the thread

    Problem: standard VLSD is tired, temprimental and often likes to spin up the inside wheel which is boring in a RWD car

    Solution: Buy a new LSD (£££), weld your diff (££) or shim it (£.p) and hope it locks better without acting up like a welder

    I choose to shim because a new LSD will bankrupt me and a welder aint versatile enough as I use my car for grip, drift, long/short distance, county rd fun runs, snow plough, minor off roading... BUT bear in mind shimming like this is a guessing game, you might feel no difference or it might be locked up like a welder as all we are doing is mashing the gears together.


    What you will need:

    A shim, fresh diff oil and thats it! assuming you are tool'd up already

    Its a good idea to get driveshaft seals while your at it as mine were a bit mongofied and they are cheap anyway, il update with seal part no.s and a guide how to remove/ install the diff from the case when i put it back in (sometime this decade), about £16

    Shim part no. from nissan4u.com (double check for your self though), about £7, I had to wait 6 weeks for mine

    3842440F60

    SELECT T=0.80
    '94, April —
    3842440F61
    SELECT T=0.83
    '94, April —
    3842440F62
    SELECT T=0.75
    '98, October —
    3842440F63
    SELECT T=0.89
    '94, April —
    3842440F64
    SELECT T=0.92
    '94, April —
    3842440F65
    SELECT T=0.95
    '94, April —
    3842440F66
    SELECT T=0.98
    '94, April —
    3842440F67
    SELECT T=0.78
    '98, October —
    3842440F68
    SELECT T=1.04
    '94, April —
    3842440F69
    SELECT T=1.07
    '94, April —
    3842440F70
    SELECT T=1.10
    '94, April —
    3842440F71
    SELECT T=1.13
    '94, April —
    3842440F72
    SELECT T=0.81
    '98, October —
    3842440F73
    SELECT T=1.19
    '94, April —
    3842440F74
    SELECT T=1.22
    '94, April —
    3842440F75
    SELECT T=1.25
    '94, April —
    3842440F76
    SELECT T=1.28
    '94, April —
    3842440F77
    SELECT T=0.84
    '98, October —
    3842440F78
    SELECT T=1.34
    '94, April —
    3842440F79
    SELECT T=1.37
    '94, April —
    3842440F80
    SELECT T=1.40
    '94, April —
    3842440F81
    SELECT T=1.43
    '94, April —
    3842440F82
    SELECT T=0.87
    '98, October —
    3842440F83
    SELECT T=1.49
    '94, April —

    Some say they are 0.8 standard, some say they are spec'd individualy
    You can put a 2nd shim ontop of the original but I decided to repace the standard one for a 1.4

    I think clive has 2 0.8 shims and its like a welder (which may have free'd up by now), let us know how many/what shims you all are running and how it feels

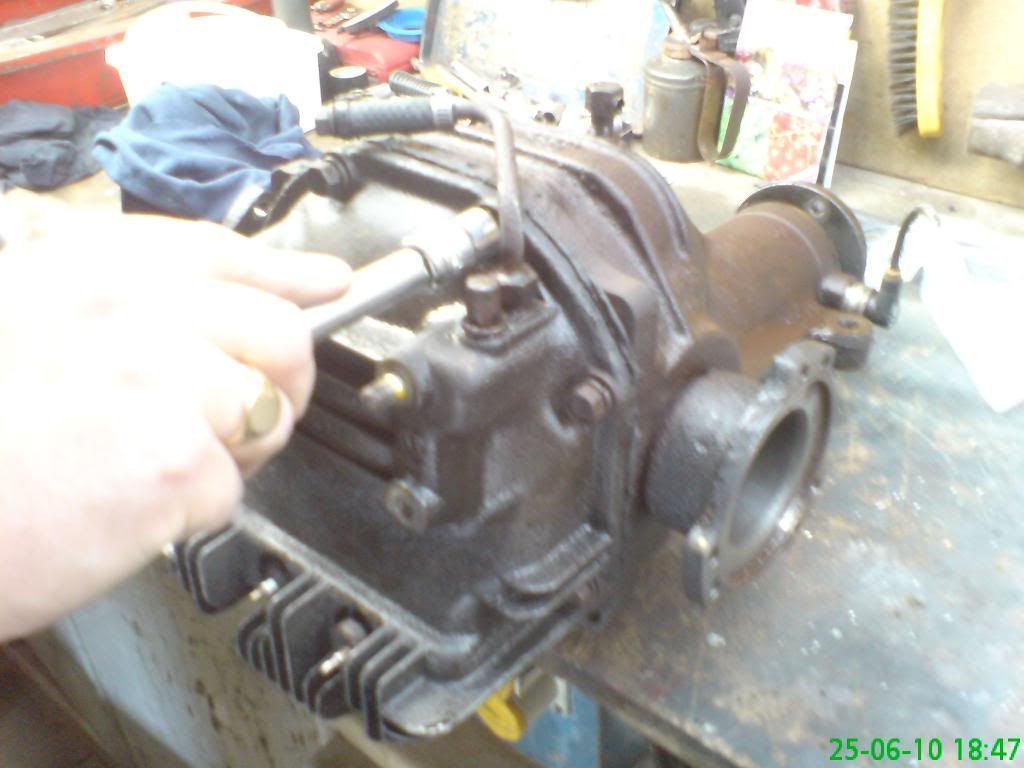
    Whack out the drive shafts:


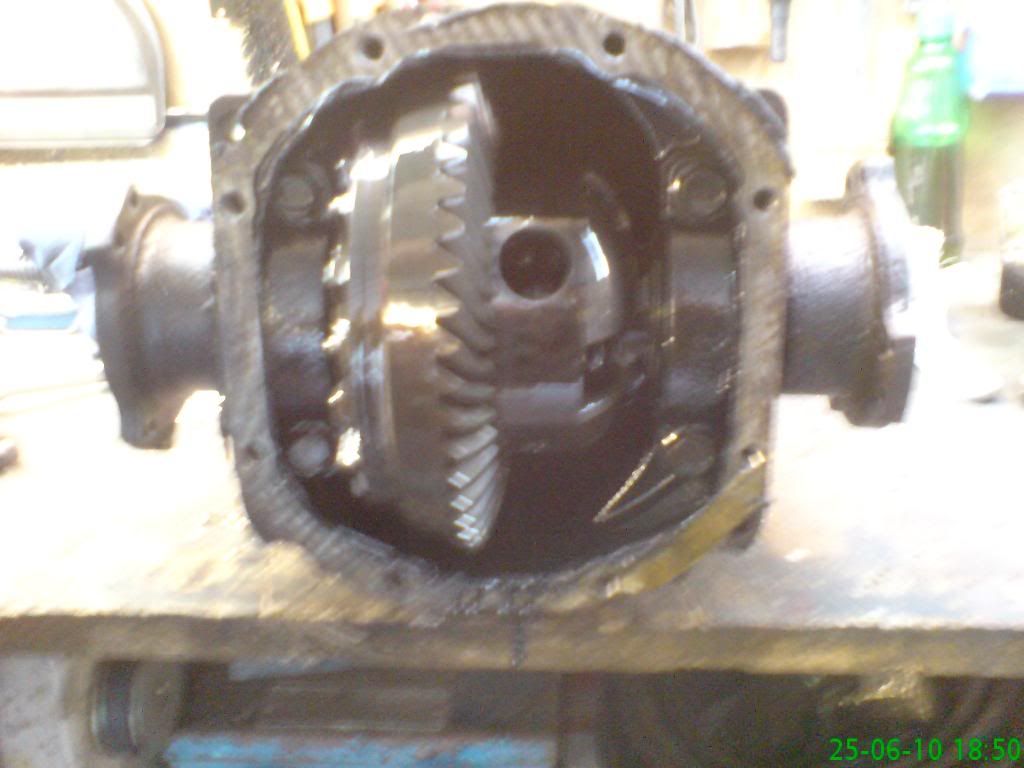
    remove the rear cover bolts and remove cover:


    Remove caps, pull out the diff and all shims, label shims and caps so you refit them the same side (I kinda forgot)


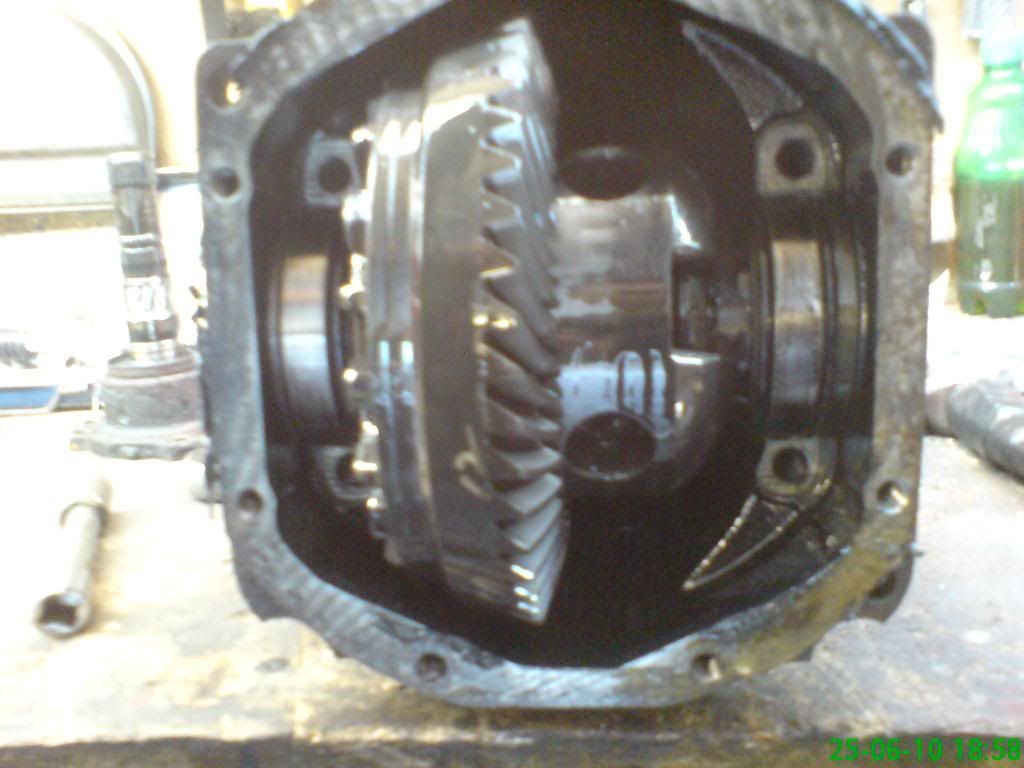
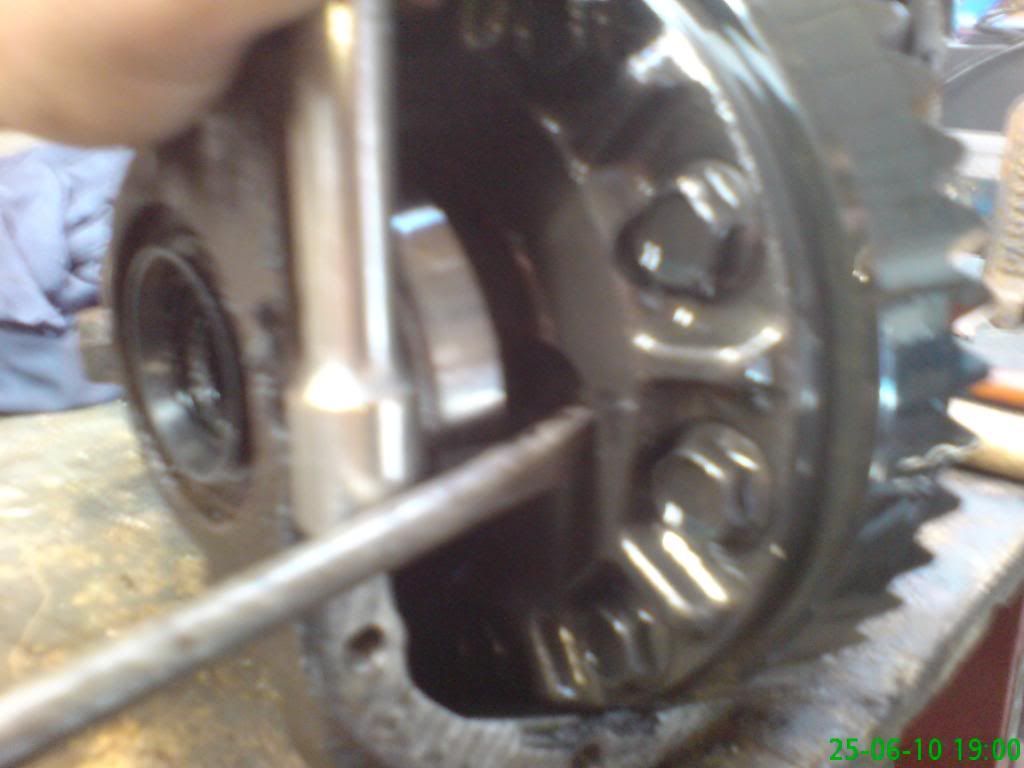
    Undo the ring of bolts:

    This has to be one of the hardest things iv done in my entire life, I put a breaker bar on one bolt, wedged it under a heavy table loaded with crap (not ideal as this ends up tightening), bit of wood under the diff, then a ratchet/pole to undo all the other bolts

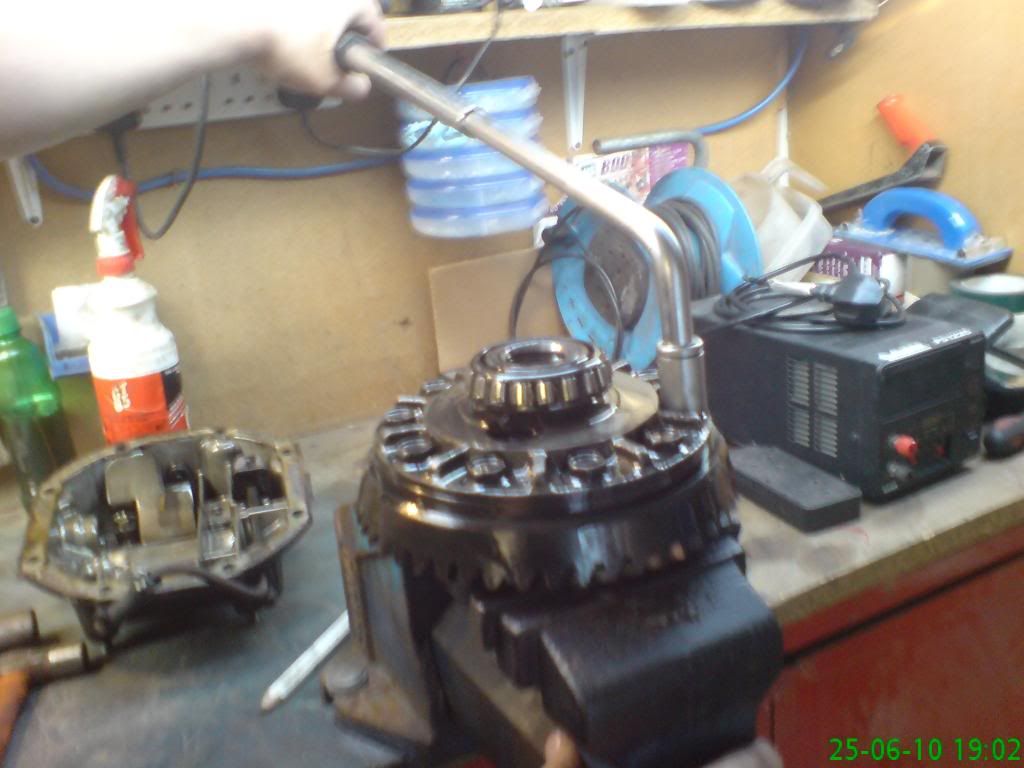
    Undone the last bolt by sticking my wheel nut tool through a hole and it came out ok, kinda like this:


    I didnt have airtools at the time but I think gunning them off would be the way to go.

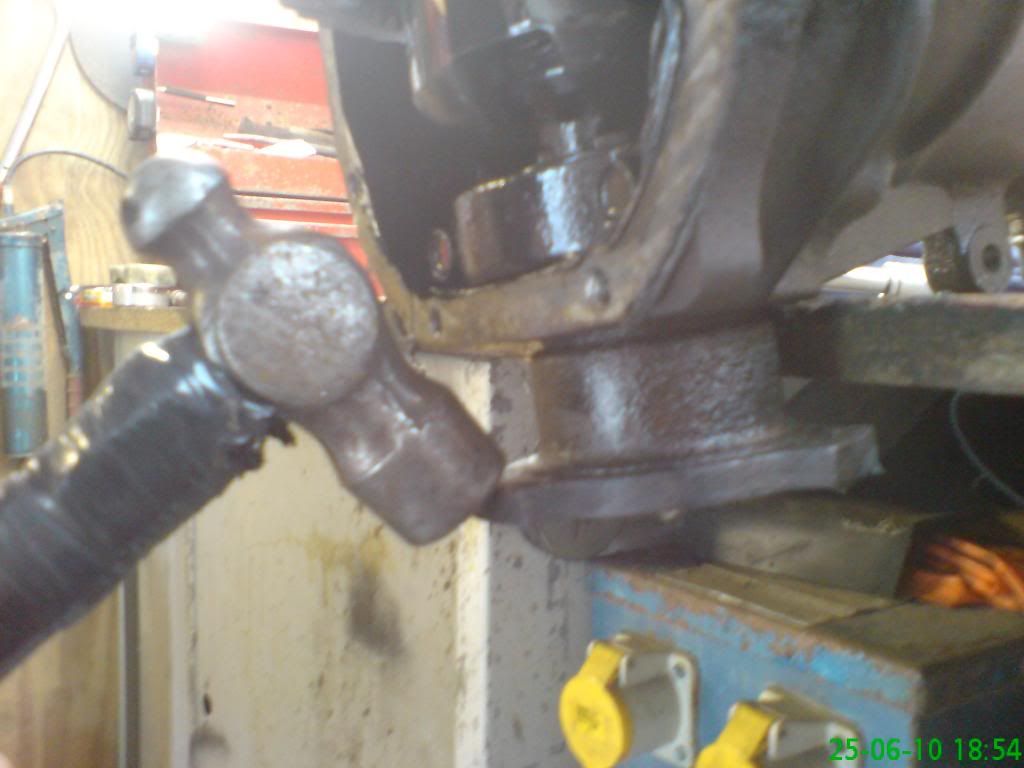
    Tap the ring on opposite sides to knock it off:


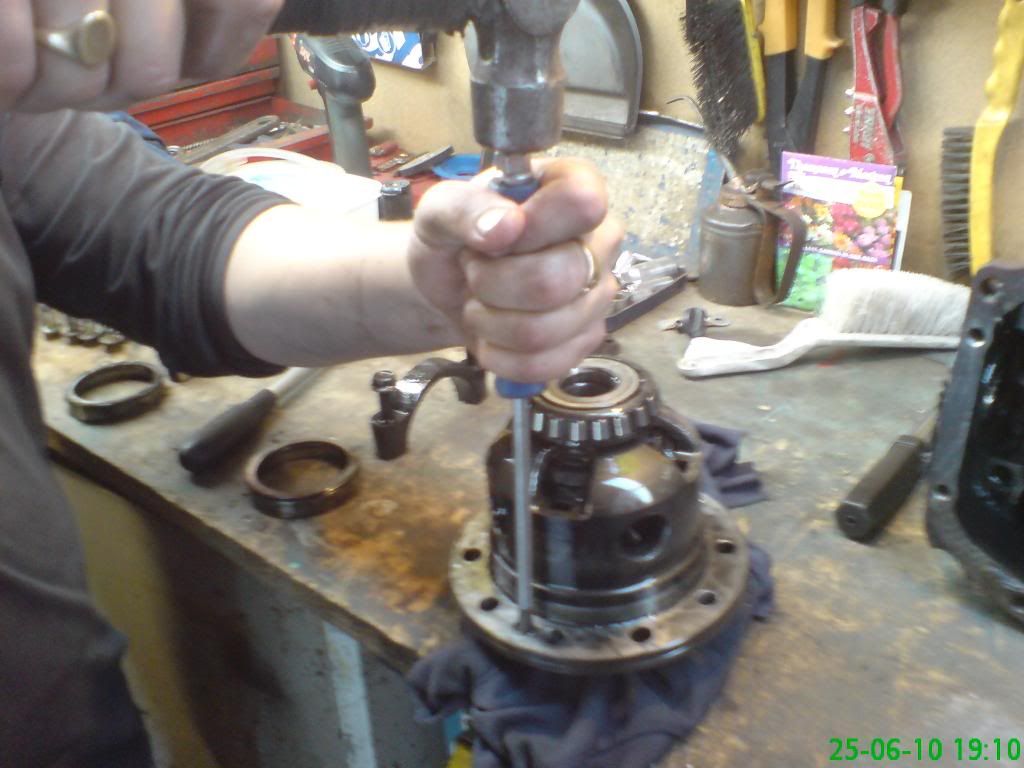
    Flip the diff round and undo these 2 screws, they are FT so use a properly fitting screwdriver or you will round them:


    Twist the 2 sections so the holes are mismatching the tap with screwdriver to seperate:


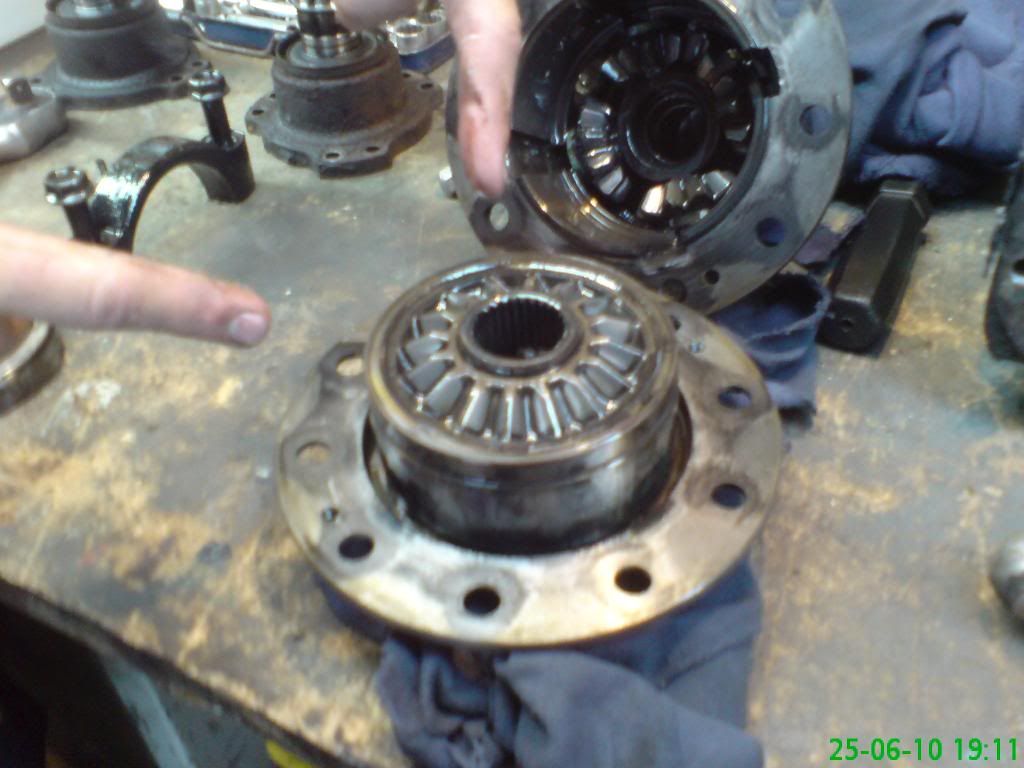
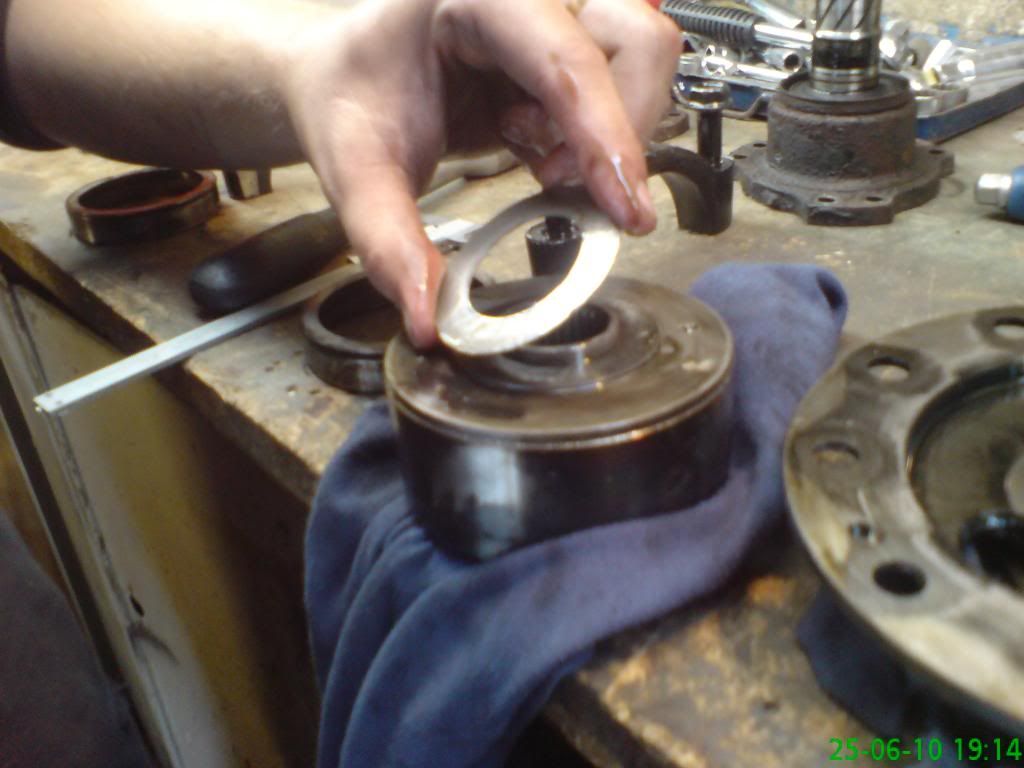
    Part of being a man is not reading things properly and some proper stupidity, that in the middle is not a shim! Try as hard as you like but you will never get it out as its one solid piece
    EDIT: as al said below it is a shim but no need to remove it anyway.


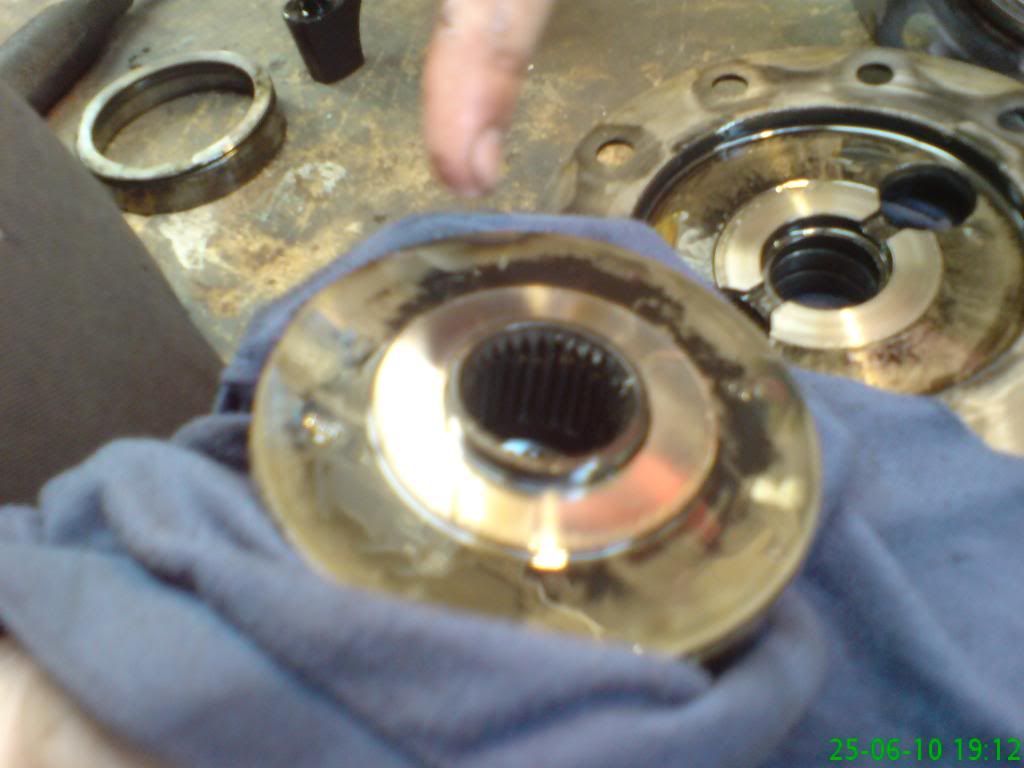
    lift it out, you are now holding the viscous unit that does all the majic, I find it amazing this little unit has to deal with so much abuse:


    Flip the diff over and knock out the gear thingys:


    And voila! there is your stock shim:


    Either double up with a new shim or chuck in your new thicker shim, as said earlier im only refiting my new 1.4 shim and leaving out the old one:


    Smother some diff oil onto the shim then put it in, 4 gear thing next, then viscos unit, then redo the 2 screws FT!:


    Refit the Crown wheel, use some locktight on the bolts and tighten the bolts as much as possible using a normal sized ratched in a cris cross pattern, then get your breaker bar/ torque wrench out and torque them up 132-152nm, I done them to 138nm (got bored of taping the + button:
    EDIT: Refit the longer driveshaft through to line everything up before tightening, guess what I didnt do


    Tap out the old seals:


    UPDATED the thread but cant post more than 30 images in one thread
    So I split it into 2 parts, see below
    Last edited by immy21; 11-08-2010 at 16:51.

  2. #2
    Guest al.'s Avatar
    Join Date
    Apr 2009
    Location
    Worthing
    Posts
    3,369
    Rides
    0
    you forgot an important step dude - before you tighten the crown wheel bolts up, put the longer of the two shafts all the way through to line everything up. sometimes it's ok without doing this but sometimes you'll have problems fitting the shafts back in. if you line them up first then you're guaranteed not to have a problem

    the bit on the back of the VC is a shim, it's just very hard to get off due to both surfaces being very flat and having sticky oil holding it in place. you can just put the replacement shim here instead of the other side, or put the extra shim on top of that one. some people even put an extra one each side to fully lock a worn diff but don't expect it to last long

    i put an extra 0.80 on top of stock in clives and it's pretty much locked because the diff was absolutely mint with no wear. it had done about 45k in an auto driven by an old lady. if the diff is older and has had abuse then you'll need a thicker shim. it's hard to gauge, but there is a long method for doing it properly in the FSM. the diff i'm running at the moment was a bit tired but not too bad, and it's also got an extra 0.80 on top of stock. it's pretty much locked, the only time it hasn't locked is after some 4th gear entries at 90mph when it got fookin hot. it's looser now than when i first reshimmed it though

    easiest way to get it out of the case is to get a couple of lever bars in the driveshaft holes and push it out with a mate holding the case down - this tends to knacker the driveshaft seals though so remove them first or replace them. the seals are just pushed into the holes so tap one side with a screwdriver and hammer to spin them round a bit, then pull em out. new ones need to go in square and flush with the casing

    when you're taking it out make sure you mark the spacers and bearings as they're linebored by nissan, ideally they need to go back the same way. getting the bearing spacers back in is a bit of a bitch but they do go. easiest way is to put the diff in the case without spacers then tap the spacers home while wiggling the diff up and down with a breaker bar through the driveshaft holes. and the spacers are thicker on one side so don't get them muddled up or the diff won't go in

    if you wanna do it properly then there are also methods in the FSM for checking the pinion/crown wheel engagement and adjusting the height, as well as the usual backlash check

  3. #3
    Guest clive's Avatar
    Join Date
    Jul 2009
    Location
    chichester, west sussex nr portsmouth
    Posts
    11,439
    Rides
    0
    ^^^Al. is a friggin legend

    my diff is so tight it might as well be welded

    but at least this way the weld cant snap on me

  4. #4
    Guest immy21's Avatar
    Join Date
    Mar 2009
    Location
    Edinburgh
    Posts
    7,176
    Rides
    0
    Good tips al il have a play later and hopefully will get the longer shaft through

    As for not mixing up the diff/case spacer things, I found that out after id removed them and muddled them up

    Any way of fiquring out what sides they go on? Is it the really thick or thin spacer that is sized to spec?
    Last edited by immy21; 27-05-2010 at 12:01.

  5. #5
    Guest al.'s Avatar
    Join Date
    Apr 2009
    Location
    Worthing
    Posts
    3,369
    Rides
    0
    it's all linebored so you'll never get it back exactly right without marking them, but it'll be ok to put them back without lining them up again - if it's out at all then i'd think they'd just get rotated round into place by the movement of the diff. iirc the thick bearing spacer goes on the same side as the back of the crown wheel, but you'll only be able to put the diff in one way anyway, so if it doesn't go in then swap the thick spacer to the other side. it's the shims that go with each spacer that are sized to spec

  6. #6
    Guest
    Join Date
    Oct 2006
    Location
    N Ireland
    Posts
    4,686
    Rides
    0
    can someone measure the shim needed. I shall maybe make some in work out of good hard metal as heard after a while they wear down a bit

  7. #7
    Guest al.'s Avatar
    Join Date
    Apr 2009
    Location
    Worthing
    Posts
    3,369
    Rides
    0
    the thickness depends on how worn your diff is and how locked you want it. the shims don't wear beyond taking the oxide off the surface, it's the teeth on the vc, the teeth of the planetary gears, and the locking action of the vc itself that wear out.

    i will just add that overshimming a diff as we do to get it locking is a bit of a botch. all it does is jam the teeth of the vc into the planetaries which means increased wear (or none at all if it's fully locked....) and is no replacement for a proper 1.5 or 2 way diff. however it costs around £7 to do instead of £700 and when you're skidding it feels fine. providing you do it correctly it's predictable and tight, which is all you really need.

  8. #8
    Guest
    Join Date
    Oct 2006
    Location
    N Ireland
    Posts
    4,686
    Rides
    0
    Could someone stretch a vernier on one and get me OD, ID and thickness ?

  9. #9
    Guest al.'s Avatar
    Join Date
    Apr 2009
    Location
    Worthing
    Posts
    3,369
    Rides
    0
    you pikey

  10. #10
    Guest immy21's Avatar
    Join Date
    Mar 2009
    Location
    Edinburgh
    Posts
    7,176
    Rides
    0
    Quote Originally Posted by eager View Post
    Could someone stretch a vernier on one and get me OD, ID and thickness ?
    I dont know/have a vernier, nearly OD before and keep losing my ID, thinkness? no comment, sorry.

  11. #11
    Guest Dunkz's Avatar
    Join Date
    Nov 2005
    Location
    Montrose/Scotland
    Posts
    7,173
    Rides
    0
    Quote Originally Posted by eager View Post
    Could someone stretch a vernier on one and get me OD, ID and thickness ?
    I'll get you one in the next day or two dude, I ordered a shim the other week but my turbo gasket didn't get into stock till today so hopefully they might arrive tomorrow, maybe saturday.

  12. #12
    Guest
    Join Date
    Oct 2006
    Location
    N Ireland
    Posts
    4,686
    Rides
    0
    Quote Originally Posted by al. View Post
    you pikey
    If can manufacture components that go in military aircraft im sure a washer wont be too hard

  13. #13
    Guest Dunkz's Avatar
    Join Date
    Nov 2005
    Location
    Montrose/Scotland
    Posts
    7,173
    Rides
    0
    62.25mm od, 38.4mm id

  14. #14
    Guest EMENEAR's Avatar
    Join Date
    Jul 2009
    Location
    Reading, England
    Posts
    1,558
    Rides
    0
    can we have this sticky'd?

  15. #15
    Guest immy21's Avatar
    Join Date
    Mar 2009
    Location
    Edinburgh
    Posts
    7,176
    Rides
    0
    PART 2

    Greese (molydenum) then Gently tap in the new seals, I pushed them in by hand then used a flat head screw driver on the harder metal part, to NOT tap on the edge of the seal, these are soft


    chuck your diff and shims back in:


    note. these shims move the diff closer/further away from the pinion (not in pics) and take up any slack, other shims in the diff move the main pinion closer and further away from crown but these are left untouched.

    This little cnut scared the crap out of me, jumped out from under the hunt then jumped head on into the fence, finaly just sat there chillin for ages


    Greese and refit drive shafts:

    note. the pics are wrong the shorter shaft goes on the crown side, found this out after plenty

    Torque the caps around 88-98nm:


    I used a little silicon sealant then refit cover, torque to 39-49nm:


    If you removed you abs sensor then when refiting torque to 11-16nm:


    And your done! When researching I struggled getting my head around shimming untill I seen pics but it aint too bad a job eh?


    So how does it drive? F knows! It will be another couple of months before my baby is back on the road as im in the middle of a never ending refurb.

    Share how your shimed diff feels and feel free to correct any dodgy info I provided
    Last edited by immy21; 01-07-2010 at 00:27.

  16. #16
    Guest Woodys13's Avatar
    Join Date
    Jun 2006
    Location
    Cardiff
    Posts
    3,176
    Rides
    0
    I rebuilt a diff for Rhys_sx and added an extra shim to help lock it up a bit more, so thought i'd take pics along the way incase it helps anyone else in the future

    First off you need to remove the diff from the car and drain all of its oil out. Didnt take pics of thiss process as its very simple anyway

    Once you have the diff on the bench you need to remove the back plate:


    Once all the bolts are undone a little tap with a hammer around the edges helps free the back plate off, then you should be able to see the stinky diff inside the casing (diff oil stinks!)


    Now we need to remove the half shafts (label them left and right for refitting correctly later) this is simply done by hitting them out with a decent hammer like so....


    Once they are out you need to remove the bearing caps:


    Then a big flat headed screwdriver can be used to carfully lever out the diff itself, this bit can be awkward but it will be easier to see how to get it out as youre doing it. When removing the diff be sure to keep the bearing outer races and spacer shims together and not mixed up with each other!


    Once the diff is out, get it held nice and tight in a vice so the crown wheel bolts are on top, a long bar will be needed to undo these as they are fukin tight!


    Once the crown wheel is off turn the diff up the other way again and you will see two cross head countersunk screws. These will be very tight too, so find the biggest screw driver that fits snugly in the screw. Then using a hammer on the end of the screw driver tap it to provide a shock to loosen the screw easier, as you dont want to round these off


    Lift the top off the diff and you will see the viscous coupling, this is the part that is supposed to transmit drive to both wheels.


    Lift it off and underneath you will see the origional shim


    This where we are going to add our extra shim (smear some diff oil over the new shim when you put it in)


    Rebuilding is the same procedure as we have just done to dismantle the diff.
    Be sure to use thread lock when putting the bolts back into the crown wheel.
    Instant gasket can be used to seal the back plate back on also.

    One thing worth mentioning is the hoses that run to the diff oil cooler can simply be joined to each other as 99% of the time nissan diff oil cooler NEVER work ! so it can be bypassed and the cooler etc can be binned

    I dont think ive missed anything out, if you think there is something ive not coverd please let me know and i'll rectify it

  17. #17
    Guest Woodys13's Avatar
    Join Date
    Jun 2006
    Location
    Cardiff
    Posts
    3,176
    Rides
    0
    Just thought i'd add my own littel how to guide aswell more info cant be abad thing

  18. #18
    Guest immy21's Avatar
    Join Date
    Mar 2009
    Location
    Edinburgh
    Posts
    7,176
    Rides
    0
    More pics/ info is always a good thing

  19. #19
    Guest sr20spam's Avatar
    Join Date
    Aug 2008
    Location
    wirral
    Posts
    616
    Rides
    0
    I want my diff tight what shims do I get?

  20. #20
    Guest al.'s Avatar
    Join Date
    Apr 2009
    Location
    Worthing
    Posts
    3,369
    Rides
    0
    tight but not completely locked - replace the stock shim with a 1.2mm shim.

    as mentioned DON'T FORGET TO LOCTITE THE CROWN WHEEL BOLTS. clean the bolts and threads with brake cleaner to ensure the loctite sticks. good write ups

Posting Permissions

  • You may not post new threads
  • You may not post replies
  • You may not post attachments
  • You may not edit your posts
  •