Been toying with the idea for a while now. Well since my previous 200. Finally grew a pair and bit the bullet. I was dubious as i didnt really fancy buying a new headlight should i break it or not like it. Decided if i didnt like it id have to do it again and buy some chrome paint so had no excuse.
I searched on here for a guide but only found bits of conversations or people saying its a ba**ard of a job. After speaking to Adam (MisterAdam) and Jon (Jon200) i bit the bullet and shoved my headlights in the oven.
Thought id take a few pictures for reference of people in the future.
Obviously, take the headlights out.
All around the edge of the headlight are metal clips which hold the lense to the body of the light. Using a thin flat bladed screw driver carefully prise these off. Watch your eyes. One was particularly tight and when it did go, caught me square between the eyes.
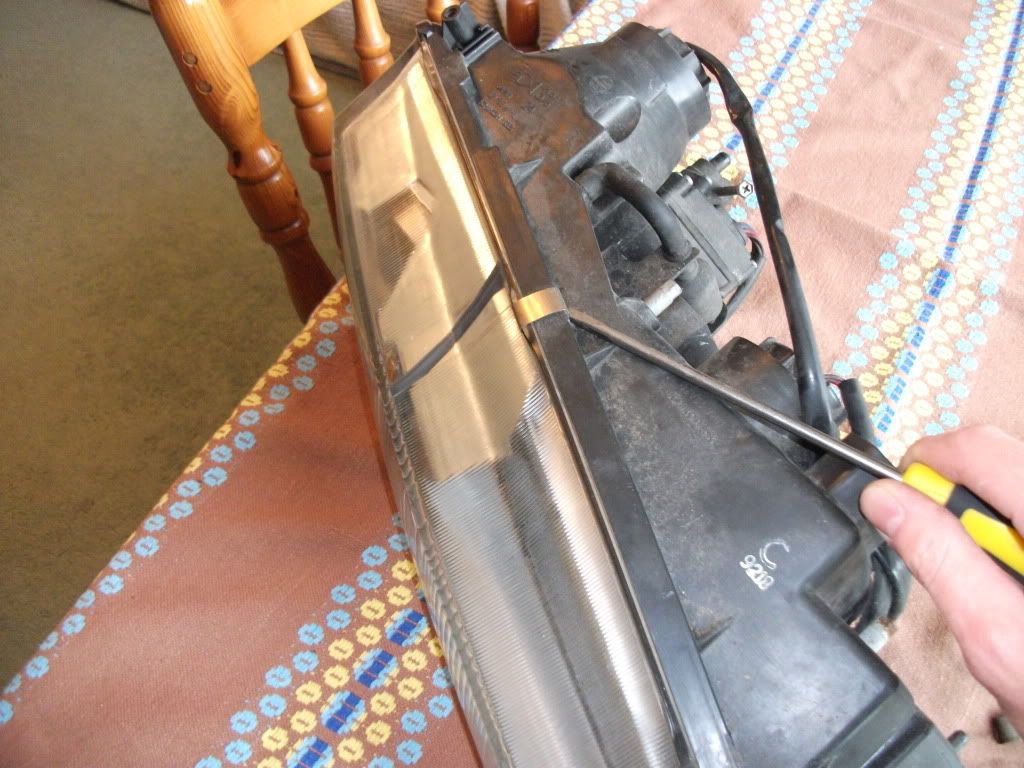
(check the retro table cloth)
From memory there are 8. 3 on the top, 3 on the bottom and one on each end.
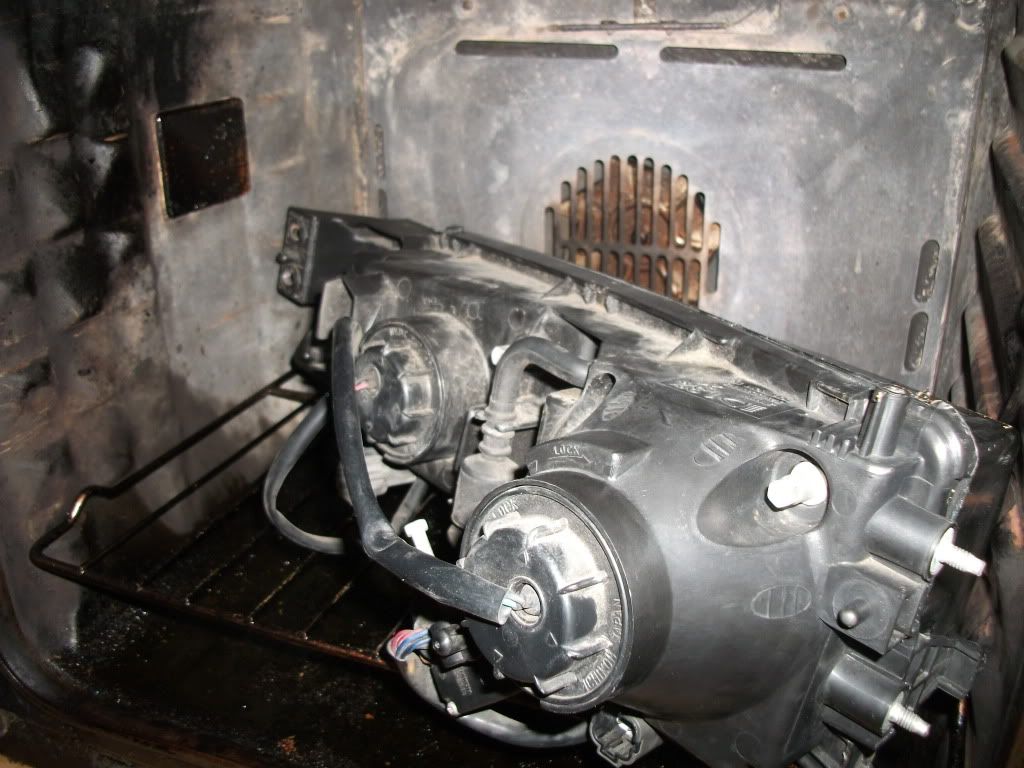
Next is the interesting bit. I pre heated the oven to 100 degrees. Once its up to temperature, place a headlight in there. Be carefull so the plastic body of the light isnt pressed against the edge or touching anything metal. Our oven was too small. Bit of a design fault by 'Tricity Bendix' i think. All i did was put it in and close the door as far as possible. Check the light regularly until its hot but not too hot to hold the glass.
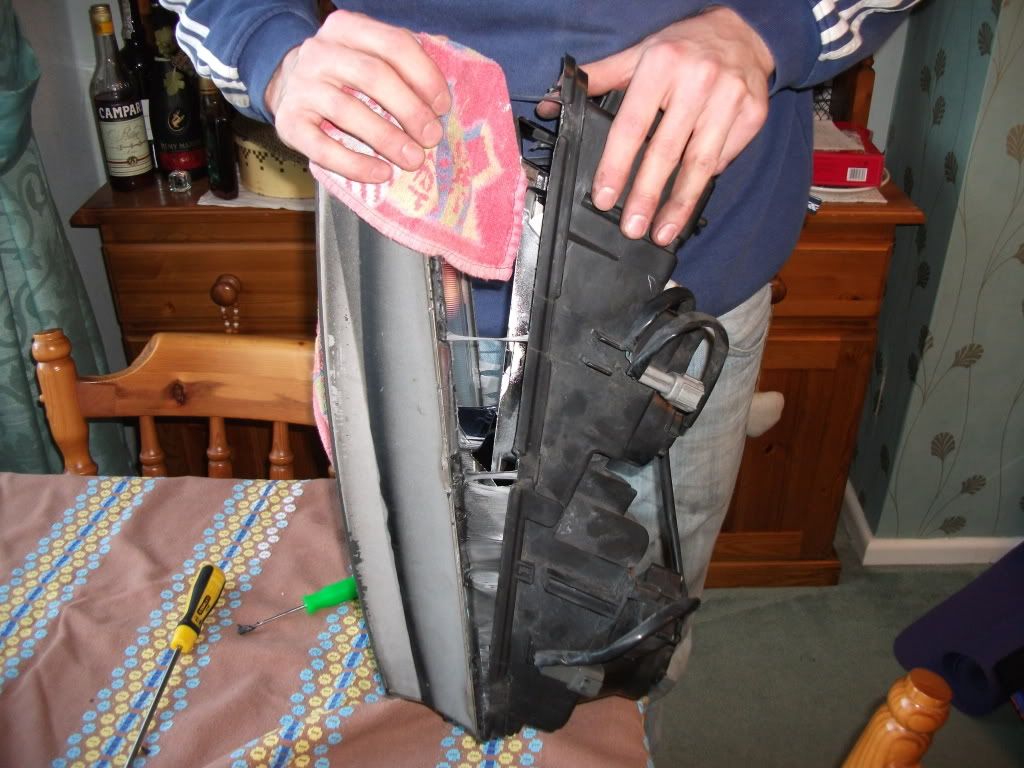
Using a fine screwdriver and an old table knife, slowly start to separate the glass from the plastic unit. I started on the bottom luckily as the glass is uber delicate and kept chipping. Nothing drastic luckily. I had to return it to the oven to warm the end that was hanging out the open door. I found the safest plases to prise from were where the clips were, as the glass is thicker here; or the corners. After 5 or 10 minutes of gentle prising i had one end in which i managed to get my fingers. From here i slowly but firmly pulled the two halves apart.
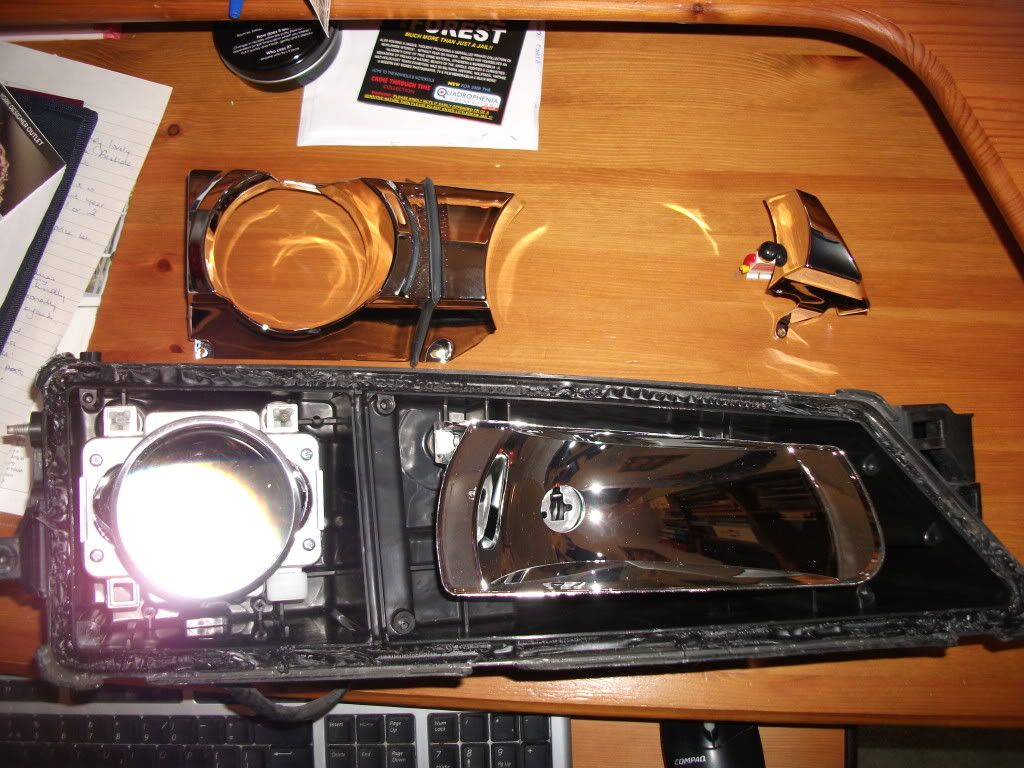
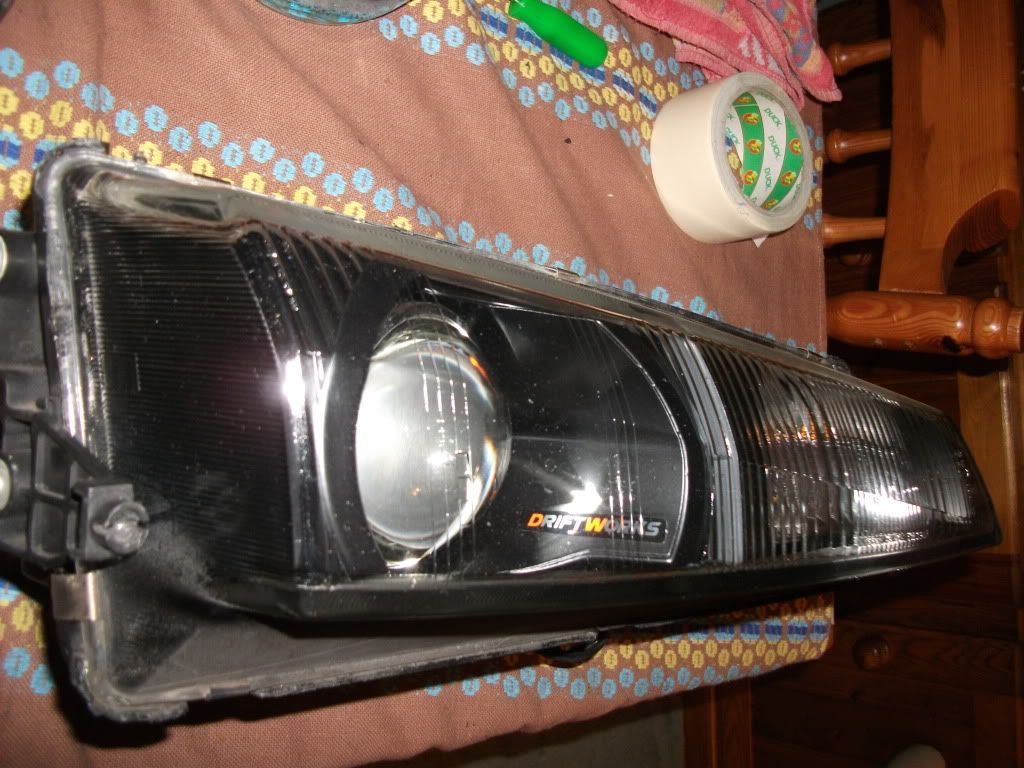
Your then left with this:
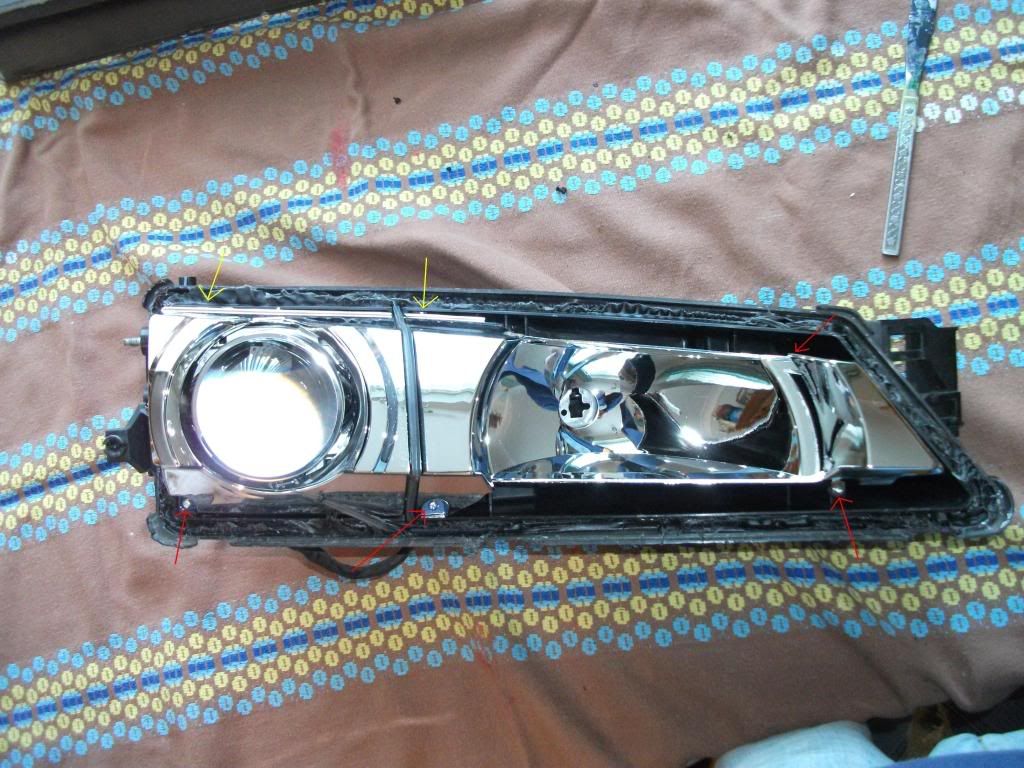
The red arrows are pointing to the screws you need to do with a small phillips scredriver. The yellow arrows point to two plastic lugs which require a little gentle persuasion to be released.
You'll then be left with this:
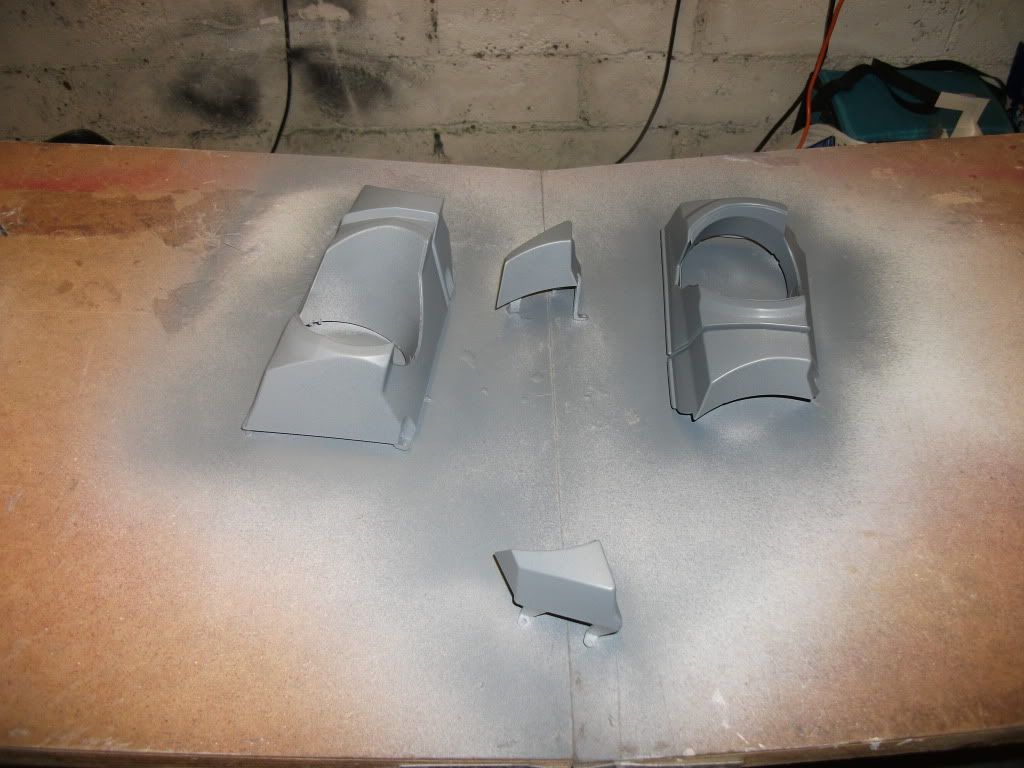
There is a rubber seal attached to the bigger piece of plastic. Slide this off.
I then used some wet and dry to give the paint a key. The silver on the plastic is only very thin and comes off easily.
They were then primed using plastic primer, before being sprayed satin black.
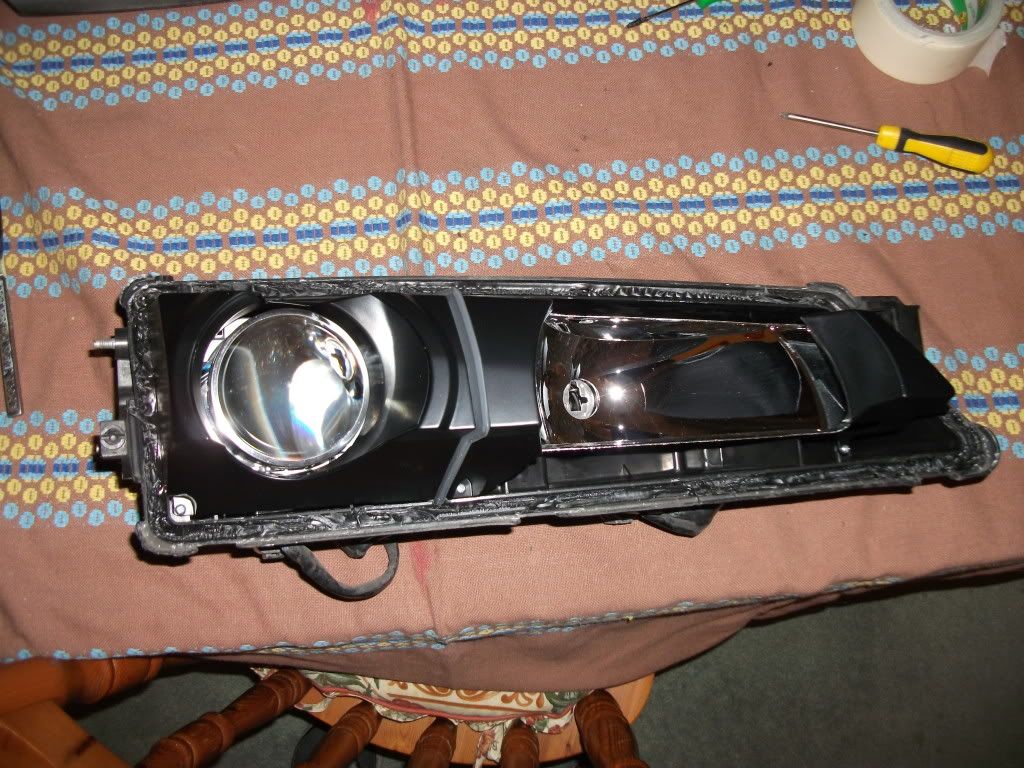
Once dry the seal was re applied and then they were screwed back into place. (not before i managed to put a dirty great thumb print in one- respray
)
Then place the glass lense back over the headlight unit and place back in the oven to re-soften the gunk.
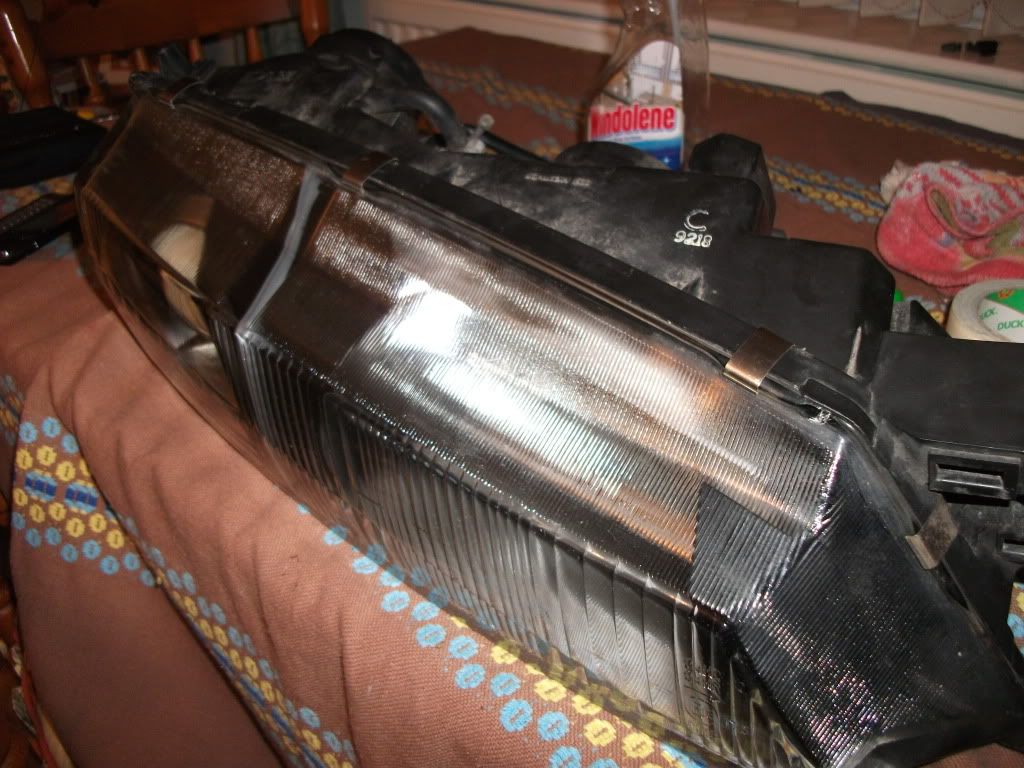
Once warmed through again firmly press the two parts together and employ your little sister to put the clips back on. (Hoping that if they ping off again that they catch her between the eyes and not you)
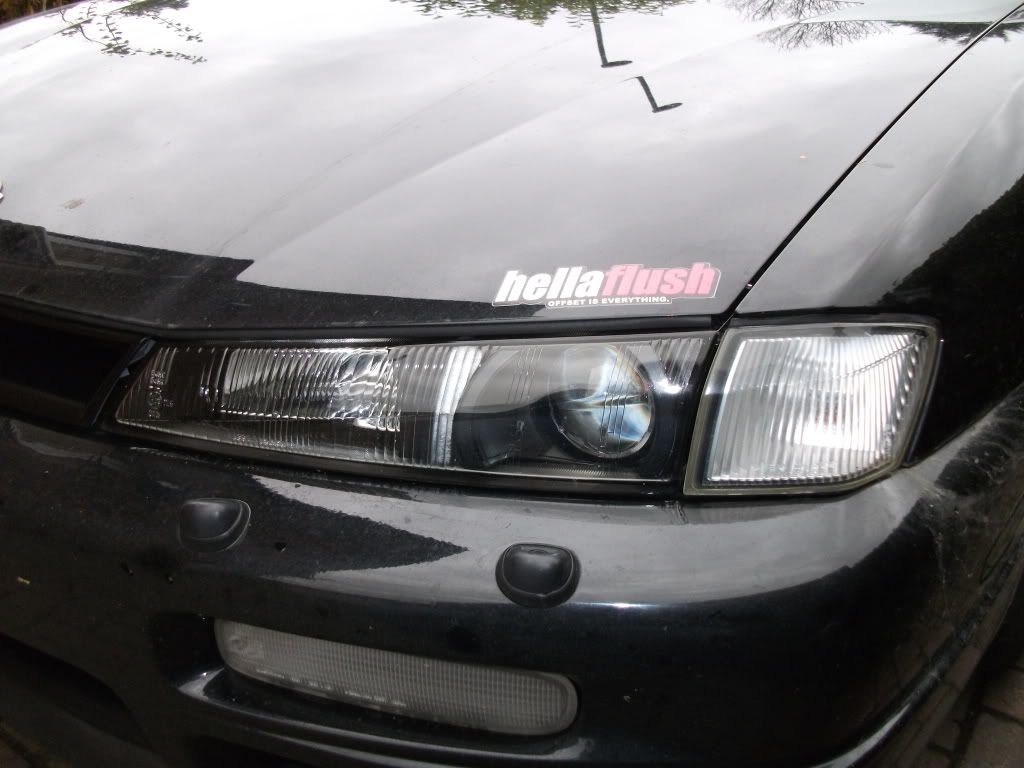
TA DA !!!
Next morning mine had developed a bit of condensation. Hopefully its just where the paint wasn't 100% dry. If not they'll be back in the oven and then have some silicone in the join too.
Il get some proper pictures when its clean.
Do i get my blue peter badge now?


 Reply With Quote


 I keep meaning to do this to mine, but knowing me I'd end up breaking them both


 In fact, I swear you get a better, sharper beam cutoff on dipped beam. The dipped beam are projector, so the reflector type bits are just there to look pretty, and on the main beam the bits you paint that are near the housing are so small it's irrelevant, and I don't think they actually serve any purpose on the beam whatsoever.