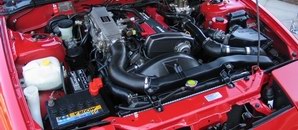
Don't worry too much about fitting the exhaust Pete, we'll have plenty of people to push it onto the trailer and the first thing I'm going to do at the other end is take it straight off again
Some good progress today by the looks of it

Don't worry too much about fitting the exhaust Pete, we'll have plenty of people to push it onto the trailer and the first thing I'm going to do at the other end is take it straight off again
Some good progress today by the looks of it
1993 [L] RS13 200SX
2003 [53] MX-5 Angels
2004 [04] E63 645i
SXOC Member #199
Sorry to comment here pete, can i just ask a little advice? I need to start cleaning up the back half of mine as my subframe bishes are falling apart!
So i am thinking strip down wire brush in a grinder to clean up and remove any surface rust. Cut out and weld any patches required.
Electrox prime any bare metal then this is where i need advice...
Hydrate 80 -- epoxy mastic -- 3m schutz stone chip.
Is that the correct way to do it other than i should do the whole underside at once!
Thanks in advance Rich
Originally Posted by Pete C

It will leave with dignity - on the key
In fact you wouldn't know there was a problem with the engine until it's warmed up and you hit the 3-4K rev mark and back off.
Not be long now mate, Ive more or less sorted it. If the truth be known, I would have taken more parts off it but since it going to an "old faithful" SXOC member, I didn't have the heart
Hi Rich,
No probs asking the questions on the thread. Give me a few days to answer your questions as I am focusing on sorting the S13 out for Pete ATM. I have taken a few pics of rust in it's various stages and plan to post up some techie info on rust as well as methods to sort it.
It's a bit more involved than meets the eye
In the meantime, not done much on this car.
I bought some paint stripper and it's pretty much useless. Manufacturers are limited to the chemicals they can use so I went for plan B
When I clean the spray gun out with thinners, I pour it into a 5L tin. This strips paint no prob
After a quick wire brush
It's ready for the deox tank
This is the degreaser I use
It gets rid of the crud pretty quick
More soon
Pete
SXOC Member Number : 317
When you do the front suspension, take a look at Apex bushed adjustable arm kit (coat it with FS365 though as otherwise the nuts go rusty PDQ) and get a set of lower arms from Camskill. They come with new balljoints for not a lot more than just a set of balljoints. Also, I can recommend Tein track rods but remember you need both the rods and the ends as they have a different thread to OEM on the hub end.
I had a standard set of shocks I could have let you have that had done 10K miles then sat in my loft for 9 years but I sold them 2 weeks ago")
I beg to differ
Maybe we should have a sound off when you get it fitted, Matt
IMO, that one would look out of place on a standardish car. Also, how will your neighbours feel about it ?
Twin exit Mongoose is barely discernible visually and quiet enough on tickover that you can sneak home at midnight without waking the kids.
Yes sound off!
My neighbours are actually ok about loud exhausts, I use a silenced down pipe so I'm hoping it's not absolutely ridiculous, my last apex system was quite loud but you could keep it quiet if you just poodled down the road at night
Will have to wait and see,
Extremely jealous of the tomei ti
I helped Pete out today by clearing his drive a bit
Pleasure to meet you finally, thanks again for everything
1993 [L] RS13 200SX
2003 [53] MX-5 Angels
2004 [04] E63 645i
SXOC Member #199
Pleasure to meet you too and I'm so glad it's gone to a good home
S13's/180SX's are getting really thin on the ground now so it's important members pool resources to keep these cars alive
Some info on rust.....
Removing rust can be a bit more challenging than meets the eye. Light surface rust is pretty easy to get rid of as a wire brush will make short work of it. Once it gets a grip though it accelerates exponentially. For metal to rust, it needs oxygen and moisture. This occurs when the protective coating is poor or damaged. One it gets a grip, the rust layers expand like this.
The result of this expansion is to create an air gap and allow moisture to trap between the layers of rust. Since there is little in the way of ventilation, the corrosion rate accelerates.
This is the part thats not common knowledge. As the process continues, the carbon content of the steel breaks down to its natural state. All steels have carbon in them and dependant on the carbon content of the particular steel, depends how badly things can be effected. This is a fuel tank strap from the S13 that has had the paint and surface rust removed using an abrasive plastic brush.
The surface rust has gone but these large black areas are where carbon has formed. Its easy to see that the brush hasnt even scratched the surface as its so hard. Even blasting with fine media wont budge it. Scrape the carbon with a screwdriver though and the red rust is visible behind the carbon.
This is all pretty easy to sort with a flat piece of mild steel off the car, as Deox C will soften the carbon. Its just a case of scrubbing it and re soaking until its gone.
With a shell however its a bit more difficult. The only way I have found to penetrate the carbon is to use Deox Gel. Its time consuming to keep scrubbing and re applying the gel.
This leads me on to rust converters. Carbon is more impervious than rust and leaves me with doubts about rust converter fluids penetrating the carbon to reach the rust behind. If youre in for the long term, as far as I can see its best to get rid of it all and apply a zinc based primer to clean steel. Its also worth pointing out that for a zinc rich primer to work properly, it needs a good electrical connection to the steel. The reason for this is that a tiny electrical charge occurs when two dissimilar metals are in contact with each other. The result is that the zinc sacrifices itself to prevent the steel rusting.
Its tempting to wire brush a corroded piece of steel, apply a rust converter then prime with zinc but the reality is, it wont work properly as the rust converter will provide electrical insulation for the zinc. Belt and braces doesnt work in this case.
More updates soon
Pete
SXOC Member Number : 317
Top work as ever Pete.
When I started my project I called bilt hamber and spoke to one of their technicians about the best way to use their products and they said it was fine to use their hydrate 80 to help neutralise any remaining rust and provide a primary barrier and then over coat with electrox zinc primer. They said that the electrox would have the cathodic action if the primary barrier, hydrate 80, got damaged or if any corrosion broke through. This is helped by the fact that the electrox is "self healing".
I can't say it's the same for other products but that is what bilt hamber told me about their products. The technician used the example of a steel hull of a ship. He said it is often impossible or uneconomical to replace corroded steal, unless very bad obviously, so you use the the hydrate 80 to stop/reduce corrosion and then protect and reduce corrosion with electrox. He said their products were initially designed to be used in harsh marine environments and to be used as a complete system if needed.
Hmmm, maybe I'm going OTT on the prep by getting it all out. This is the fuel tank strap before primer
Removed the fuel, brake and clutch pipes
The clutch damper pipe is split. If anyone has one, I need another.
More of the back end prepped
These metal plugs under the back seat are notorious for rust
I will either weld plates in, or fit rubber bungs.
Pete
SXOC Member Number : 317
Paint run today, got loads of small parts painted in 2K

Pete
SXOC Member Number : 317
I took the fuel pump out of the tank and the O ring had swollen quite a bit. What happens is the solvents in the fuel are absorbed by the O ring creating the expansion. I put it on the boiler for a few days to allow the solvents to evaporate and now it fits
The tank is two halves roll welded together
The first thing to do is sort the rust in the seam so I split it down to the roll weld
Then gave it a quick clean up with this plastic brush
Came up like this
Syringe to inject Deox gel
I have covered it in cling film to stop the gel drying out. Needs checking in 24 hours.
Pete
SXOC Member Number : 317
I really need to stop spending money on my daily so i can concentrate on my project.
At some point will you write a guide on how to deal with dust for beginners like myself?
I have no idea what deox stuff is or the other stuff you have used. Im not sure how to check seams etc...
My intention was grind back surface rust (cut out bad rust), use krust, prime it, paint it, then use some sort of coating like waxoyl or something.
I would like top have a bit of insight in to what to do to mine as i build it. I want to try and do as much of the rust repair as possible by myself. Im currently trying to find a little clarke pro 90 gas mig welder and getting pointers from a guy at work but i would like to know how to fight and prevent rust not just cut it out after its already got in
Sent from my SM-G920F using Tapatalk
I have the whole clutch damper unit that I was just about to throw away! Which bit do you need?
It's worth pointing out that everyone has different methods of rust removal / treatment. I wouldn't however mix techniques from different members as they might not work.
Everything I know is posted in these threads
Full on rust removal, S14a shell in good condition so no welding at all required. Fairly straightforward
http://www.sxoc.com/vbb/showthread.p...ve-S14a-refurb
Full on rebuild, completely rotten, full blown shell re manufacture. Mini but to be honest, the car makes no difference as far as rust removal / re fabrication is concerned
http://www.theminiforum.co.uk/forums...-bolt-rebuild/
Hope that helps
Just this pipe

Pete
SXOC Member Number : 317
If you pay for postage it's yours pm me some details and we will sort it out
Thank you
I want to get the car water tight before winter. S13's leak into the boot because either the seam sealer is cracked along the hatch surround, or the hinge seals fail. The water runs down inside the C post and ends up on top of the rear lights. It looks like it's the boot seal but more often than not, it's coming from the hinge area.
First job was to remove the headlining and disconnect the cables
Hatch off
This is where the hing mounts to the shell
The hinge has a small recess in it. The only thing sealing it is a bit of butyl
Sealant cracks along here OS
NS (Sorry it's out of focus)
Rust removed
Aerosol is convenient and saves cleaning the spray gun out
Cleaned up where the hinge mounts to the hatch
Then slapped a load of Sikaflex on the shell. I also put a bead around the top of the hinge to stop water running off the roof and into the hinge
British weather can't be trusted

Pete
SXOC Member Number : 317
Sprayed across the top in 2K solid, this will be finished in 2K base and clear when I respray the car
Top of hatch
Hinges
Filled the spoiler with sikaflex. I forced it in through the bottom to fill any voids

Pete
SXOC Member Number : 317
 Posting Permissions


 Reply With Quote