Page 2 of 5 FirstFirst 1234 ... LastLast
Results 21 to 40 of 95

Thread: Project Ruby a.k.a Neil F's old car

  1. #21
    Guest
    Join Date
    Mar 2004
    Location
    Helston, West Cornwall
    Posts
    24,438
    Rides
    0
    Hot Start Solenoid removal.


    The S13 is fitted with a hot start solenoid (aka HSS aka cold start solenoid). The solenoid sits between the fuel pressure regulator (FPR) and the plenum and (I think) increases the fuel pressure at the FPR (by reducing vacuum) when the engine is started from warm to avoid fuel vapourisation.

    I don’t imagine that there are that many S13s left that still have this fitted as it seems to like getting stuck and it makes very little difference to the day-to-day running of the car.

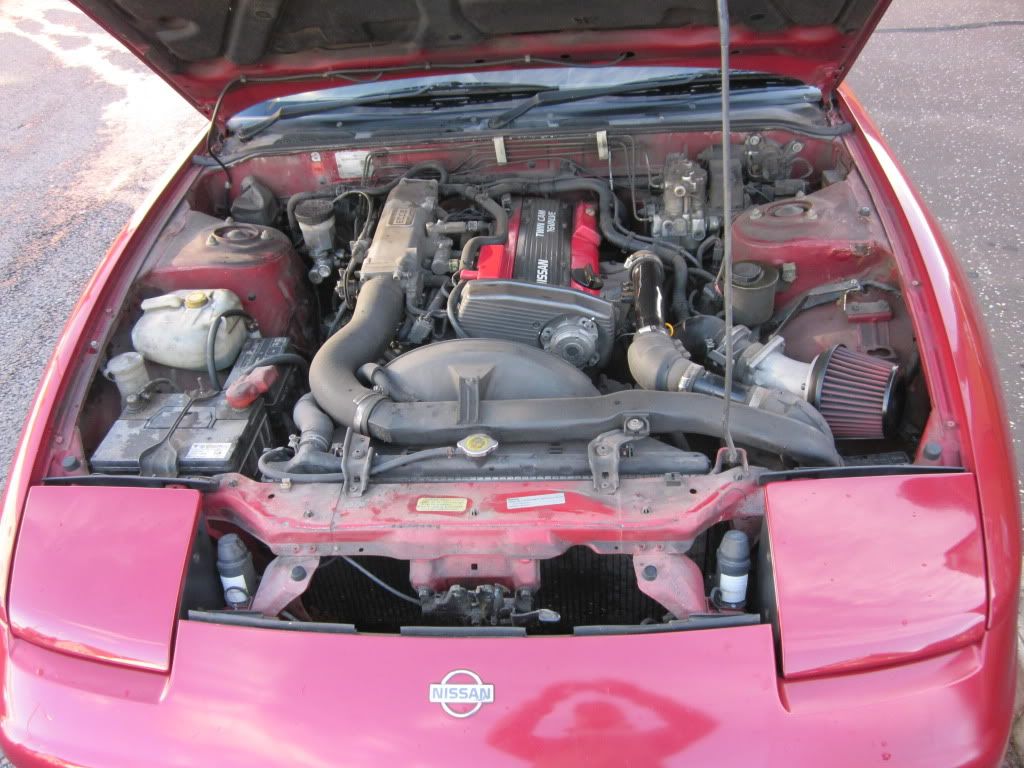
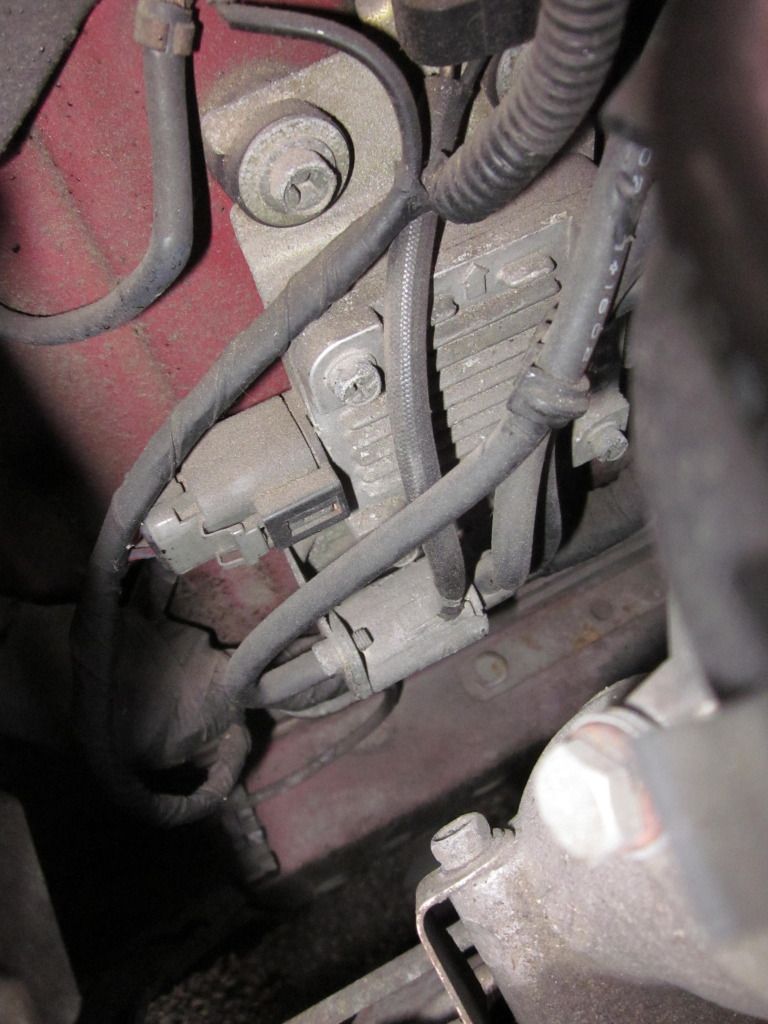
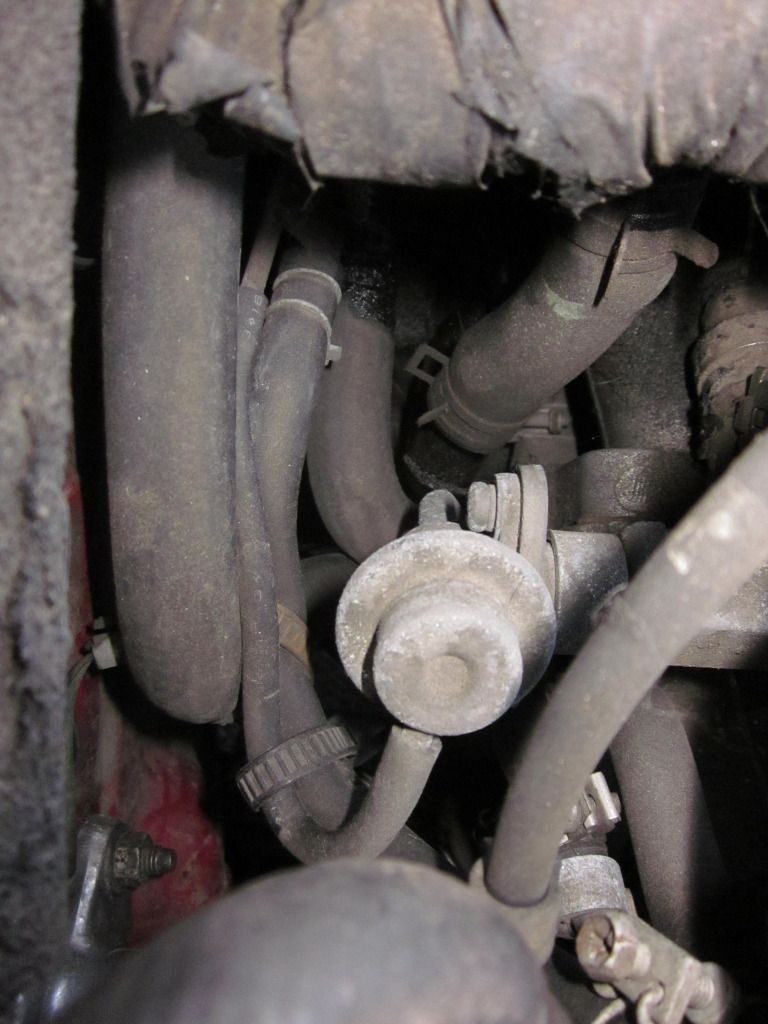
    The HSS sits on the passenger side inner arch below the power transistor. This is the little monkey.


    The pipework is all small diameter and runs as follows :-

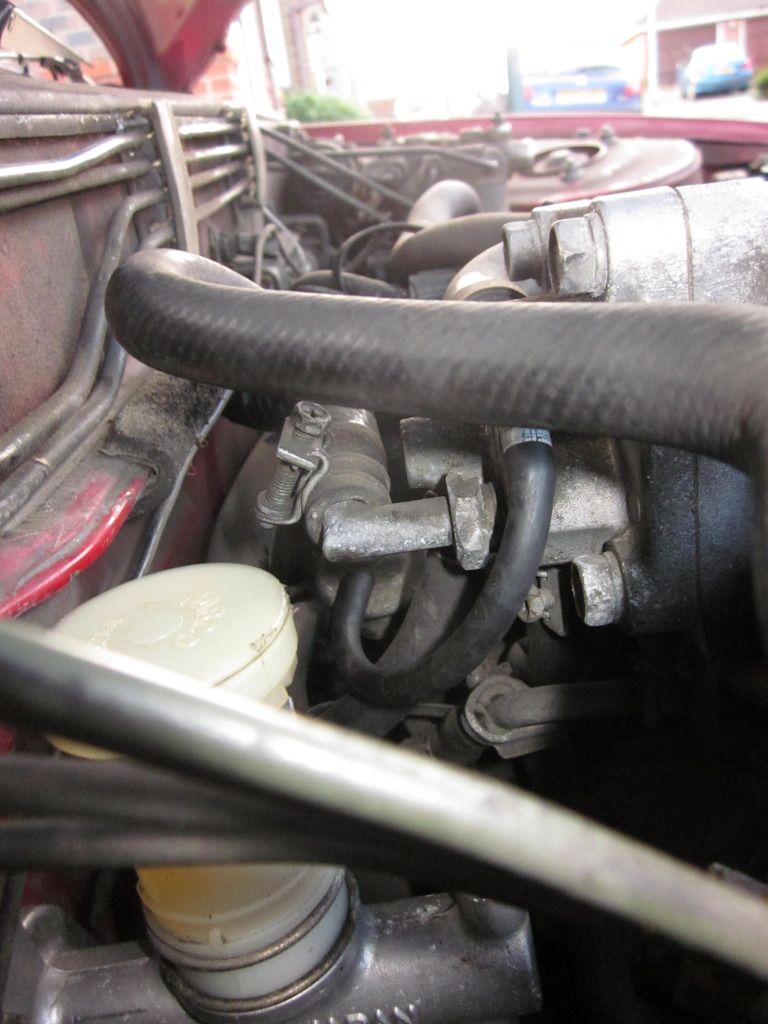
    A rubber pipe comes from the FPR to a hard pipe behind the engine to a rubber pipe and connects to the solenoid.


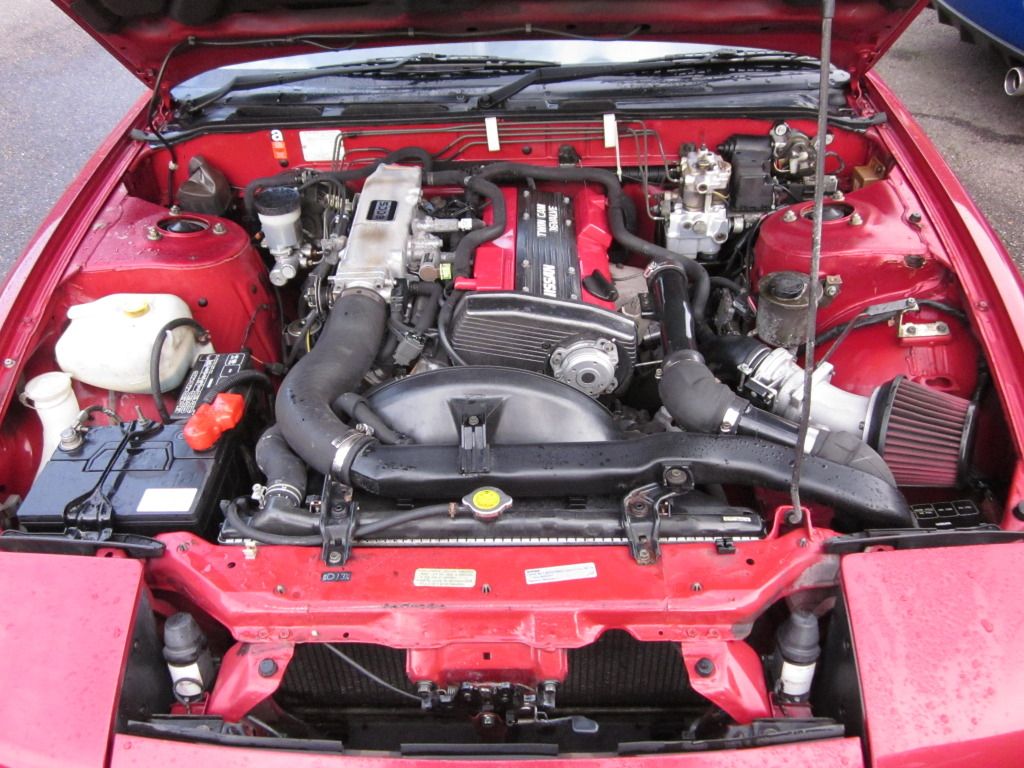
    The return rubber pipe goes from the solenoid either all the way to the back of the plenum using a load of plastic clips to keep it with a thicker pipe-run that goes over the engine OR to another hard pipe that goes behind the engine to a rubber pipe that goes to the plenum.

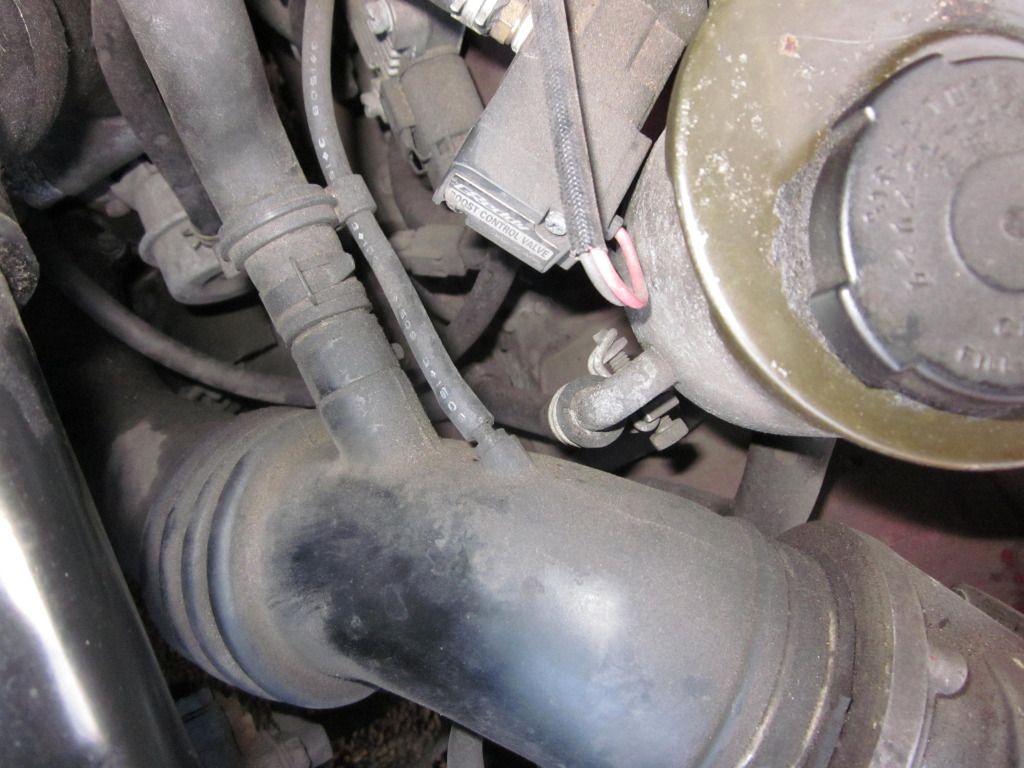
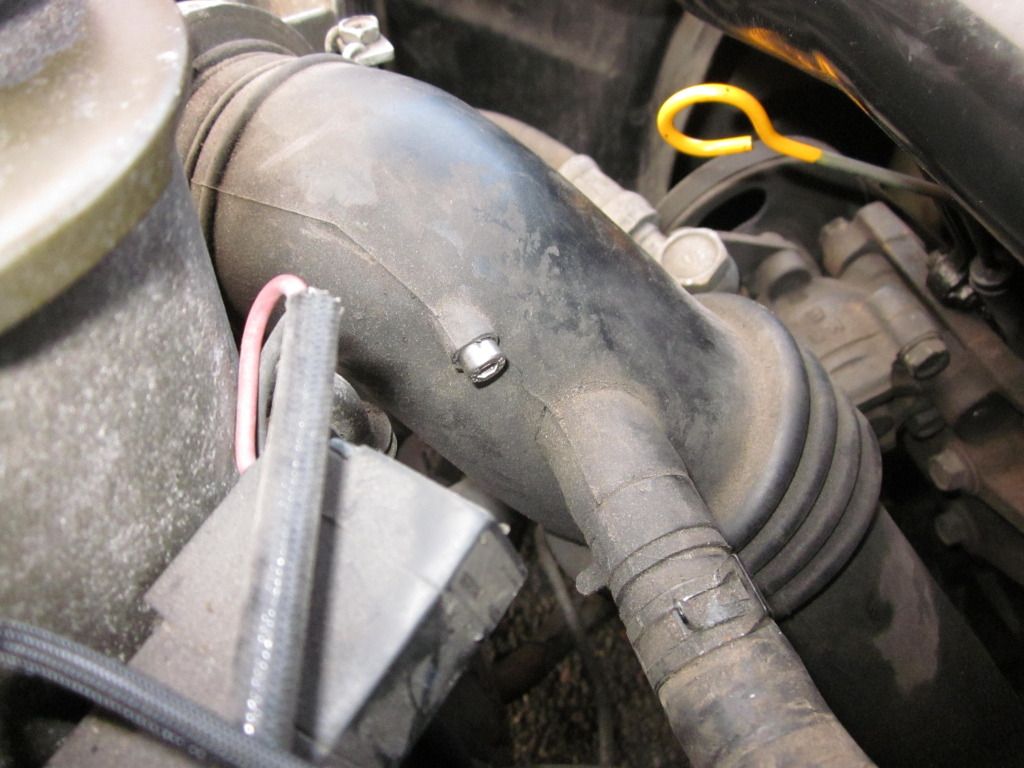
    A third rubber pipe goes from the solenoid to the elephant’s trunk next to the junction of the breather pipes and the elephant’s trunk.


    As this car has a problem with the engine revving quite highly when started from warm, I figured it was worth removing.

    This is what I did…

    1. Disconnect the pipe that runs from FPR to hard pipe and remove.

    2. Disconnect the pipe that runs to the plenum, trimmed to an appropriate length and connected one end to the plenum and the other to the FPR.

    3. Disconnect the rubber pipe (including the plastic connector) where it connects to the elephant’s trunk and block the hole with an M5 cap screw.


    4. Optional – disconnect the electrical connector that feeds the solenoid and tuck out of the way behind the ABS unit. I ended up cutting the wires and insulating them as I couldn’t get the connector apart.

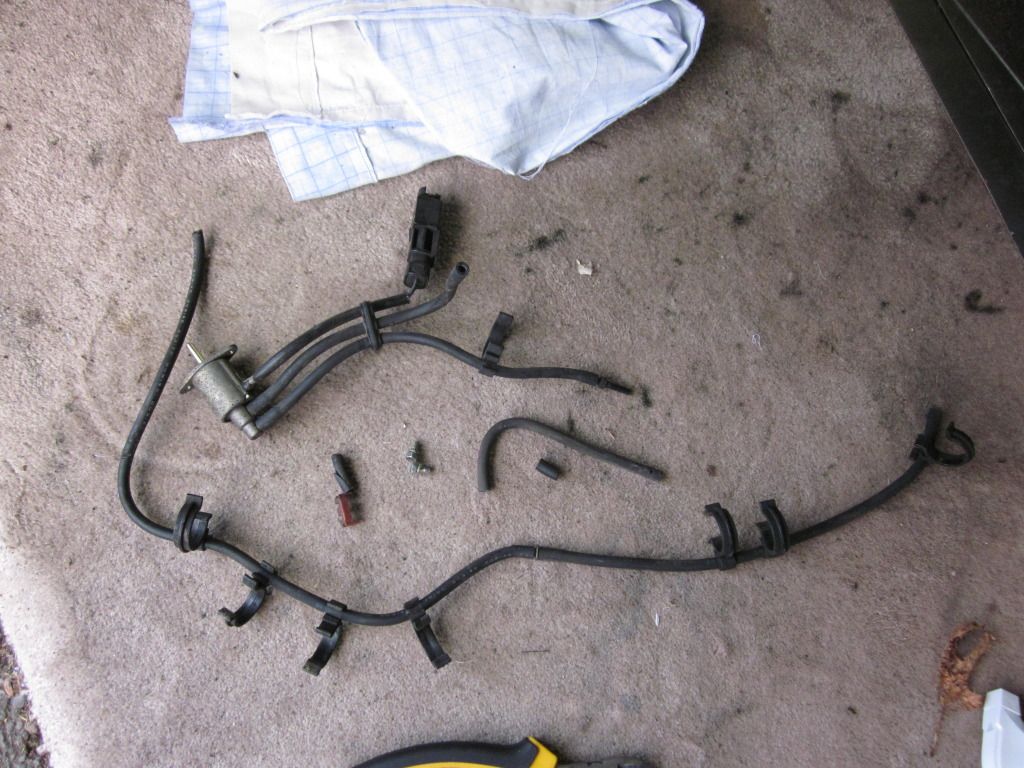
    5. Optional - Remove the two 8mm bolts that hold the solenoid to its bracket, disconnect all the clips that hold the return pipework and pull away all the unnecessary bits and pieces.


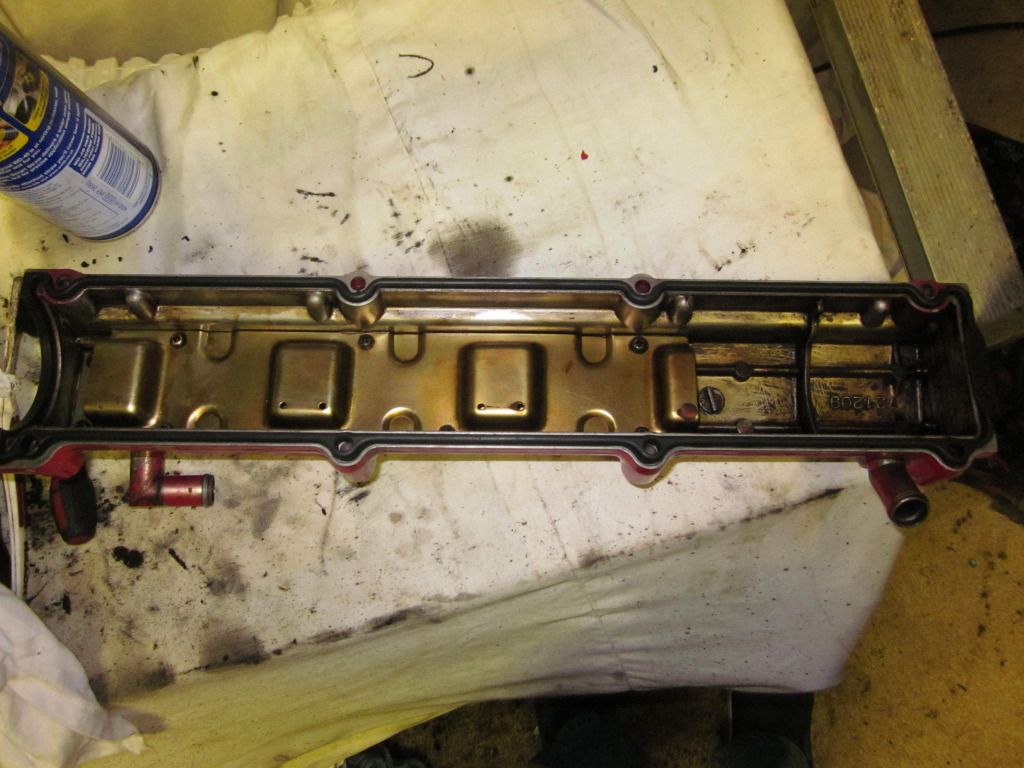
    You should now have a heap of stuff like this.

  2. #22
    Guest
    Join Date
    Mar 2004
    Location
    Helston, West Cornwall
    Posts
    24,438
    Rides
    0
    Swapped the steering wheel over so now there is no more twisting in the fingers nonsense. (Pics to follow)

  3. #23
    Guest
    Join Date
    Mar 2004
    Location
    Helston, West Cornwall
    Posts
    24,438
    Rides
    0
    So, every now and again its only running on three cylinders so I pulled the plugs and found them all up to their necks in oil

    I've fitted a new set of plugs and already it seems to run nicer.

    Tomorrow I'll get the cam covers off and replace the seals. Was it cold today or what ? !!!!

    I also editted the first post to try to explain what my goals are and to give a sort of plan of action.
    Last edited by Jonny Wilkinson; 02-12-2012 at 18:01.

  4. #24
    Guest arry's Avatar
    Join Date
    Dec 2001
    Location
    Essex
    Posts
    64,839
    Rides
    0
    Good progress mate.

    Really good to see you the other day by the way.

  5. #25
    Guest
    Join Date
    Mar 2004
    Location
    Helston, West Cornwall
    Posts
    24,438
    Rides
    0
    Yeah. Maybe we should do it again but I'll take the afternoon off so I can drink more and chill.

    Not looking for an S13 are you ? There's a minty one going in burgundy but with less miles than my white one

  6. #26
    Guest arry's Avatar
    Join Date
    Dec 2001
    Location
    Essex
    Posts
    64,839
    Rides
    0
    Think that would officially earn me divorce. S13 that is, not meeting up again lol

    just can't commit to a toy at moment mate, unfortunately. The beems has to see me through another year at least

  7. #27
    Guest
    Join Date
    Mar 2004
    Location
    Helston, West Cornwall
    Posts
    24,438
    Rides
    0
    So, most of today was spent sorting out the cam covers...or one of them at least. I happened to have a spare set of gaskets and I have a fairly unlimited supply of rags and cleaning products so this....


    in just 4 hours became this...

    new gaskets


    I managed to clean up the face of the head using a soft brass wire brush (so as not to damage the ally) and I've put it back together without any sealant, just the gaskets. Time will tell if that is a mistake...


    The other side will have to wait until next weekend unless the temps warm up a bit and I decide to brave an evening in the garage

  8. #28
    Guest steve109's Avatar
    Join Date
    May 2010
    Location
    Lincoln
    Posts
    1,194
    Rides
    0
    Attention to detail makes me mucho excite! I like the way this is going, with some top quality work to boot

  9. #29
    Guest
    Join Date
    Mar 2004
    Location
    Helston, West Cornwall
    Posts
    24,438
    Rides
    0
    Cheers Steve. Things seem to be breaking almost as fast as they can be fixed ATM but its going to get a check over on Saturday from SteveCRC who does the MOTs on my cars so hopefully then I will know what is "coming up" apart from the metalwork that needs doing on the strut tops and the rear quarters.

    This weekend I only got to spend about an hour on the white car and that was spent cocking up the fabrication of a complex bracket for the front bumper I keep meaning to get a thread going for the white one but its hard to know where to start as I've done quite a bit on it already over the last 15 years and even over the last 12 months or so since I took it off the road.

  10. #30
    Member alanjuggler's Avatar
    Join Date
    Feb 2004
    Location
    manchester
    Posts
    9,969
    Rides
    0
    the only place you should need sealant on the cam covers is below the half moons at the back. if you put it anywhere else it causes more problems than it solves - I was digging it out of craig's bought engine for a while - even had chunks in the oil cavities in the head that had separated.

    edit: given the black build up in the head, I'd try and get to the breather pipe below the plenum too.
    white '94 s13 200sx scrapped - mapped to 1.45bar. OS giken box, garrett GT2876R, 950cc injectors, ORC twin plate, nistune. 349bhp/325lbft @ 1.3bar CA18DET
    white '96 s13 180sx - type g with more kouki bits - RB25DET, GTR steel twin turbo conversion, RB26 crank & rods. 2.6L VVT twin turbo, SR20 OSG box, OSG STR twin plate clutch, Z32 ECU w/ nistune.

    current status: 180 a bit broken but to be repaired.

  11. #31
    Guest
    Join Date
    Mar 2004
    Location
    Helston, West Cornwall
    Posts
    24,438
    Rides
    0
    Quote Originally Posted by alanjuggler View Post
    the only place you should need sealant on the cam covers is below the half moons at the back. if you put it anywhere else it causes more problems than it solves - I was digging it out of craig's bought engine for a while - even had chunks in the oil cavities in the head that had separated.

    edit: given the black build up in the head, I'd try and get to the breather pipe below the plenum too.
    I'll do that when I get the other side off which is the next job.

  12. #32
    Guest M.D.'s Avatar
    Join Date
    Jul 2005
    Location
    plymouth
    Posts
    10,631
    Rides
    0
    never use sealant on the cam cover seals, thats exactly what i did and killed my RB20 a few years ago,
    the sealant gets down to the sump and blocks up the oil pick up, from now on i just put up with oil leaks, its much cheaper than an engine rebuild.

  13. #33
    Guest
    Join Date
    Mar 2004
    Location
    Helston, West Cornwall
    Posts
    24,438
    Rides
    0
    Took the car round to Steve at CRC on Saturday morning and he very kindly gave the car a pre-MOT checkover and things are better than I had hoped. Thanks Steve

    Only thing to add to the list is to rebuild the rear calipers as the braking force is below par. Not an MOT fail, but not ideal. I had the fronts lock-up the other day in a little emergency stop required by badly advertised roadworks.

    After that it was time to attack the inlet side of the cam covers and What a Mess !

    The breather to the PCV was completely clogged with a yellow and black custard, the breather to the inlet cam cover also blocked, the breather to the crank case similarly blocked with mayo but at least not packed with carbon deposits.

    Dismantling the cam cover baffle plates revealed a nasty gooey black sludge and so, 4 hours later and a lot of stinking goo, I was in a position to screw it all back together.


    The result ? When I pop off the breather to the PCV, its sucking into the plenum. When I pop off the breather at the elephant's trunk its also sucking all the way through the system into the plenum via the PCV.

    The idle now drops as the engine gets warm to a nice steady 800 rpm instead of the constant 1200-1500 rpm I was getting before and it seems much smoother and quieter.


    I then cleaned the AFM wires with carb cleaner just as a service item really.

    The only thing I haven't fixed is the slight misfire at idle, most noticeable on cold idle. It doesn't seem to affect non-tickover running so I might just wait and see with that.

    The other thing I did was to remove the rear mudflaps. This constituted shearing the top bolt and watching the mudflap come way with a biggish lump of car


    By the time I'd washed the car, the light was fading so my attempts to get exterior shots are still being foiled. This was the best I could do.


    Yet another weekend spent on this and not the white car, although in all honesty I would have been tempted to lie in bed moaning with man-flu if I hadn't needed to get Ruby moved from where she was parked.
    Last edited by Jonny Wilkinson; 10-12-2012 at 20:17.

  14. #34
    Guest M.D.'s Avatar
    Join Date
    Jul 2005
    Location
    plymouth
    Posts
    10,631
    Rides
    0
    dont bother rebuilding the rear callipers, they are and always will be shite. itll probably cost you just as much to scource a new seal and piston kit plus pads, as it will to just get a second hand z32 set up, thats what i did and was a brilliant mod.
    http://www.ebay.co.uk/itm/NISSAN-300...item2ec3b8f256

    glad to see your keeping at it with the cleaning, the sludge as im sure you are well aware is the biggest killer of these engines
    #

  15. #35
    Guest
    Join Date
    Mar 2004
    Location
    Helston, West Cornwall
    Posts
    24,438
    Rides
    0
    Quote Originally Posted by M.D. View Post
    dont bother rebuilding the rear callipers, they are and always will be shite. itll probably cost you just as much to scource a new seal and piston kit plus pads, as it will to just get a second hand z32 set up, thats what i did and was a brilliant mod.
    http://www.ebay.co.uk/itm/NISSAN-300...item2ec3b8f256

    glad to see your keeping at it with the cleaning, the sludge as im sure you are well aware is the biggest killer of these engines
    #
    I can't see the ebay link til I get home so I don't know how much they are but I rebuilt the rears on my white one and it cost me 2 hours of my time and no money. I suspect the problem is the sliders so, as long as I can get them apart, I don't expect it to cost me anything much. It probably won't take a lot longer to rebuild them than it would to swap them.

    To be honest, most of what this car needs is a little TLC. I'm not going to put the sort of money into it that a major resto requires as I don't have any intention of keeping the car.

    EDIT: Just seen you're talk about a set of Z32 rears that cost £100 and they look like they need a rebuild I'll save my pennies I think. I've got a strict budget on this.
    Last edited by Jonny Wilkinson; 10-12-2012 at 20:20.

  16. #36
    Guest
    Join Date
    Mar 2004
    Location
    Helston, West Cornwall
    Posts
    24,438
    Rides
    0
    Added pics to the recent posts above.

  17. #37
    Guest Rude Dog's Avatar
    Join Date
    Sep 2003
    Location
    Pissing in my sink
    Posts
    16,270
    Rides
    0
    Nice to see you're looking after my next car. Glad you got it running right now mate. I do hate cars that refuse to idle correctly (like my Stagea).

  18. #38
    Guest Ronster's Avatar
    Join Date
    Dec 2008
    Location
    North London / Woodford, Essex
    Posts
    1,046
    Rides
    0
    Quote Originally Posted by Jonny Wilkinson View Post

  19. #39
    Guest
    Join Date
    Mar 2004
    Location
    Helston, West Cornwall
    Posts
    24,438
    Rides
    0
    Not much visible progress this weekend just gone.

    I swapped out the coils for cylinders 1 and 2 and that help the misfire but didn't eradicate it completely.

    I also did some frankenstein soldering of the connector for the rear window demister as it had fallen off after someone's previous attempt. No pics of that as I'm ashamed of how bad it looks. It does seem to be demisting a bit but not as well as I'd like. Long term I guess the thing to do is take the hatch off and turn it over as soldering uphill is always going to be a struggle. I think that will have to wait until I do something with the spoiler.

    I've got some steering rack bushes on the way from CriagLancs so they'll be going on at some point to cure what is now a fairly persistent steering wheel wobble at around 70.

  20. #40
    Guest
    Join Date
    Mar 2004
    Location
    Helston, West Cornwall
    Posts
    24,438
    Rides
    0
    The last two weekends have seen me doing a few bits of jobs on the car.

    I replaced the struts that hold the rear hatch open but it was a waste of time as the replacements were weaker than the ones that cames off

    I cleaned the engine bay with some Astonish engine degreaser (which I have to say is very good). I didn't do a very thorough job but for half an hours work its looks better now I think you'll agree.

    From this...


    To this...


    I also replaced the sidelight which had a nasty stone hole in it...


    and shinied up the mirrors which were so dull and ***ae ridden they were making me cross.

    before...


    after...


    I also powerwashed the car to get the arches clean (finally) and to prepare for when I get the toothbrush out to clean the seams on the body.

    She's off the DALs next Saturday for some major surgery in preparation for the MOT on the 13th so fingers crossed that all goes well.

    If I get a chance on New Years Day and the weather is unfit for me to be out working on the cars, I'm going to start a thread for my white car, Precious as I am making progress on her too and its more substantial work I'm doing on her....basically a nut and bolt restore on an already very clean and tidy car I spent an hour today trying to convince myself I'm not an obsessive because I decided not to put a Nissan stamp and part number on a replica part I made

Posting Permissions

  • You may not post new threads
  • You may not post replies
  • You may not post attachments
  • You may not edit your posts
  •