Page 1 of 4 123 ... LastLast
Results 1 to 20 of 79

Thread: The get me to the Nürburgring project.

  1. #1
    Guest
    Join Date
    Apr 2009
    Location
    Harsewinkel, Germany
    Posts
    338
    Rides
    0

    The get me to the Nürburgring project.

    Well finally after a year of happy motoring in the 13 i have finally got some time and space to start a proper project.

    The plan was just to pop the odd mod on and keep it running for as long as possible, and this was going well giving me a respectable 248bhp @ 0.9 Bar. However after thinking the handling could do with a tighten up, springing a fuel leak and the boot filling up every time it rained, i thought sod it lets just rip it all apart and do it properly.

    So things that i had done already.

    Binned ABS,
    DB Power ABS Removal kit,
    R33 Rear Brakes,
    S14 Front Brakes,
    Apex Catch tank,
    Apex rear strut brace,
    New Garret T28r,
    Braided lines,
    Gizzmo EBC,
    Colder plugs,
    Walbro fuel pump.


    Photobucket


    Photobucket


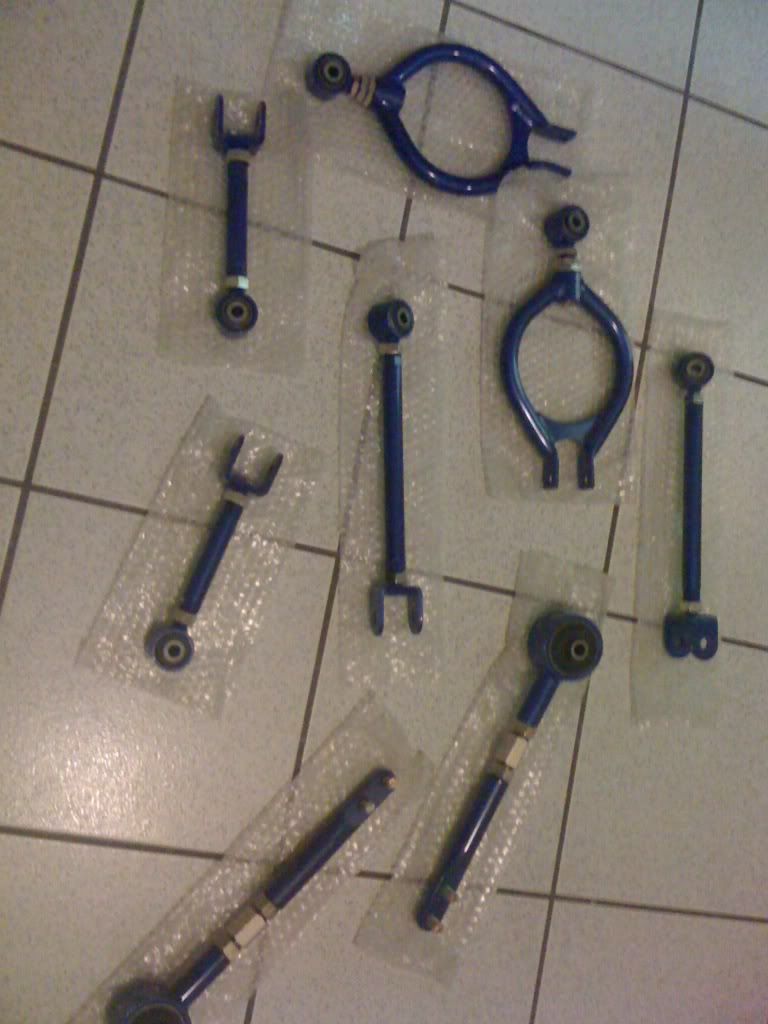
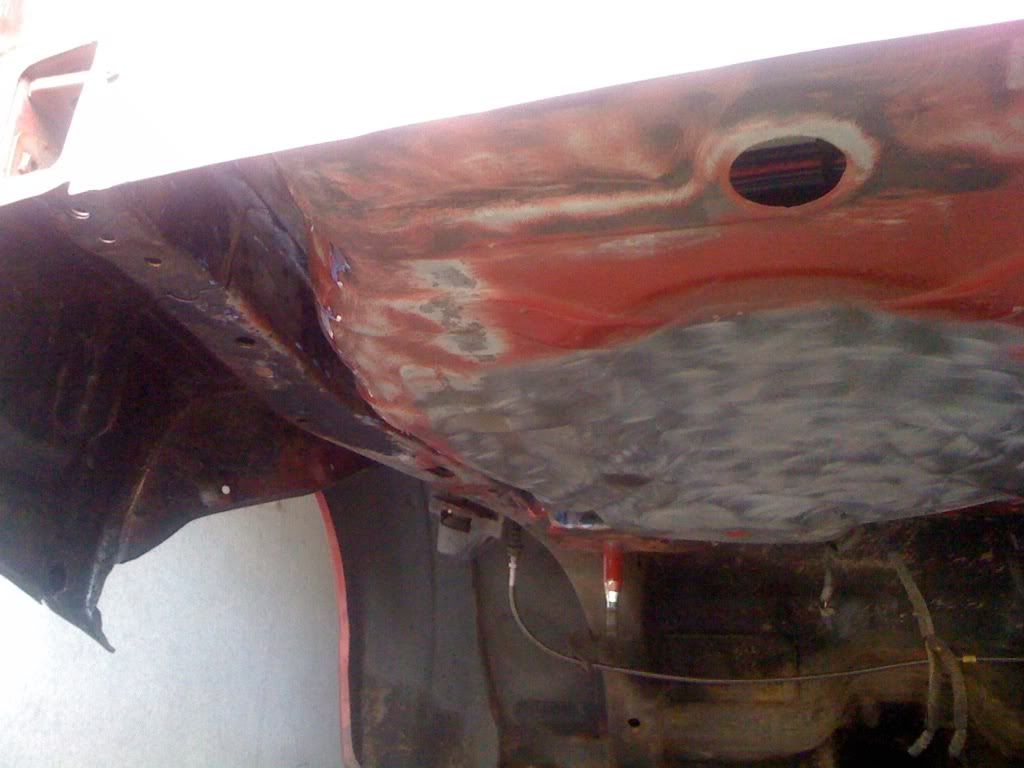
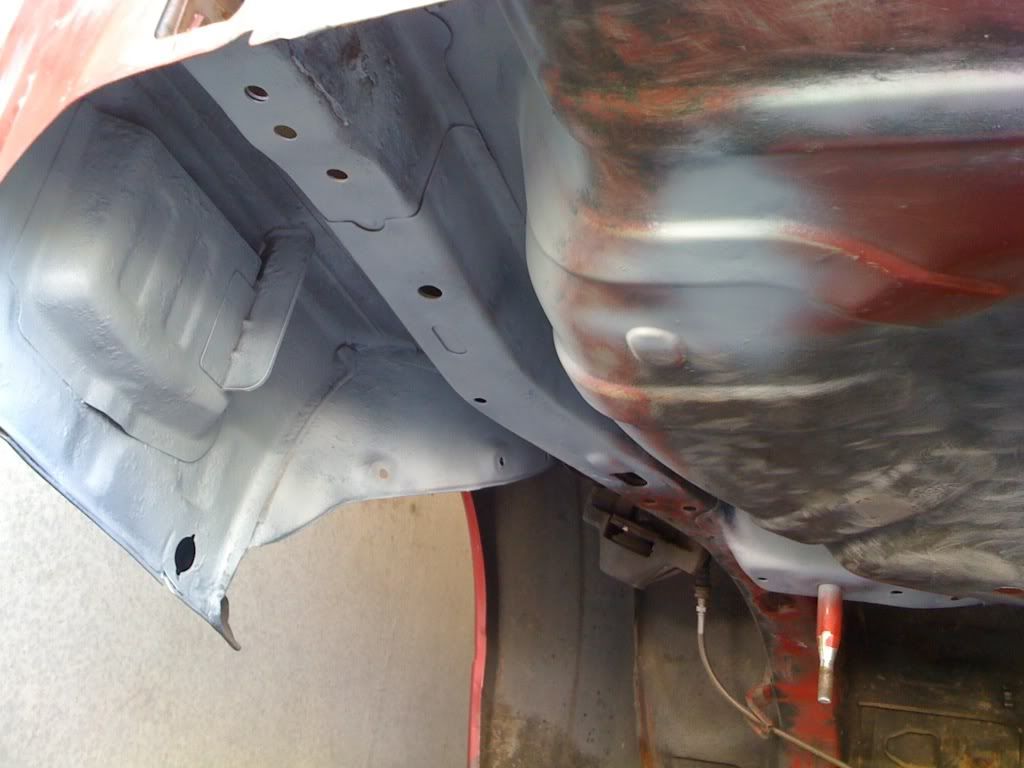
    As with any S13, rust was starting in some places, so some parts have already been sorted such as some nice new chassis rails,


    [IMG]Photobucket[/IMG]


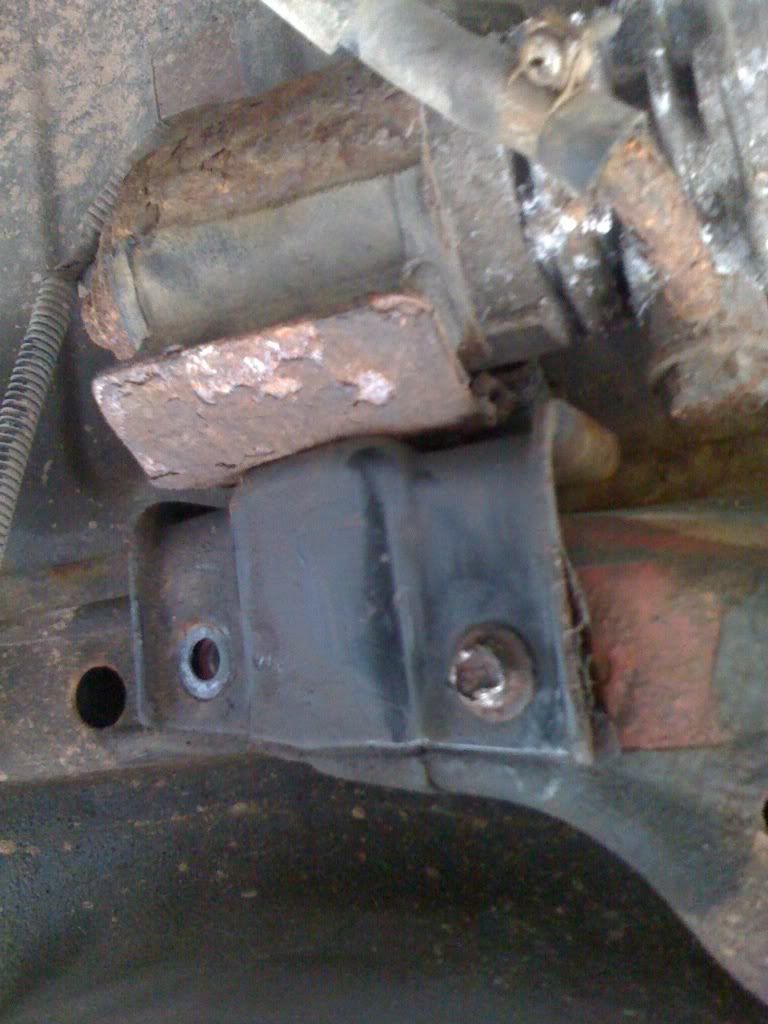
    and some still need some attention such as,


    Photobucket


    and someones dodgy welding skills (not mine or my welders!)


    Photobucket


    but the plan is to strip back to shell, send to the welder, send to paint, then stick it all back together hopefully in time to get to the ring when the sxoc go next year

    Unfortunately this is mostly going to be a one man job in a garage space (though to be fair it is quite a big garage), so it might take a bit longer but meah!
    Last edited by JonoDT; 15-10-2010 at 20:44.

  2. #2
    Guest
    Join Date
    Apr 2009
    Location
    Harsewinkel, Germany
    Posts
    338
    Rides
    0
    So today i had a free day so it was down to the garage to start.

    Rear interior out,


    Photobucket


    Rear end off,


    Photobucket


    Exhaust off (The hard way),


    Photobucket


    Ariel (sp) off,


    Photobucket


    And this is how i left it, not to bad for a one man show!


    Photobucket

    Last edited by JonoDT; 15-10-2010 at 20:43.

  3. #3
    Guest
    Join Date
    Oct 2009
    Location
    Bristol
    Posts
    1,569
    Rides
    0
    nice one dude my s13 is looking the same tbh, minus the suspension :P

    get the subframe off and get it blasted, baked and bushed!! you can get a full bush set from the USA for £112 inc postage and it wont half make a difference in the suspension

    which is what iam doing now.

  4. #4
    Guest
    Join Date
    Apr 2009
    Location
    Harsewinkel, Germany
    Posts
    338
    Rides
    0
    Yeah that's the first part of the plan, following the subframe off guide on the home page but only got this far as i forgot to take it to the garage with me.

    While that's off tank will be dropped to find the leak which appears to be coming from one of the pipes coming from the top of it!

  5. #5
    Guest
    Join Date
    Apr 2009
    Location
    Harsewinkel, Germany
    Posts
    338
    Rides
    0
    So its Sunday and the hangover from hell is in full flow but i was adamant that the day was not to be wasted.

    So it was off down the garage and a little bit later off come the rear shocks, probably just as well really cos they don't look in the best condition and are probably fit for the skip.


    Photobucket


    Looks like they might be kind of adjustable however!


    Photobucket


    After that it was onto the subframe, following a printed out guide from the front page of the site, and still fighting off the hangover with a big bottle of water and some dry roast penuts, about half an hour later this was the scene,


    Photobucket


    The good thing is the underside of the car looks good and will just need a clean and fresh underseal, the subframe however is a different story. Next it will be getting stripped to go to the shotblaster before some paint. Just need to pick a colour for it now!


    Photobucket

  6. #6
    Guest skinz180189's Avatar
    Join Date
    Mar 2010
    Location
    Nr Selby, North Yorkshire
    Posts
    3,600
    Rides
    0
    I don't think those shocks are adjustable. But good progress fella.

  7. #7
    Guest
    Join Date
    Apr 2009
    Location
    Harsewinkel, Germany
    Posts
    338
    Rides
    0
    Quote Originally Posted by skinz180189 View Post
    I don't think those shocks are adjustable. But good progress fella.
    Cheers, Well no matter they are off to the skip anyway but whats the little threaded thing for on the top? Any idea?

  8. #8
    Guest skinz180189's Avatar
    Join Date
    Mar 2010
    Location
    Nr Selby, North Yorkshire
    Posts
    3,600
    Rides
    0
    Just looks like any other shock, you need to hold the damper from spinning with the flat, remove the nut and you'll be able to change the spring. Have a go before you chuck them, you'll see what I mean. (For safety reasons, you should use a spring compressor. I don't however.)

  9. #9
    Guest
    Join Date
    Apr 2009
    Location
    Harsewinkel, Germany
    Posts
    338
    Rides
    0
    Ahh ok cool i see now! First time i have ever done anything like this so finding out a few things as i go.

  10. #10
    Guest
    Join Date
    Jun 2009
    Location
    Germany
    Posts
    25
    Rides
    0
    Hi fellow if you need some help from the locals at sxce.org were quite a few enthusiats who can lend a helping hand if needed.

    See you at the ring!

  11. #11
    Guest
    Join Date
    Apr 2009
    Location
    Harsewinkel, Germany
    Posts
    338
    Rides
    0
    Quote Originally Posted by V12 View Post
    Hi fellow if you need some help from the locals at sxce.org were quite a few enthusiats who can lend a helping hand if needed.

    See you at the ring!
    Nice one cheers mate

  12. #12
    Guest
    Join Date
    Apr 2009
    Location
    Harsewinkel, Germany
    Posts
    338
    Rides
    0
    So back to it after a few days off and all i had done so far was try out the old rust removal by putting the parts in vinegar


    Photobucket


    however for some reason this hasn't worked for me so must be using the wrong stuff or something cos they were in for nearly a week and it still won't brush off with the wire brush or sand off!

    Anyway i started stripping down the subframe and it was all going well until 2 bolts rounded off 
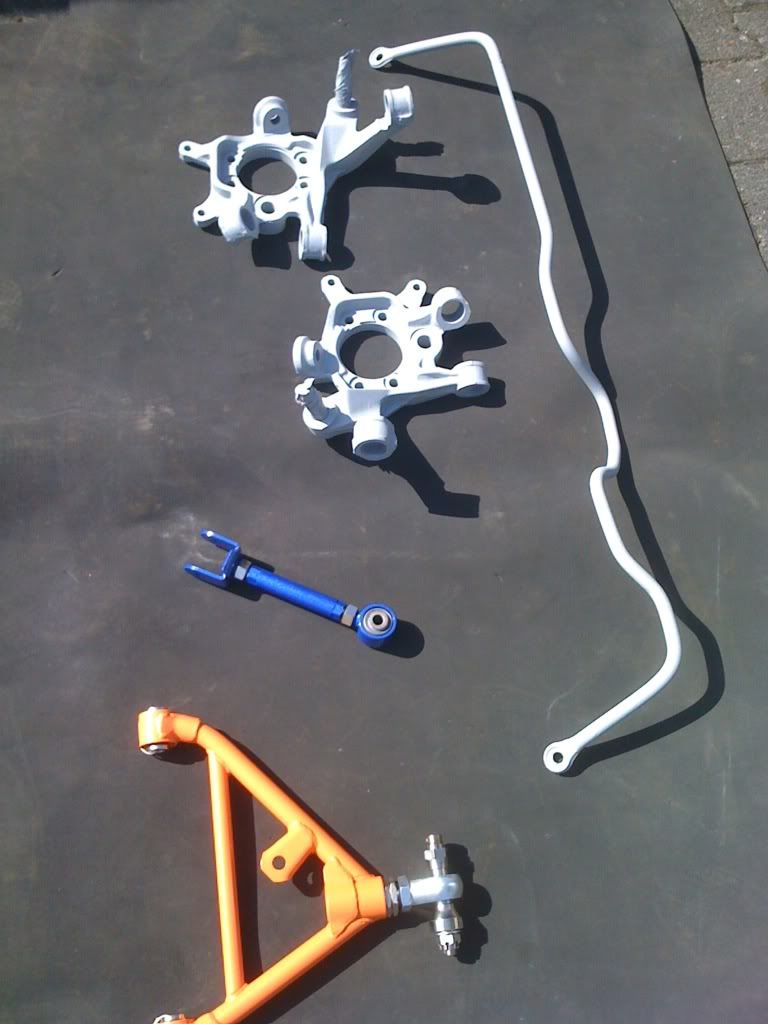
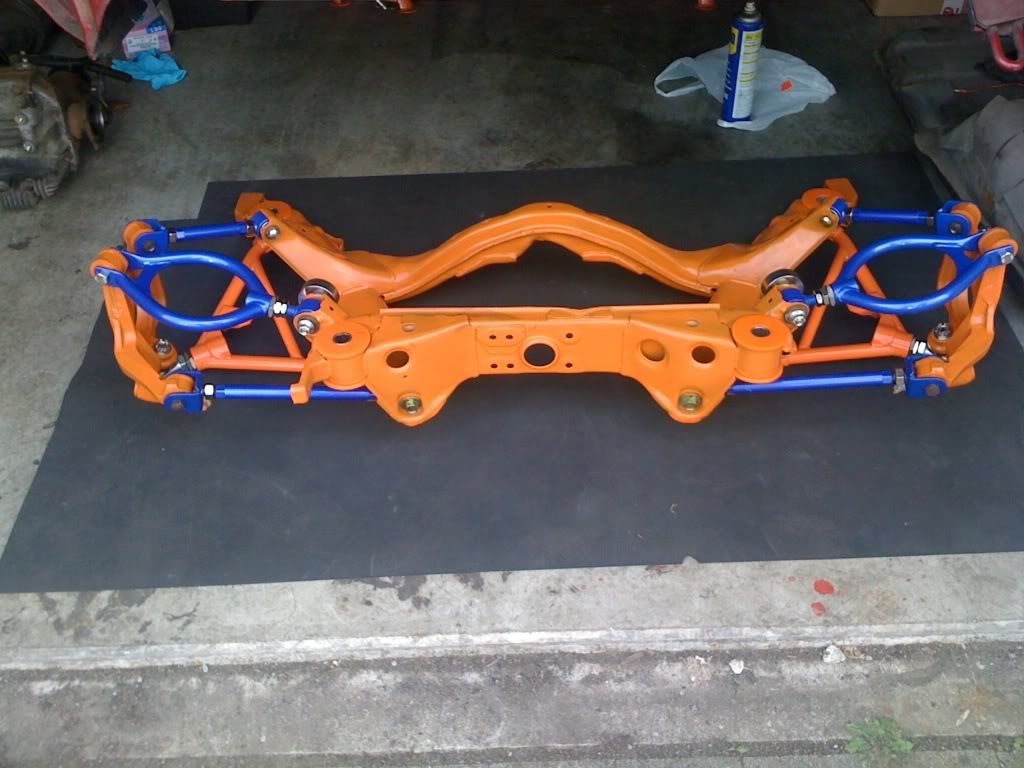
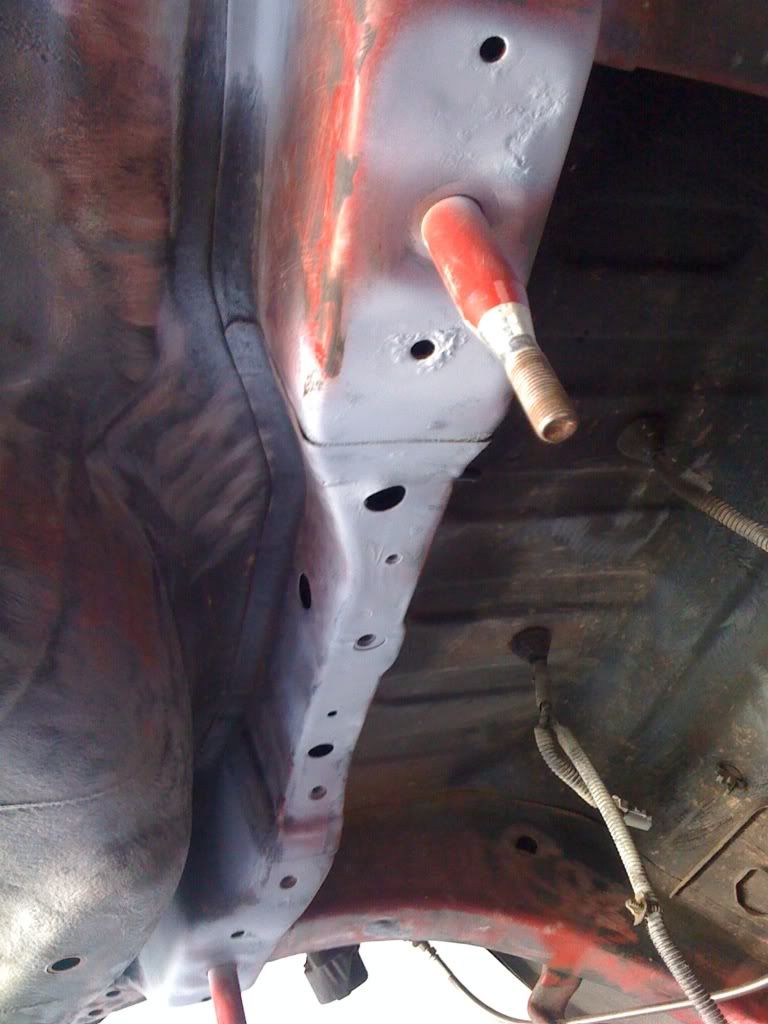
so i now have a subframe that looks like this


    Photobucket


    with these parts stuck on it


    Photobucket


    funny how they are both on the same side!

    Hopefully a garage can get them off for me as i have no power in the garage!

    As that was as far as i was going with that it was time to tackle the fuel leak and get the tank out. The removal of the pipes went well but one of the bolts sheared when taking the tank straps off 
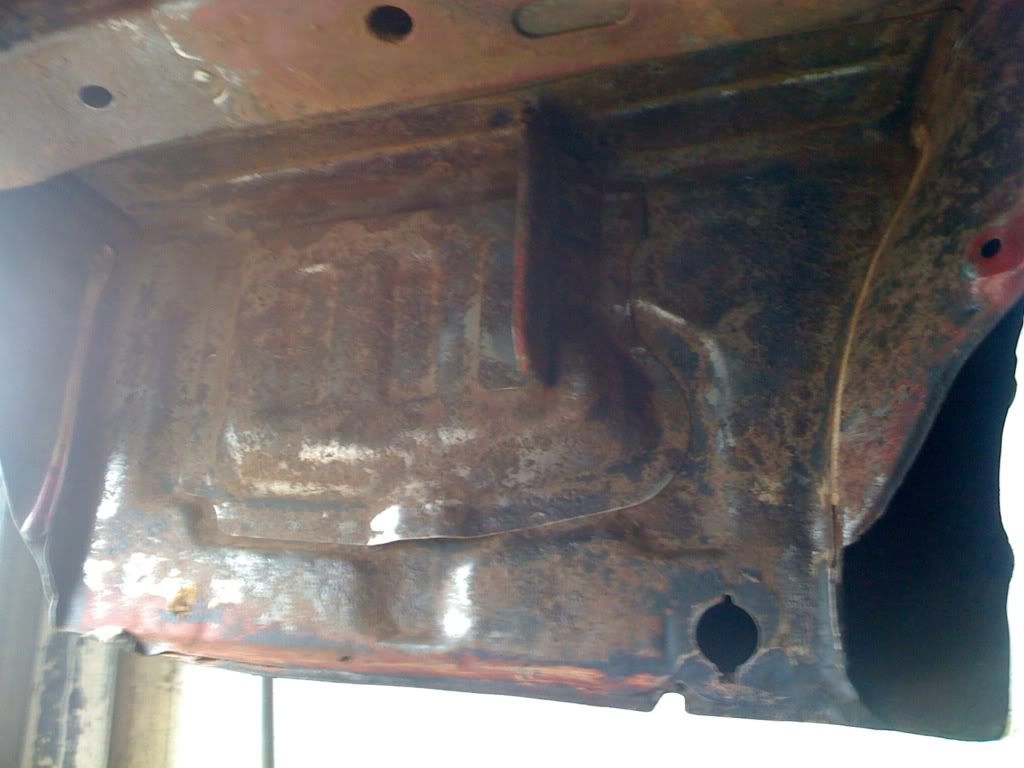
so now i am left wondering whether or not i can get that drilled out and re tapped. Hope so or i will need to think about a fuel cell or another way of securing the tank.

    Dropping the tank


    Photobucket


    The tank removed


    Photobucket


    And the pipe that was the cause of the leak


    Photobucket


    After all that and losing the fight with a couple of bolts that was enough for the day! So i sealed up the pipes on the tank and locked up.

  13. #13
    Guest
    Join Date
    Apr 2009
    Location
    Harsewinkel, Germany
    Posts
    338
    Rides
    0
    Got back home to find these shiny parts waiting


    Photobucket


    Photobucket

  14. #14
    Guest
    Join Date
    Apr 2009
    Location
    Harsewinkel, Germany
    Posts
    338
    Rides
    0
    Not been able to work on car for a while but have managed to get the subframe finished

    The ReFurbed Subframe.

    Photobucket

    Also took delivery of some nice new Apex control arms, so roll on the better weather so i can start putting the rear end back together!

  15. #15
    Guest ChrisS13's Avatar
    Join Date
    Oct 2010
    Location
    Barnard Castle/Todmorden
    Posts
    465
    Rides
    0
    Looks like a great project. Kudos to you for attacking it by yourself!

  16. #16
    Guest
    Join Date
    Apr 2009
    Location
    Harsewinkel, Germany
    Posts
    338
    Rides
    0
    Cheers Chris

    Hope it all works out in the time frame i have or my next project will be getting it back to the UK in bits! LOL

  17. #17
    Guest
    Join Date
    Apr 2009
    Location
    Harsewinkel, Germany
    Posts
    338
    Rides
    0
    Well due to other commitments it has been a looooooong time since i have been in the garage but over the last week things have picked up a bit so time for an update.

    First off i had to check out the shiny bits before getting dirty again


    Now, not sure if this is the best way to set these up but it will do, as the car should be getting put on a trailer to the garage to get aligned.


    Then i suppose it was time to get dirty again, so it was off with some more bits for the bin, and after reading on here that for normal use the diff oil cooler pump had probably never been used it was decided that it was time for the parts to go. I checked the pipes and they were dusty and dry inside and the pump looked fit for nothing anyway.


  18. #18
    Guest
    Join Date
    Apr 2009
    Location
    Harsewinkel, Germany
    Posts
    338
    Rides
    0
    After this i got stuck in about reconditioning a couple of parts for going back onto my nice fresh subframe so the hub knuckles and the ARB were off for shot-blasting. Managed to get those turned around in 2 days so then it was back to the garage for some paint and i started to rebuild some parts ready to go back onto the car.

    ARB as was,


    ARB and knuckles back from blaster


    Some paint on them


    However after rebuilding the rear ARB with new rubber from Nissan, I have discovered that it is almost as much as an uprated ARB, but i'd started so i'll finish!! Anyhoo it was time to try and put the subframe back together and i managed to get it to look like this.


  19. #19
    Guest
    Join Date
    Apr 2009
    Location
    Harsewinkel, Germany
    Posts
    338
    Rides
    0
    After seeing all this nice clean stuff waiting to go onto the car i decided that i couldn't put it back on without stripping the old underseal off and giving the underside of the car a freshen up. So i have been under the car for the last few days with a wire wheel, rust treatment and some primer, and have ended up with the car looking like this.

    Starting with the wire wheel


    After the wire wheel and rust treatment


    I an slightly further on that this now but as i have no power in the garage and only have one battery for my drill, i am tackling this 1 hour at a time. So once i have got half way down the car, i will underseal it, fit enough back onto the car so i can roll it out the garage, turn it round, and start on the front end. I have also purchased an engine stand so once i get it turned round everything is pretty much ready to go.

  20. #20
    Guest nismo's Avatar
    Join Date
    Mar 2002
    Location
    East Anglia
    Posts
    1,165
    Rides
    0
    Good work especially with no power to the garage.

    Is there no one who lives nearby you can connect an extension lead too and drop them a quid or two?

Posting Permissions

  • You may not post new threads
  • You may not post replies
  • You may not post attachments
  • You may not edit your posts
  •